
Introduction
Oil pastel art is a versatile and vibrant medium that allows artists to create stunning works of art with ease. Whether you are a seasoned artist looking to explore a new medium or a beginner with a passion for art, oil pastels can offer a world of creative possibilities. In this blog article, we will take a deep dive into the world of oil pastel art for beginners, exploring its unique qualities, techniques, and tips to help you get started on your artistic journey.
Part 1: Understanding Oil Pastels
Level 1: What are Oil Pastels?
Oil pastels are a type of art medium that consists of pigment, oil, and wax, which gives them a creamy and buttery texture. Unlike dry pastels, oil pastels do not require fixatives, making them ideal for beginners who want to dive into the world of pastel art without the hassle of excessive smudging or dust.
Level 2: Characteristics of Oil Pastels
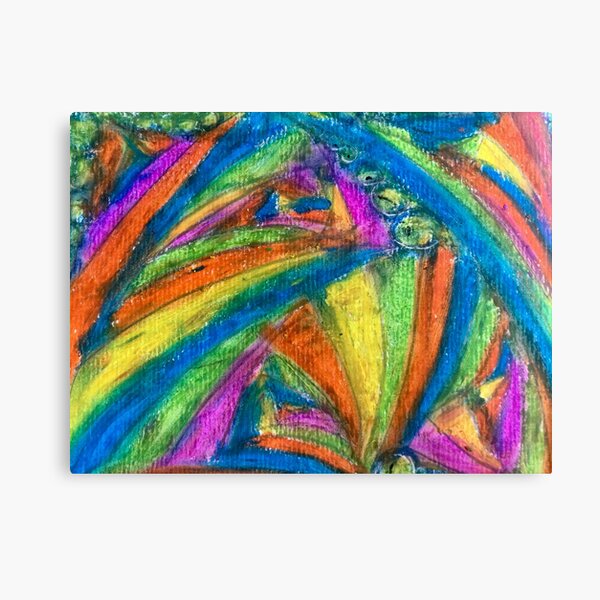
Oil pastels are known for their vibrancy and intense pigmentation, making them perfect for creating bold and colorful artworks. They can be easily blended, layered, and mixed to achieve a wide range of effects, from smooth gradients to textured finishes. Additionally, oil pastels are highly versatile and can be used on a variety of surfaces, including paper, canvas, and even wood.
Part 2: Essential Materials for Oil Pastel Art
Level 1: Basic Supplies
To start your oil pastel journey, you will need a few essential supplies, including a set of oil pastels, a sketchpad or drawing paper, and a blending tool such as a blending stump or a cotton swab. Additionally, it’s recommended to have a work surface that can handle the waxy nature of oil pastels, such as a drawing board or a textured paper.
Level 2: Optional Tools and Accessories
While the basic supplies are sufficient to get started with oil pastel art, there are some optional tools and accessories that can enhance your creative process. These include fixatives for preserving your finished artworks, a palette knife for mixing and applying oil pastels, and a solvent such as mineral spirits for achieving a painterly effect with your pastels.
Part 3: Techniques for Working with Oil Pastels
Level 1: Basic Techniques
When working with oil pastels, it’s important to familiarize yourself with some basic techniques, such as layering, blending, and stippling. Layering involves building up colors and textures by applying multiple layers of pastels, while blending allows you to seamlessly merge different hues and create smooth transitions. Stippling, on the other hand, involves creating patterns and textures by dabbing the pastels onto the surface.
Level 2: Advanced Techniques
As you become more comfortable with oil pastels, you can experiment with advanced techniques to further expand your artistic repertoire. These may include sgraffito, which involves scratching through layers of pastels to reveal the underlying colors, and impasto, which involves applying the pastels in thick, textured layers to create a sculptural effect. Additionally, you can explore the use of mixed media by combining oil pastels with other art supplies such as acrylic paints or colored pencils.
Part 4: Tips for Success with Oil Pastel Art
Level 1: Color Mixing and Blending
One of the most important aspects of working with oil pastels is mastering the art of color mixing and blending. Take the time to familiarize yourself with the color wheel and experiment with creating new hues by blending different pastel shades. Practice blending techniques to achieve smooth transitions and gradients in your artworks, and don’t be afraid to mix and match colors to create dynamic and harmonious compositions.
Level 2: Experimentation and Exploration
Oil pastel art offers endless opportunities for experimentation and exploration. Don’t be afraid to take risks and try out new techniques, surfaces, and subject matters. Use your oil pastels to capture the vibrant colors of a sunset, the texture of a flower petal, or the play of light and shadow in a landscape. Let your creativity flow and allow yourself to make mistakes, as they can often lead to unexpected and exciting results.
Part 5: Inspiration and Resources for Oil Pastel Art
Level 1: Seeking Inspiration
Finding inspiration is essential for any artist, and there are countless sources of inspiration for oil pastel art. Look to nature for its rich colors and organic forms, explore the works of renowned oil pastel artists for guidance and ideas, and draw inspiration from everyday life and your own experiences. Keep a visual diary or a mood board to collect images, colors, and textures that resonate with you and use them as a springboard for your own creations.
Level 2: Learning and Community
As a beginner in oil pastel art, it’s important to continue learning and growing as an artist. Seek out tutorials, books, and online resources that can help you deepen your understanding of oil pastel techniques and expand your artistic skills. Consider joining art communities or forums to connect with fellow oil pastel enthusiasts, share your work, and receive constructive feedback. Remember that art is a journey, and there is always something new to learn and discover.
Part 6: Blending Techniques with Oil Pastels
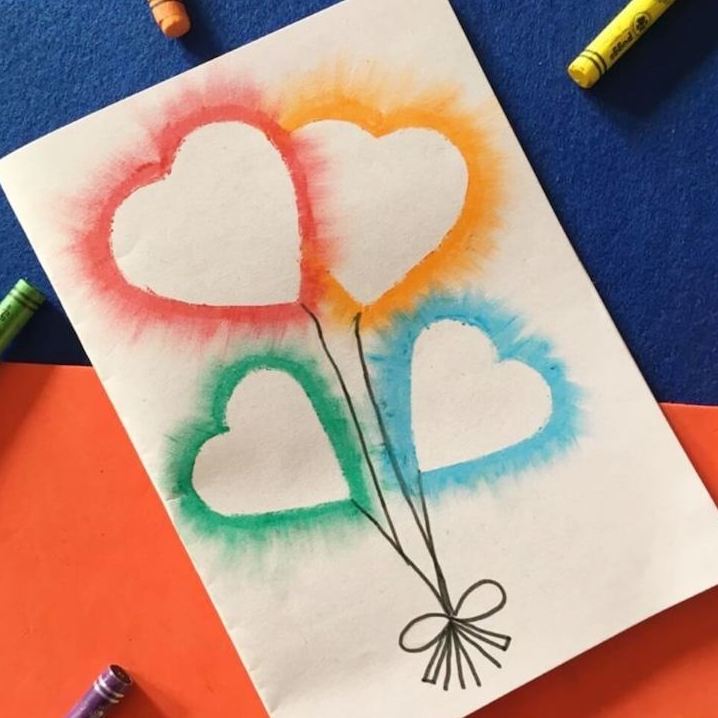
Blending is an essential technique in oil pastel art as it allows you to create smooth transitions between different colors and tones. There are several ways to blend oil pastels, and each method can produce unique and beautiful effects in your artwork.
One of the most popular blending techniques is using your fingers. Simply apply two or more colors of oil pastels on the paper and then use your fingers to blend them together. This method allows for a great deal of control and precision, making it perfect for creating realistic textures and gradients.
You can also use blending stumps or tortillons, which are specialized tools for blending oil pastels. These tools are made of tightly rolled paper or felt and can be used to blend and soften the colors in your artwork. They are particularly useful for creating fine details and subtle transitions between colors.
Another technique for blending oil pastels is using a blending solution or solvent. This method involves applying a small amount of solvent to the oil pastels and then using a brush to blend the colors together. Be sure to use a well-ventilated area and follow all safety precautions when using solvents.
Experiment with different blending techniques to see which works best for your artwork. Remember that blending takes practice, so don’t be discouraged if your first few attempts don’t turn out the way you want. Keep practicing, and soon you’ll be able to create beautifully blended oil pastel artwork.
Part 7: Adding Texture to Oil Pastel Art
Texture is an important element in oil pastel art, as it can add depth and interest to your artwork. There are many ways to create texture with oil pastels, and each method can bring a unique and dynamic quality to your pieces.
One simple way to add texture to your oil pastel art is by using different types of paper. Textured or rough paper can create interesting effects when combined with oil pastels, as the raised surface of the paper can catch and hold the pigment, creating a rough and tactile quality to your artwork.
You can also add texture to your oil pastel art by using various tools and techniques. For example, you can use a toothpick or a stylus to scratch lines or patterns into the oil pastels, creating intricate designs and details. You can also use a palette knife or a credit card to scrape and blend the oil pastels, creating a gritty and layered texture.
Another technique for adding texture to your oil pastel art is by using mixed media. You can incorporate other materials such as sand, fabric, or collage elements into your artwork, creating a rich and multidimensional surface that adds depth and interest to your pieces.
Experiment with different textures and techniques to see which work best for your oil pastel art. Don’t be afraid to try new things and push the boundaries of traditional oil pastel techniques. With practice and experimentation, you’ll be able to create stunning and textured oil pastel artwork that is truly unique and captivating.
Part 8: Protecting and Displaying Your Oil Pastel Art
Once you have completed your oil pastel artwork, it’s important to take steps to protect and display it properly. Oil pastel art can be delicate and prone to smudging, so it’s essential to handle and store your pieces with care to preserve their beauty and vibrancy.
It’s also important to handle your oil pastel artwork with care to avoid smudging or damaging the delicate surface. When transporting or storing your pieces, be sure to use protective sleeves or matting to prevent the artwork from coming into contact with other surfaces. Avoid touching the surface of the oil pastel art with your fingers, as the natural oils in your skin can cause smudging and discoloration.
Lastly, be sure to keep a record of your oil pastel artwork, including the title, date of creation, and any special techniques or materials used. By taking these precautions and handling your oil pastel artwork with care, you can ensure that it remains beautiful and vibrant for years to come. 
Conclusion
Oil pastel art is a captivating and accessible medium that offers endless creative possibilities for beginners and experienced artists alike. By understanding the characteristics of oil pastels, gathering the essential materials, honing your techniques, and seeking inspiration and resources, you can embark on a fulfilling and enriching artistic journey. Embrace the unique qualities of oil pastels, experiment with different approaches, and let your imagination soar as you explore the vibrant world of oil pastel art. Whether you’re creating expressive landscapes, vibrant still lifes, or abstract compositions, oil pastels can be a versatile and vibrant medium for bringing your artistic vision to life. So, roll up your sleeves, lay out your pastels, and let your creativity flourish on the colorful canvas of oil pastel art.


