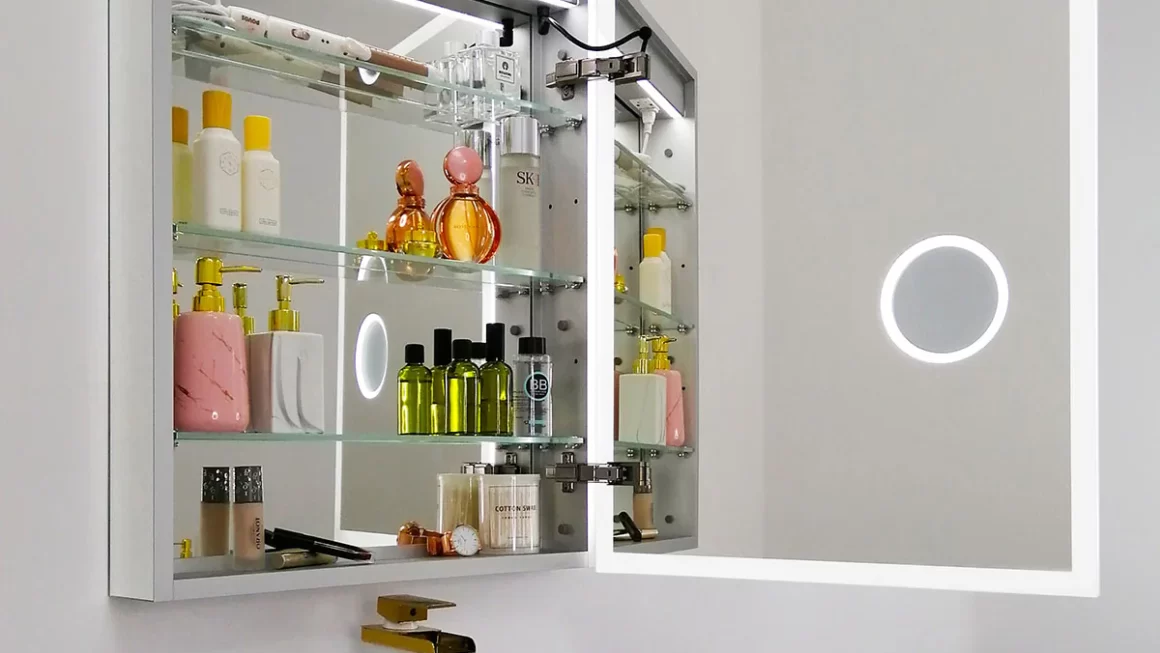
Introduction to Recessed Medicine Cabinets
How to install recessed medicine cabinet? Recessed medicine cabinets are a sleek, space-saving solution for bathroom storage. By nesting within a wall, they offer a flush finish. This keeps your bathroom looking tidy and modern. Understanding how to install a recessed medicine cabinet is crucial. It adds not only style but also practicality to your space.
These cabinets are hidden behind mirrors or artwork. This design can add an element of surprise and elegance to your bathroom. Before you begin the installation, it’s important to know what you’re in for. This guide will walk you through the process. We will cover what tools and materials you need. We will also discuss how to choose the perfect spot for your cabinet. Follow our steps, and you’ll have a new, functional cabinet in no time.
Keep in mind the importance of precision and care in this task. A well-installed cabinet can last for years. It will also enhance the overall aesthetics of your bathroom. On the contrary, a poorly installed recessed medicine cabinet can lead to unevenness. It can also create the potential for damage in the future. Let’s ensure that your cabinet is installed correctly from the get-go.
Tools and Materials Needed for Installation
Before you begin learning how to install a recessed medicine cabinet, gather all necessary tools and materials. This preparation ensures a smooth installation process.
- Measuring Tape: Essential for measuring the wall space and the size of the cabinet.
- Stud Finder: Helps locate studs behind the wall, which is crucial for secure mounting.
- Level: Ensures your medicine cabinet is perfectly horizontal after installation.
- Drill: Needed for making holes in the wall for screws.
- Screws and Anchors: Used to firmly attach the cabinet to the studs.
- Saw (Jigsaw or Handsaw): Required if you need to modify the wall opening.
- Drywall Saw: Useful for cutting through the drywall during initial opening.
- Pencil or Marker: For marking the area on the wall where the cabinet will go.
Make sure all tools are in good working condition and that you have protective gear like gloves and safety goggles. Preparing these items beforehand will help maintain a safe environment while you work on the installation of your recessed medicine cabinet.
Choosing the Right Location for Your Medicine Cabinet
Choosing the perfect spot for your medicine cabinet is crucial. It affects both design and function. Start by considering how you use your bathroom. Think about what’s most convenient for you. The cabinet should be easily accessible. Yet it must not interfere with other bathroom fixtures.
Check if there is enough space for the cabinet door to open without hitting anything. Look for a location that’s close to your bathroom sink. This can be a practical choice since you’ll likely use the sink with the cabinet. Avoid placing the cabinet too high or too low. You want it at an eye level for easy use.
Use your stud finder to ensure you choose a spot with studs. The cabinet must have solid support to be safe and secure. Remember that plumbing and electrical lines may run behind your bathroom walls. You must avoid these when choosing your location.
Once you find a suitable spot, mark the center point with your pencil or marker. This will guide you in the next stages of installation. Your chosen location will influence the size of the cabinet you can install. Make sure to measure the space before buying your cabinet. This guarantees a good fit during the installation process.
When deciding on the location, consider the overall layout of your bathroom. Think about symmetry and balance with other features. You want the cabinet to complement your bathroom’s design, not clash with it. Find an area that allows for a comfortable reach and good visibility in the mirror. Avoid direct exposure to moisture or sunlight to prevent damage over time.
Preparing the Wall for Installation
Once you have chosen the perfect location for your recessed medicine cabinet, the next step is preparing the wall for installation. This preparation is crucial for ensuring that the installation process goes smoothly and that the cabinet is securely mounted.
First, use a stud finder to detect the studs in the wall where the cabinet will be installed. Mark these locations with a pencil or marker. This step is vital as you will need to mount the cabinet to these studs for stability.
Next, measure the dimensions of the medicine cabinet and outline the area on the wall where it will be recessed. Be precise with your measurements to ensure a perfect fit. Use a level to check that the lines are straight and even, preventing any potential issues with the cabinet’s alignment.
After marking the area, use a drywall saw to cut out the section of the wall. Proceed cautiously to avoid any damage to plumbing or electrical lines hidden behind the drywall. It’s recommended to cut slightly within the marked lines; you can always trim more if needed but cannot undo an overly large cut.
Once the opening is ready, remove any debris and ensure the space is clean before proceeding to the installation phase. Preparing the wall correctly will help you how to install recessed medicine cabinet efficiently and securely, ensuring a flush and professional finish. Keep the workspace tidy and free from unnecessary clutter to facilitate a smoother operation.
Step-by-Step Installation Process
After preparing your wall, you’re ready to install your recessed medicine cabinet. Follow this step-by-step process to ensure success:
- Check the Fit: First, ensure the cabinet fits into the opening snugly. If it’s too big, trim the wall opening carefully with a saw.
- Level the Cabinet: Place the cabinet into the wall opening. Use your level to check for evenness. Make adjustments until it’s perfectly level.
- Secure the Cabinet: Locate the pre-drilled holes in the cabinet. Align them with the wall studs. Attach using screws. Do not overtighten.
- Install Shelves: Fit any adjustable shelves into the cabinet. These should easily clip or slide into place.
- Attach the Door: If the cabinet door is not pre-attached, install it now. Make sure it opens and closes smoothly.
- Final Inspections: Double-check that the cabinet is secure and level. Open and close the door to ensure it doesn’t stick or wobble.
By following these steps for how to install a recessed medicine cabinet, you’ll have a functional storage space that’s both stylish and sturdy. A level and secure cabinet will provide safety and convenience for years to come. Remember to take your time and measure twice before securing anything in place.
Finishing Touches and Wall Repair
After securing the recessed medicine cabinet, it’s time for finishing touches. These ensure a polished look and restore the wall’s integrity. Here’s what to do next:
- Caulk the Edges: Apply caulk around the cabinet’s perimeter. This seals gaps and gives a neat finish. Choose a caulk color that matches your wall.
- Touch-up Paint: If the wall or cabinet frame needs it, touch up with paint. Use a small brush for precision. Let it dry completely.
- Clean Up: Wipe away any dust or debris from the installation. A clean work area highlights your new cabinet.
- Patch Up: If there were accidental nicks or holes made, patch them now. Use spackle for small repairs. For larger areas, drywall patches are best.
- Sand Smooth: Once the spackle dries, sand the area. Make it level with the wall surface.
- Paint Over Repairs: Choose matching paint for the wall. Cover the patched areas. Blend with the rest of the wall. This conceals the repair work.
Take a final look at your work. Ensure everything aligns and looks seamless. Quality finishing touches can hide the signs of installation. They make the cabinet look as though it was always part of your bathroom. Remember, a job well done is about the details.
Safety Tips and Best Practices
Installing a recessed medicine cabinet requires careful handling and adherence to safety protocols to ensure a secure and risk-free installation. Here are some essential safety tips and best practices to follow:
- Wear Protective Gear: Always use safety goggles and gloves. This protects your eyes and hands during the process.
- Check for Electrical and Plumbing Lines: Use a stud finder that can detect wires and pipes. Avoid electrical shocks and plumbing damage.
- Work with a Helper: Lifting and positioning the cabinet can be easier and safer with an extra pair of hands.
- Use the Right Tools: Ensure all your tools are in good condition. This prevents accidents caused by tool malfunctions.
- Keep the Area Clean: Remove any obstacles from your working area. A clear space prevents trips and falls.
- Be Cautious with Power Tools: Handle drills and saws with care. Follow the manufacturer’s instructions for safe use.
- Secure the Cabinet Firmly: Double-check that the cabinet is attached solidly to the studs. This prevents it from coming loose.
- Avoid Over-tightening Screws: Over-tightening can damage the wall or the cabinet. Tighten just until it’s firm.
Following these safety tips and best practices can help you learn how to install a recessed medicine cabinet safely and effectively. They ensure that the installation is not only successful but also minimizes any risk of accidents or future problems.
Maintenance and Care for Your New Recessed Medicine Cabinet
Once you have successfully installed your recessed medicine cabinet, maintaining it is essential. Proper care ensures it remains functional and looks great over time. Here are practical maintenance and care tips for your new cabinet:
- Regular Cleaning: Wipe down the cabinet’s exterior and interior regularly. Use a mild cleaner and a soft cloth. This prevents dirt build-up.
- Avoid Moisture: Try to keep the cabinet dry. Moisture can warp the cabinet and damage its finish.
- Tighten Hardware: Over time, screws and hinges may loosen. Check them periodically and tighten as needed.
- Check Alignment: Ensure the door stays aligned. If it starts to sag, adjust the hinges.
- Limit Weight: Do not overload the shelves. Keep the weight distribution even to prevent strain.
- Inspect Seals: Look at the caulk or sealant around the cabinet. If it cracks or peels, reapply it.
- Handle with Care: Open and close the door gently. Rough handling can weaken the hinges.
- Clean Glass: If your cabinet has a mirror, clean it with glass cleaner. Do this often to maintain clarity.
- Avoid Harsh Chemicals: Don’t use abrasive cleaners. They can scratch surfaces and cause damage.
By following these tips, you can enjoy your recessed medicine cabinet for many years. Regular care will keep it looking new and functioning well. Remember, taking care of your bathroom fixtures is part of a clean and safe home environment.


