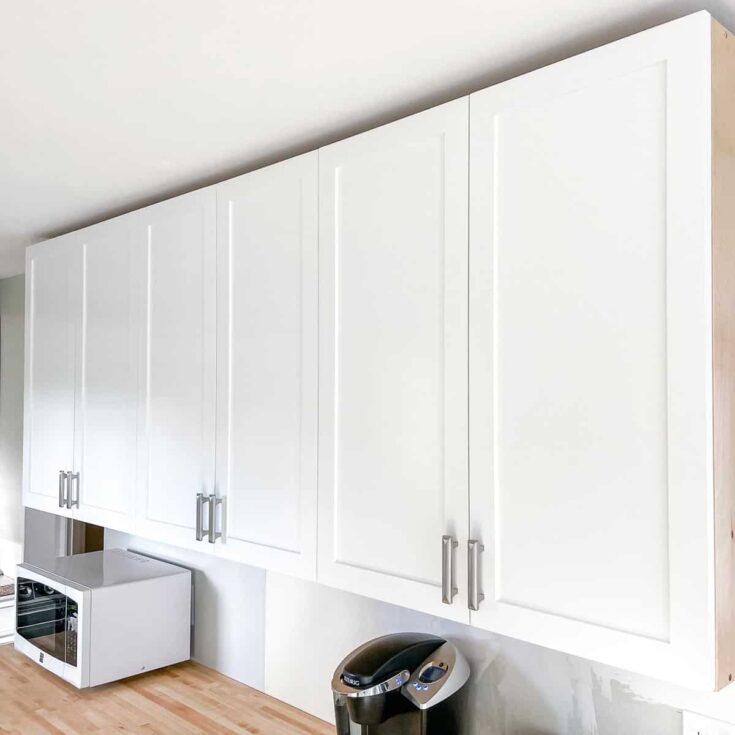
Introduction to Shaker Cabinet Doors
How to build shaker cabinet doors? Shaker cabinet doors are a beloved choice for their clean, simple lines. Their timeless style brings a blend of traditional and modern aesthetics to any space.
The Appeal of Shaker Style
The appeal of Shaker style lies in its versatility and minimalist design. Its simplicity allows it to fit effortlessly into a variety of decor themes, from rustic farmhouse to sleek contemporary settings. The focus on functionality and durability also makes Shaker doors a practical choice for long-term use.
DIY Versus Buying Pre-Made Doors
Choosing to build Shaker cabinet doors yourself can be a cost-effective and rewarding project. It provides the opportunity to customize the size, color, and materials. Conversely, buying pre-made doors offers convenience but usually comes at a higher price and with less personalization. Regardless of your choice, understanding the project’s demands is key to making the right decision.
Essential Tools and Materials Needed
To start building your own shaker cabinet doors, you need the right tools and materials. Gathering everything beforehand ensures a smooth project flow. On that note, let’s dive into the essentials.
Choosing the Right Wood and Hardware
- Wood Selection: Choose sturdy and durable wood like poplar or pine boards for the door frame. For the center panel, 1/4″ plywood, such as birch, is commonly used.
- Hardware: Look for pocket hole screws, concealed hinges, and cabinet knobs or pulls. Make sure they match your existing cabinetry if necessary.
- Additional Supplies: You’ll also need wood glue, caulk, primer, and paint to complete your doors. Select high-quality products for lasting results.
Understanding Measurements and Calculations
- Cabinet Measurements: Accurately measure the existing cabinet openings to determine the size of your new doors. Include the overlay of the door if applicable.
- Wood Calculations: Calculate the sizes of the vertical stiles and horizontal rails, keeping in mind that 1×3 boards are actually 2.5″ wide.
- Cut List: Create a precise cut list based on your measurements to minimize waste and ensure accuracy.
Preparing these tools and materials while understanding the important measurements sets a solid foundation for your DIY shaker cabinet doors project.
Step-by-Step Construction Process
Building shaker cabinet doors might seem complex, but breaking it down into steps makes it achievable.
Measuring and Cutting Wood Correctly
Start with precise measurements of your cabinet openings. Add extra for door overlap if needed. Choose strong wood like poplar for frames and birch plywood for panels. Cut your stiles (vertical pieces) and rails (horizontal pieces) to length, remembering a 1×3 board is actually 2.5 inches wide.
Assembling the Door Frame
Lay out your cut wood pieces to form a door shape. Number each piece to remember their order. Attach the stiles to the rails with wood glue and use clamps to secure them while drying. Ensure corners are square for a professional look.
Cutting and Fitting the Center Panel
Measure the opening in your frame for the center panel, adding 1/4 inch to both dimensions for a snug fit. Cut your plywood panel accordingly. Fit the panel into place, checking it’s flat and even.
How to Drill Pocket Holes Correctly
Pocket holes will attach your door frame securely. Place them on the ends of the rails using a pocket hole jig. Set the jig to your wood thickness for accurate drilling. Drill slowly to avoid splitting. Smooth any rough edges with sandpaper.

Finishing Touches for Your Shaker Doors
After building your shaker cabinet doors, it’s time for the finishing touches.
Sanding, Caulking, and Priming
Begin by sanding down all surfaces and edges for a smooth finish. Use fine-grit sandpaper and spend time on this step – the smoother your surfaces, the better the final paint job. Once sanded, examine each corner and seam. Caulk any gaps or seams to seal the door completely. Use paintable caulk for best results. After caulking and allowing sufficient dry time, apply a quality primer. This helps your paint adhere to the wood and provides a protective base.
Painting Techniques for a Smooth Finish
For painting, pick a method that suits your skill level and tools. If you have access to a paint sprayer, use it to achieve a smooth, professional finish. If not, high-quality brushes or foam rollers are good options. Apply at least two coats of paint, allowing time to dry between each coat. Repeat with additional coats until you reach the desired opacity. Remember to paint in a well-ventilated space and wear appropriate protective gear.
Attaching Hinges and Door Hardware
With paint dried, it’s time to install hinges and hardware. Opt for concealed hinges if you seek a clean look, or choose surface-mount hinges for easier installation. Use a hinge jig to ensure precise placement if necessary. Measure and mark where each hinge should go; then, attach them to your door. For door hardware, such as knobs or pulls, keep them consistent with your cabinet’s design. Measure and mark the placement for these as well, ensuring uniformity across all doors. Pre-drill holes to prevent splitting, then attach the hardware securely.
Installing Your Shaker Cabinet Doors
Now that your shaker cabinet doors are crafted, it’s time to install them.
Aligning and Securing Doors to Cabinets
1. Position the Doors: Start by holding the door up to the cabinet to find the proper alignment.
2. Marking: Once aligned, lightly mark the cabinet with a pencil where hinges will attach.
3. Hinges: Attach the hinges to the door first, then secure the door to the cabinet.
4. Adjust for Fit: Make sure doors open and close smoothly, adjusting hinges as needed.
Pro tip: Recheck your alignment after attaching each hinge to ensure a straight fit.
Adding the Perfect Handles or Knobs
1. Choose Your Hardware: Pick handles or knobs that suit your cabinet’s style.
2. Measure for Placement: Use a ruler to find the center or the desired placement point.
3. Mark the Spot: Gently mark where you’ll drill. Keep measurements consistent on all doors.
4. Pre-drill Holes: Carefully drill holes at your marks to avoid splintering the wood.
5. Attach Hardware: Secure the handles or knobs with screws, making sure they’re tight.
Enjoy the new look and feel of your custom shaker cabinet doors!
Tips and Tricks for Perfect Shaker Doors
Building shaker cabinet doors can be an enriching DIY project. To ensure the success of your project, consider these tips and tricks. They can help you avoid common pitfalls and ensure your doors are durable and long-lasting.
Avoiding Common Mistakes
- Double-check measurements: Always measure twice before cutting once to avoid errors.
- Invest in quality materials: Use strong woods like poplar for the frame and birch for the panels.
- Secure clamping: Use enough clamps to hold pieces firmly during assembly. This prevents shifting.
- Test the pocket holes: Practice making pocket holes on scrap wood first.
- Sanding is key: Sand each piece smoothly before assembly for a flawless paint job.
- Even caulk application: Apply caulk meticulously and wipe away excess for neat seams.
- Careful with hinges: When attaching hinges, be precise to ensure doors hang straight.
- Balance the paint: Apply multiple thin coats of paint rather than one thick one for a smooth finish.
Maintenance and Care for Your Doors
- Regular cleaning: Wipe your doors with a damp cloth regularly to prevent dust buildup.
- Touch-up paint: Keep spare paint for quick fixes on chips or scratches.
- Check the hardware: Tighten screws on hinges and knobs periodically to keep them secure.
- Avoid moisture damage: Protect wood from excess water to prevent warping or mold.
- Use gentle cleaners: Avoid harsh chemicals that can strip the finish or damage the wood.
By following these tips, you can ensure that your handmade shaker cabinet doors remain in top condition, looking as good as they did the day you installed them.
Conclusion: Enjoying Your Handcrafted Doors
How to build shaker cabinet doors? After the work is done, you can take pride in your DIY shaker cabinet doors.
Reflecting on the DIY Experience
Creating shaker cabinet doors yourself is a meaningful achievement. You’ve learned new skills, for instance, how to build shaker cabinet doors. The process has taught you patience and attention to detail. Each time you enter the room, the doors remind you of your hard work and creativity.
Planning Your Next Home Improvement Project
With this project done, think about what’s next. Perhaps you’ll tackle a matching shaker-style table or bookshelf. You now have the tools, know-how, and confidence. Remember to start with a plan, just like before. Choose a project that excites you and builds on what you’ve learned.