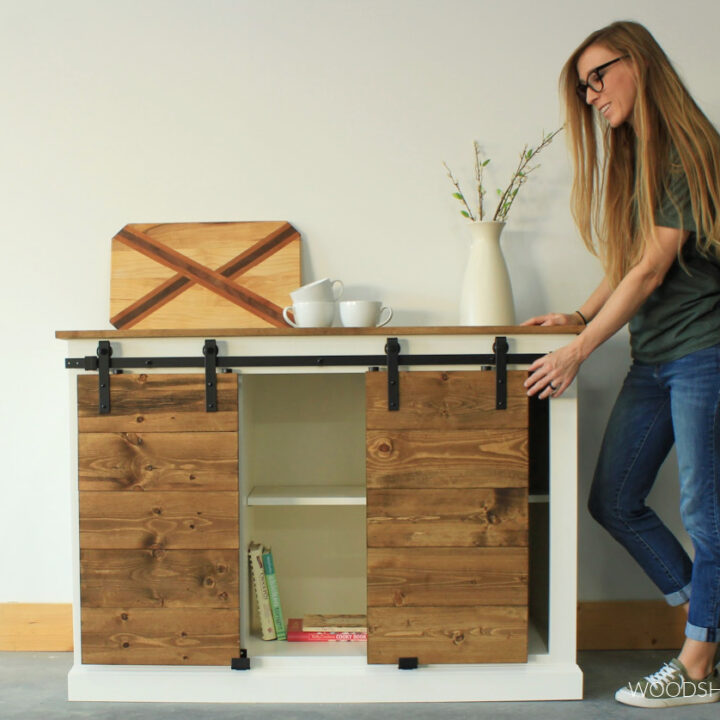
Introduction to DIY Cabinet Door Making
How to build cabinet doors? Welcome to the world of DIY cabinet door making! This guide is here to help you learn how to build cabinet doors. We’re talking about the kind that not only function well, but also add a touch of elegance to your kitchen or any other space requiring cabinets.
Building your cabinet doors can be both rewarding and cost-effective. With the right tools and some basic woodworking skills, you can create custom doors that fit your style and needs. Whether you plan to paint or showcase the natural wood, this skill allows you to fully personalize your living space.
In this introduction, we will dive into selecting suitable materials and tools, cutting precise dadoes in cabinet frames, and the art of routing decorative edges. We’ll also guide you through accurate door sizing, cutting and mitering frame pieces, preparing the middle panel, and provide a step-by-step assembly procedure.
By the end of this guide, you will have gained the confidence and knowledge to tackle cabinet door construction like a pro. Let’s get started on this DIY journey to making your cabinet doors standout!
Selecting the Right Materials for Your Cabinet Doors
Selecting the right materials is key to building cabinet doors. The choice of wood affects not only the look but also the durability and maintenance of the doors. Here’s a simple guide to help you make the best choice:
- Identify the Purpose: Are the doors for a paint job or to display natural wood? For painting, select woods like poplar or smooth plywood that take paint well.
- Match Existing Cabinets: If you’re only replacing doors, try to match the wood species and color with existing cabinetry for a consistent look.
- Consider the Wood’s Characteristics: Each type of wood has unique properties. Hardwoods like oak and maple are durable and have a prominent grain. Softer woods like pine are easier to work with but may not last as long.
- Think About Finish: Some woods stain better than others. If you wish to stain your doors, choose a wood with an even grain, like cherry or alder.
- Budget Matters: Your budget will also influence your decision. Hardwoods tend to cost more, while softwoods and engineered woods like MDF are more affordable.
How to build cabinet doors? Choose wisely to ensure your cabinet doors turn out exactly as you envisioned. Always remember to factor in the cost, functionality, and style when making your selection.
Detailed Guide on Cutting Dadoes in Cabinet Frames
Cutting dadoes in your cabinet door frames is a crucial step in door construction. These grooves will hold your panel in place, ensuring strength and stability. Let’s walk through the process step by step.
- Choose Your Blade: If you own a dado blade, that’s perfect. If not, a standard table saw blade can work too.
- Measure and Mark: Measure where the dado will go on your 1×3 board. Mark the edge clearly.
- Set Up the Saw: Install the dado blade on your table saw. Adjust it to the necessary height and width.
- Make the Cut: Run the board through the saw to cut the dado. For a standard blade, make multiple passes.
- Test the Fit: After cutting, check if your panel fits snugly into the dado.
Cutting dadoes doesn’t have to be complex. With the right approach, you’ll have sturdy and professional-looking cabinet doors.
Routing Decorative Edges for Appeal
After making precise dado cuts, you’ll want to add some decorative appeal to your cabinet doors. Here’s a step-by-step guide to routing those stylish edges:
- Choose Your Router Bit: A trim router with a round over bit works well for creating a smooth, rounded edge.
- Adjust the Router: Set up your router to match the profile you desire on the edge of your boards.
- Secure Your Material: Before routing, clamp your door frame securely to avoid shifting during the process.
- Route the Edges: Guide the router along the edge of your frame piece. Keep the router steady for a consistent finish.
- Repeat for All Boards: Each piece of your door frame needs this decorative edge for a uniform look.
- Inspect Your Work: After routing, check for any rough spots or inconsistencies and touch them up.
- Clean Up: Remove sawdust and debris from the routed edge before moving on to the next step.
How to build cabinet doors? Routed edges can elevate the appearance of your cabinet doors significantly. Mastering this technique will allow you to customize your doors to suit your aesthetic preferences better.
How to Determine Cabinet Door Sizing Accurately
Determining the correct size for your cabinet doors is crucial for a proper fit and function. Here’s what you need to do:
- Measure the Opening: Start by measuring the frame opening where the door will install. This ensures a precise fit.
- Subtract for Inset Doors: If you want inset doors, subtract half an inch from both the height and width of the opening measurement.
- Add for Overlay Doors: For partial overlay doors, add twice the overlay size to the opening’s height and width.
- Allow for Gaps: For double door cabinets, deduct one-eighth inch from the total width. Then split this number for each door’s width.
- Factor in the Frame Style: For frameless cabinets, subtract three-sixteenths of an inch from the outer cabinet box dimensions.
- Check Your Math: Double-check your calculations to prevent mistakes and rework.
By carefully measuring and adjusting for door type and gaps, you can achieve the perfect door size. Remember, accuracy at this stage sets up the whole project for success. So, take your time and measure twice before cutting once.
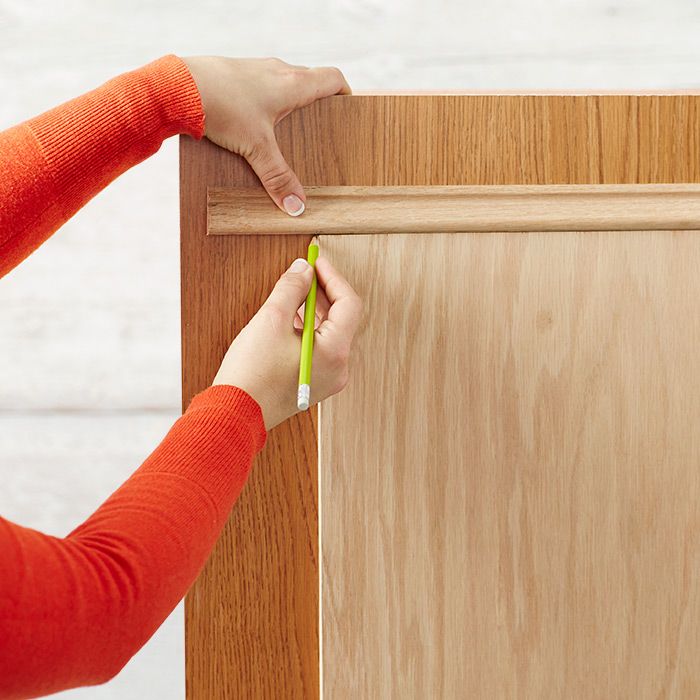
Cutting and Mitering Cabinet Door Frame Pieces
Cutting and mitering cabinet door frame pieces requires precision and the right tools. For this step, ensure you have your measurements from the door sizing step and a miter saw ready to go. Here’s a methodical approach to achieving accurate frame pieces for your DIY cabinet doors.
- Measure Accurately: Based on your door sizing calculations, measure the length for each frame piece.
- Mark Miter Cuts: Draw lines where you’ll make 45-degree miter cuts. This helps in creating the frames’ corners.
- Cut with Miter Saw: Use the miter saw to cut the ends of each piece at a 45-degree angle.
- Remember: measure twice, cut once.
- Ensure cuts are sharp for snug fitting frame corners.
- Keep Consistent Edges: Maintain the decorative edge pattern on each piece you cut.
- Dry Fit the Frame: Arrange the frame pieces to check they fit well together.
- Adjust as Needed: Any pieces not fitting well may need slight adjustments.
This stage sets the stage for a sturdy and aesthetic door. Cutting precise, mitered frame pieces paves the way for a seamless assembly. Take your time and ensure the accuracy of each cut for the best results.
Preparing the Middle Panel of Your Cabinet Door
After cutting and mitering the door frame pieces, the next step is preparing the middle panel. This panel sits within the dadoes cut into the frame. It’s vital for the overall look and stability of your cabinet doors. Here’s how to get it right:
- Measure for the Panel: Subtract approximately 4 and a half inches from the door frame height and width. This accounts for the width of the frame pieces and the dado depth.
- Choose the Right Material: For painted doors, ??-inch birch plywood is ideal. It’s smooth and takes paint well. Match the wood type with your frames if you’re going for a natural wood look.
- Cut the Panel: Using a jig saw or table saw, cut the plywood to the size calculated. Double-check the fit within the frame to ensure it can move slightly, allowing for wood expansion.
- Sand the Edges: Smooth out any rough edges with sandpaper. This helps the panel fit neatly into the dadoes.
- Test Fit: Place the panel into the frame to check the fit. There should be a small gap around the edges for expansion.
By taking care to prepare the middle panel accurately, you’ll ensure a seamless fit when you move on to assembling your cabinet door. The panel should sit well within the frame, ready for the final assembly.
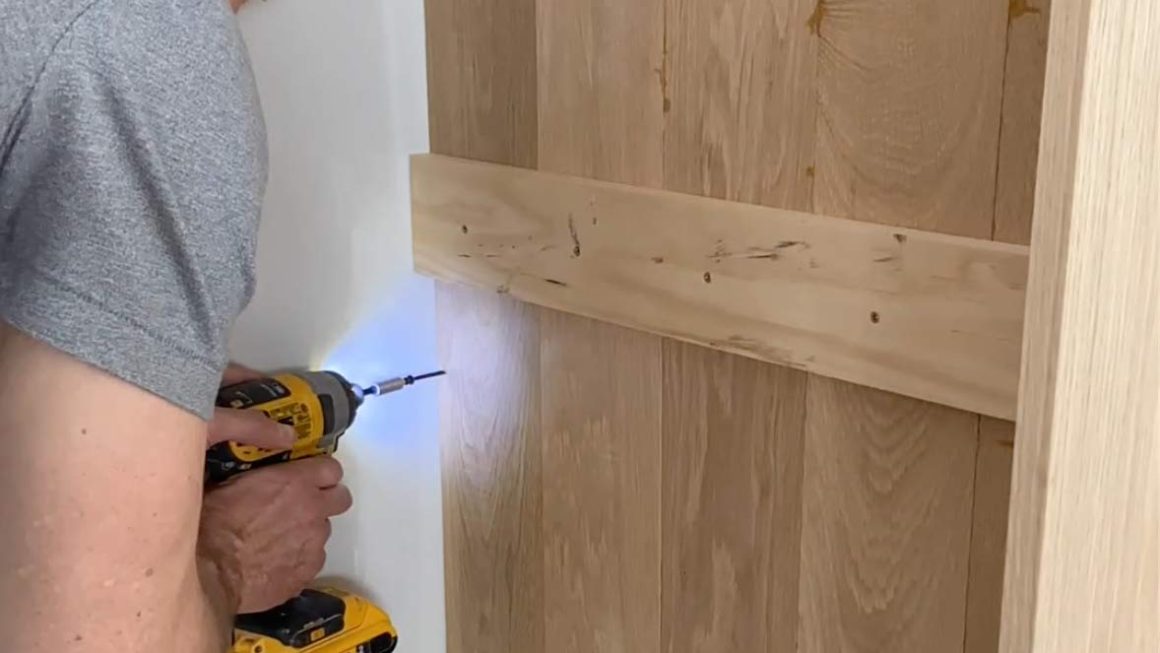
Step-By-Step Cabinet Door Assembly
How to build cabinet doors? Once your frame pieces and middle panel are ready, it’s time to assemble your cabinet door. Follow these simple steps to bring them all together:
- Lay Out Frame Pieces: Start by laying out the frame on a flat surface.
- Mark Dowel Holes: Use a square to mark where dowels will be inserted at the corners.
- Drill for Dowels: Align your dowel jig with the marks and drill the holes.
- Apply Glue: Spread wood glue on the ends of the frame pieces and inside the dowel holes.
- Insert Dowels: Place dowels in the holes to connect the frame corners.
- Attach Panel: Slide the middle panel into the dadoes you previously cut.
- Secure Final Piece: Add the final frame piece to close up the door.
- Clamp the Door: Use large clamps to hold everything in place while the glue dries.
- Wipe Excess Glue: Clean any glue that seeps out to ease the sanding process later.
- Let Dry: Allow ample time for the glue to set before moving on to finishing touches.
These steps should help you efficiently assemble your cabinet doors, ready for sanding and finishing.

Sanding, Finishing, and Installing Your Cabinet Doors
Once your DIY cabinet doors are assembled, sanding and finishing are the next key steps before installation. Start by sanding the door to create a smooth surface for the paint or stain. Sand with medium-grit sandpaper first and then with a fine-grit for a flawless finish. Wipe down the doors to remove all dust before you apply any finish.
When finishing, if you’re painting, apply a primer coat first. This helps the topcoat of paint adhere better. After the primer dries, sand lightly with fine-grit sandpaper, then apply the topcoat. Use a high-quality paint for durability and a fine-bristle brush or foam roller for a smooth application. If staining, select a stain compatible with your wood type and apply according to the manufacturer’s instructions.
Installing cabinet doors correctly is just as crucial as building them. Measure and mark the placement for your hinges. Use a concealed hinge jig to drill precise holes for the hinges. Attach the hinges to your door and then to the cabinet. Adjust the hinges for alignment. With the doors attached, add knobs or handles to finish off your cabinets. Check that all doors open and close smoothly. Make any final adjustments. How to build cabinet doors? Your DIY cabinet doors are now ready to enhance the look and function of your space.
By following these steps, you ensure that your handcrafted cabinet doors are both beautiful and functional, offering a satisfying conclusion to your DIY project.
Practical Tips for Attaching Concealed Hinges
Attaching concealed hinges adds a sleek look to your cabinet doors. Follow these tips to do it right:
- Measure Correctly: Precision is key. Measure exactly where the hinges should go on the doors.
- Choose the Right Hinges: There are different types of concealed hinges for inset, partial, and full overlay doors. Pick the one that suits your door style.
- Mark the Spot: Use a pencil to mark the spot where you’ll drill for hinges. Double-check these marks.
- Drill Holes: Use a concealed hinge jig for accurate drill holes. Ensure the jig is firmly clamped before drilling.
- Install Hinges: Place the hinges in the holes. Fasten them securely with screws.
- Attach to Cabinet: Align the door with the cabinet frame. Screw in the hinges to the frame.
- Adjust for Alignment: Turn the hinge screws to adjust door alignment. Make sure the door is level and even.
- Test the Door: Open and close the door several times. Check for smooth movement.
- Fine-Tune as Needed: Small adjustments can make a big difference. Tweak until everything is just right.
By carefully measuring, drilling, and adjusting, your concealed hinges will make your doors functional and visually appealing. Enjoy the clean lines and uncluttered look of your new cabinet doors.