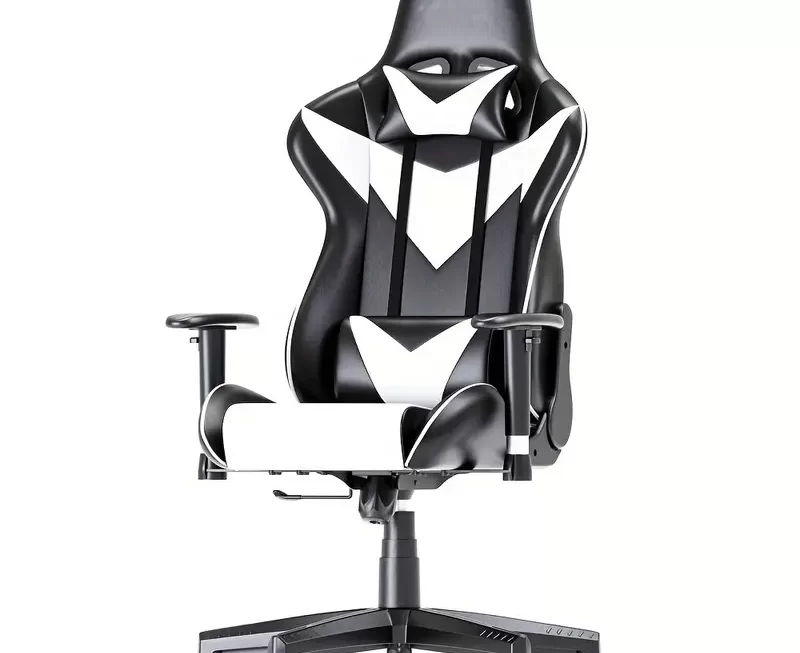
Disassembling an office chair can be necessary for various reasons. Whether you’re moving, performing maintenance, or replacing parts, knowing how to take apart your branch ergonomic chair disassembly is essential. How to disassemble an office chair? This comprehensive guide will provide you with the steps and tips needed to safely and efficiently disassemble an office chair. By the end of this article, you’ll be equipped with the knowledge to tackle the task with confidence.

Why Disassemble an Office Chair?
Understanding why you might need to disassemble an office chair is the first step. In this section, we’ll explore common reasons, highlighting the importance and benefits of disassembling your office chair correctly.
Moving and Storage
Moving office furniture can be challenging, particularly with larger items like office chairs. Disassembling the chair makes it easier to transport and store. By breaking it down into smaller parts, you can fit the chair into car trunks or moving boxes, reducing the risk of damage during transit. Additionally, disassembled chairs take up less space during storage, which helps if you’re dealing with limited storage capacity.
Maintenance and Repairs
Regular maintenance and occasional repairs extend the life of your office chair. To address issues like squeaks, loose components, or worn-out parts, disassembling the chair is often necessary. Opening up the chair gives you access to its internal mechanisms, allowing you to perform thorough cleaning, lubrication, and part replacements. Proper maintenance ensures the chair remains functional and comfortable for longer.
Replacing Parts
Over time, some parts of your office chair may wear out or break. Replacing these parts requires disassembly. For instance, you might need to replace the wheels, armrests, or gas lift. Knowing how to take apart the chair ensures you can replace these components correctly, saving money on professional repair services.
Customization and Upgrades
If you’re looking to upgrade your chair’s components or customize it to suit specific needs, disassembly is a crucial first step. Whether you’re adding ergonomic features, upgrading the cushioning, or installing new armrests, disassembling the chair allows for a smooth and precise installation of new parts.
Tools and Preparation
Proper preparation makes the disassembly process smoother and more efficient. In this section, we’ll outline the tools you need and the preparatory steps to take before starting the disassembly.

Essential Tools
Having the right tools at hand is essential. Here are the basic tools you’ll need:
- Screwdrivers: Both Phillips and flathead screwdrivers for handling various screws.
- Allen wrenches: Many office chairs use hex screws that require Allen wrenches.
- Adjustable wrench: Useful for loosening and tightening bolts and nuts.
- Rubber mallet: Helps in gently tapping parts out of place without causing damage.
- Pliers: For gripping and turning stubborn screws or bolts.
- Soft cloth or towel: To protect the chair’s surface during disassembly.
- Lubricant: WD-40 or silicone spray to help loosen tight parts.
Additional Tools and Supplies
Depending on your chair’s model and complexity, you might need additional tools. Here are some optional items that can be useful:
- Screw storage: Small containers or magnetic trays to keep screws and small parts organized.
- Labeling materials: Sticky notes or labels to mark parts and screws for easy reassembly.
- Work gloves: Protective gloves to keep your hands safe from sharp edges or pinches.

Preparing Your Workspace
- Clear the area: Ensure you have plenty of space to work. Clear any obstacles and set up a clean, flat surface.
- Use protective coverings: Place a towel or soft cloth on the workspace to protect the chair’s components and prevent scratches.
- Gather your tools: Arrange all your tools and supplies within reach to avoid interruptions during the disassembly.
Step-by-Step Guide to Disassemble an Office Chair
With your tools ready and workspace prepared, it’s time to disassemble the office chair. Follow these detailed steps to ensure a safe and effective disassembly process.
Step 1: Remove the Wheels
The first step is to remove the wheels, as they are often the easiest part to detach. Follow these instructions:
- Turn the chair upside down: Place the chair on its back on a soft surface to protect it.
- Pull out the wheels: Most office chair wheels are simply pushed into place and can be pulled out with some force. If they are tight, use pliers to grip and wiggle them out gently.
- Set aside the wheels: Store them in a small container to keep them organized.
Step 2: Detach the Base
Next, you’ll need to detach the chair’s base, which typically includes the gas lift and the five-star base.
- Remove the gas lift: The gas lift can be tricky, as it may be tightly secured. Use an adjustable wrench to loosen the nut at the base of the lift. If it’s still stuck, spray a little lubricant and allow it to sit for a few minutes before trying again.
- Separate the base: Once the gas lift is removed, pull the five-star base away from the rest of the chair. You may need to wiggle it slightly to disengage.
Step 3: Remove the Armrests
Armrests are often attached with screws or bolts. Here’s how to remove them:
- Locate the screws or bolts: Use an appropriate screwdriver or Allen wrench to loosen and remove the screws or bolts.
- Detach the armrests: Once the screws are removed, gently pull off the armrests.
Step 4: Disassemble the Seat and Backrest
The seat and backrest are often connected with a bracket and screws. Follow these steps:
- Locate the connecting screws: Identify the screws that connect the seat and backrest.
- Remove the screws: Use a screwdriver or Allen wrench to remove these screws, keeping them organized for reassembly.
- Separate the seat and backrest: Gently pull the seat and backrest apart.

Step 5: Handle Any Additional Components
Some office chairs come with additional components like headrests, lumbar support, or seat cushions. Remove these parts as required:
- Locate attachment points: Identify where these components are attached.
- Remove screws or bolts: Use the appropriate tools to detach these parts.
- Store components carefully: Keep all removed parts organized for easy reassembly.
Step 6: Keep Everything Organized
Throughout the disassembly process, keep all parts, screws, and tools organized. Use containers, trays, or labels to ensure nothing gets lost. Taking photos of each step can also help with reassembly.
Tips for Reassembling Your Office Chair
Once the disassembly is complete, knowing how to reassemble the chair is equally important. This section provides tips to ensure a smooth and successful reassembly process.
Organize and Label Parts
Before reassembling, review all the parts and ensure everything is accounted for. Label each part if you haven’t already to avoid confusion. Organizing parts neatly will make the reassembly process more straightforward.
Refer to Manufacturer Instructions
If you have the original assembly instructions or manual, refer to them during reassembly. These instructions can provide valuable guidance and specific details about your chair model.
Follow the Reverse Order
Reassembling the chair typically involves following the disassembly steps in reverse. Start with attaching the seat and backrest, then the armrests, and finally the base and wheels. Ensure each part is securely fastened, but avoid over-tightening screws and bolts, as this can strip threads or damage components.
Double-Check for Stability
After reassembling the chair, double-check for stability. Sit in the chair and test all adjustable mechanisms to ensure they function correctly. If you notice any wobbling or loose parts, make necessary adjustments to secure them.
Regular Maintenance
Perform regular maintenance on your office chair to keep it in good condition. Tighten screws, lubricate moving parts, and clean the chair regularly to ensure optimal performance and longevity.

Troubleshooting Common Issues
Sometimes, issues may arise during disassembly or reassembly. This section provides troubleshooting tips for common problems you might encounter.
Stubborn Parts
If certain parts are stubborn and difficult to remove, don’t force them excessively. Apply a small amount of lubricant to loosen tight components and try gently again. Using excessive force can damage the parts or the chair.
Missing Screws or Bolts
If you misplace screws or bolts, check local hardware stores or contact the chair’s manufacturer for replacements. Using the wrong size or type of fastener can compromise the chair’s stability and safety.
Misaligned Components
If components don’t seem to fit correctly during reassembly, ensure you have the correct parts and alignment. Refer to assembly instructions or photos taken during disassembly for guidance. Recheck all connections and make adjustments as needed.
Conclusion
Disassembling an office chair can be a straightforward task with the right tools, preparation, and guidance in 2024. Whether you’re moving, performing maintenance, or replacing parts, following the steps outlined in this comprehensive guide ensures a smooth and efficient process. Proper disassembly and reassembly extend the life of your office chair, keeping it functional and comfortable.
By understanding the reasons for disassembly, preparing effectively, and following step-by-step instructions, you can confidently tackle the task. Regular maintenance and proper handling further enhance your chair’s longevity, providing you with comfort and support for years to come. Now you’re equipped with the knowledge to disassemble, maintain, and reassemble your office chair effectively.