Introduction to Cabinet Construction
How to build a cabinet with drawers? Building cabinets with drawers can seem daunting at first. It combines woodworking precision with the need for functionality. Whether you are a beginner or an expert, understanding the basics is key. In this guide, we’ll cover how to build a cabinet with drawers. From tools and materials to step-by-step instructions, you’ll learn everything you need.
When you think of cabinets, you may just think of storage. But they add style and character to a room too. Your cabinet can be simple or fancy, based on your taste. The process remains the same.
To start, let’s consider what you need to know before picking up any tools. You’ll learn about the materials and tools required. Then, we’ll discuss the planning phase. Detailed measurements and careful planning are the foundations of a great build.
Next, we’ll go through the assembly process. This phase is where your cabinet starts to take shape. It is important to follow the steps closely for a strong build.
Installing drawers is a critical part of the cabinet construction. It’s where precision comes in. This guide will show you how to make sure your drawers slide in and out smoothly.
Finally, no cabinet is complete without the finishing touches. Sanding and painting are not just about looks. They also protect your cabinet. We’ll give you tips to get a professional finish.
How to build a cabinet with drawers? Building a cabinet with drawers is a rewarding project. With a bit of effort, you can create a piece that is both useful and beautiful. Let’s dive in and start building!
Tools and Materials Needed
Before you dive into the process of building a cabinet with drawers, make sure you have the right tools and materials. Here’s what you’ll need:
- Measuring Tape and Ruler: Accurate measurements are essential in cabinet making.
- Saw: You could use a hand saw or a power saw to cut the wood to size.
- Drill and Drill Bits: For making holes for screws and hardware.
- Screws and Nails: These will hold your cabinet pieces together.
- Glue for Wood: This adds strength to the joints.
- Plywood or Solid Wood: The main material for your cabinet.
- Drawer Slides: To enable the drawers to open and close smoothly.
- Sanding Block or Sander: For smoothing out rough edges.
- Paint or Stain: This will give your cabinet the desired finish and look.
- Paintbrushes or Rollers: For applying paint or stain.
- Level: To ensure your cabinet is even and plumb.
- Clamps: To hold pieces together as they’re being joined.
Take your time to gather these items before starting. Having everything at hand will make the construction process smoother. Remember to choose quality materials. They ensure durability and better end results. Begin by noting down the sizes and quantities based on your cabinet design.
Planning Your Cabinet Dimensions
Planning the dimensions of your cabinet is crucial to your project’s success. Measure the space where your cabinet will go. Consider how wide, tall, and deep you want it to be. Think about what you will store in the drawers. Their size will affect the cabinet’s overall dimensions.
Here are steps to plan your cabinet dimensions:
- Decide on the Purpose: Define what you will store in the cabinet. This will guide the size and number of drawers.
- Measure Your Space: Use a measuring tape to get the height, width, and depth of the area.
- Sketch a Draft: Draw a rough sketch of the cabinet. Include all the drawers and sections.
- Consider Clearances: Allow for space to open doors and drawers fully. Don’t forget to include room for handles.
- Account for Materials: Remember the thickness of your materials. This will affect the inner dimensions.
- Allocating Drawer Sizes: Plan for different drawer sizes if needed. Some items may require taller or wider drawers.
- Review and Tweak: Check your plans. Make adjustments as necessary before you cut any wood.
Good planning will save you time and materials. It ensures your drawers fit perfectly in the space you have. Always double-check your measurements. If you’re confident in your plan, you’re ready to move to the assembly process.
Step-by-Step Cabinet Assembly Process
Once you have your tools, materials, and a solid plan, it’s time to assemble your cabinet. Follow these step-by-step instructions to ensure a sturdy and well-built cabinet. Keep in mind to use simple words and concise sentences for clarity.
- Cut the Wood: Using your saw, cut the plywood or solid wood to the required sizes. Refer to your measurements carefully.
- Mark the Parts: Label each piece with a pencil. This makes identifying parts easier during assembly.
- Drill for Hardware: Carefully drill holes for screws and drawer slides. Use a drill bit that matches the size of your hardware.
- Construct the Frame: Start by building the outer frame of the cabinet. Make sure the corners are square and the frame is level.
- Attach the Back Panel: Secure the back panel to the frame with screws or nails. This adds stability to the structure.
- Install the Shelves: If your design includes shelves, insert and fix them to the frame now.
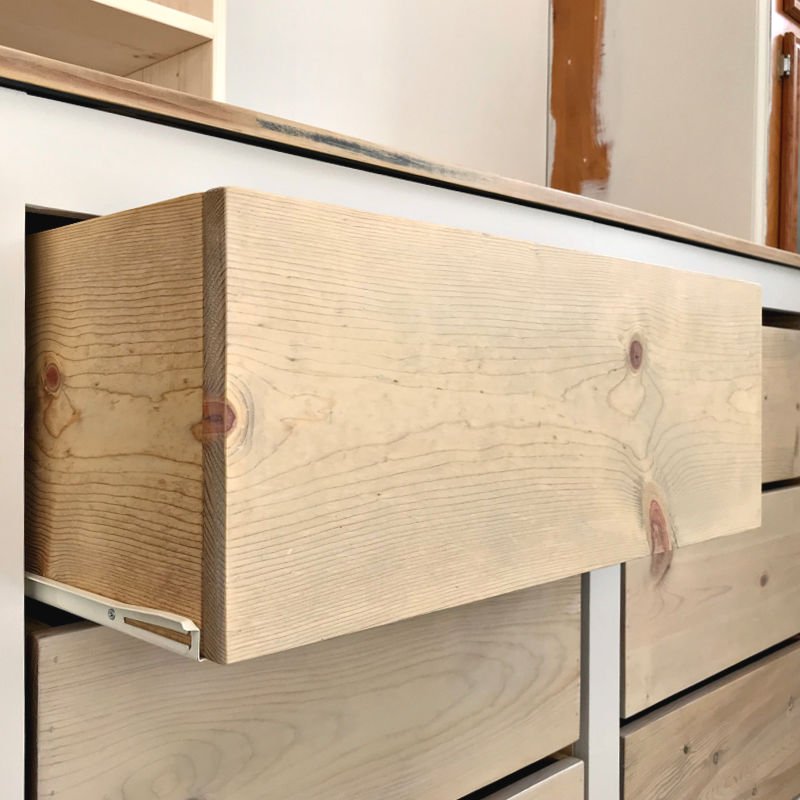
- Assemble Drawers: Put together the drawers. Ensure they are square and fit within the frame without forcing.
- Add Drawer Slides: Attach slides to the cabinet and drawers. Double-check they glide smoothly.
- Secure the Top: Finally, attach the top piece to the frame, ensuring it is level.
- Final Check: Ensure all parts are secure. Make minor adjustments if needed for a perfect fit.
By following these steps, the bulk of your cabinet assembly is complete. You’ll next focus on the specifics of drawer installation for optimal performance.
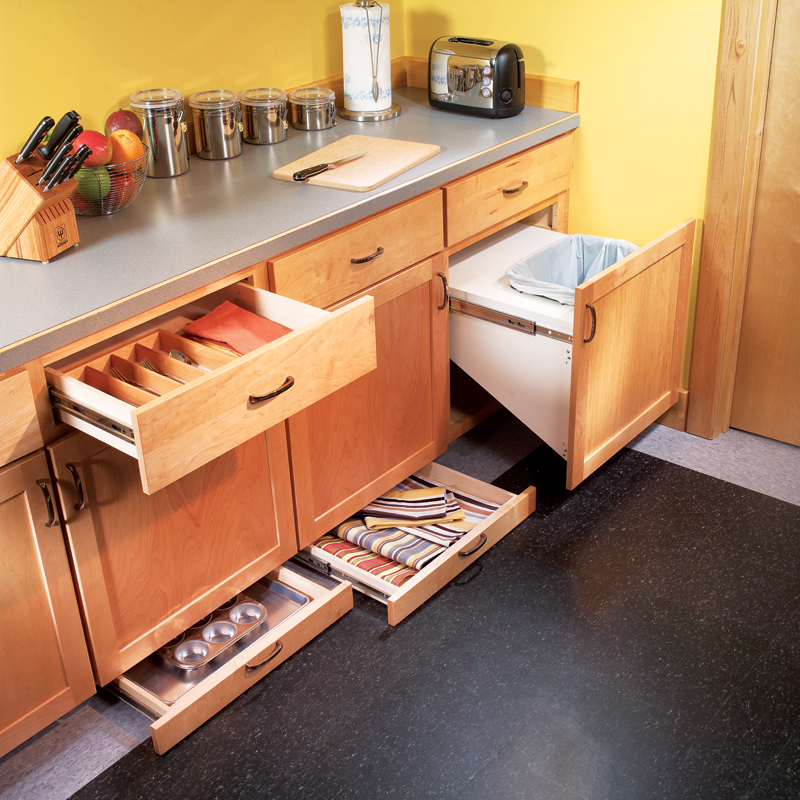
Installing Drawers in Your Cabinet
How to build a cabinet with drawers? Install your drawers with care to ensure they operate smoothly. Here is a simple guide:
- Measure the Drawer Spaces: Double-check the distance inside the cabinet where the drawers will fit.
- Assemble Drawer Boxes: Put together your drawer boxes according to your measurements.
- Install Drawer Slides: Attach the slides inside the cabinet. Then, fix the other part to the drawers.
- Insert the Drawers: Slide the drawers into place to ensure they move in and out without resistance.
- Adjust if Necessary: Make small adjustments to the slides if the drawers stick or are too loose.
- Test Thoroughly: Open and shut drawers several times to confirm smooth operation.
Your patience will pay off when you see your drawers sliding perfectly. Each step is crucial for drawer installation. By focusing on precision, you can build a cabinet that looks great and functions well.
Finishing Touches: Sanding and Painting
After assembling your cabinet and installing the drawers, the next step involves giving it a refined look. Proper sanding and painting not only enhance beauty but also offer protection. Here’s how to apply these finishing touches effectively:
- Smooth the Surface: Start with sanding the wood. This step removes any rough patches and prepares it for painting.
- Choose the Right Grit: Sand with finer grit for a smoother finish. Begin with coarser sandpaper and work your way up.
- Wipe Clean: After sanding, wipe down the wood. Remove all the dust to ensure the paint adheres well.
- Apply Primer: Coat your cabinet with primer. It helps the paint stick and leads to an even color.
- Let it Dry: Wait for the primer to dry completely before applying the paint.
- Paint Evenly: Use a paintbrush or roller for an even coat. Paint in the direction of the wood grain.
- Add Layers: Consider two or more thin paint layers until you reach the desired look.
- Dry Between Coats: Let each coat dry before adding the next. This prevents smudging and drips.
- Inspect and Touch Up: Look for missed spots and apply touch-ups as needed.
With sanding and painting out of the way, your cabinet should look sleek and be more durable. Take your time in this stage to get a professional-looking finish. Remember to work in a well-ventilated area and wear protective gear when painting.
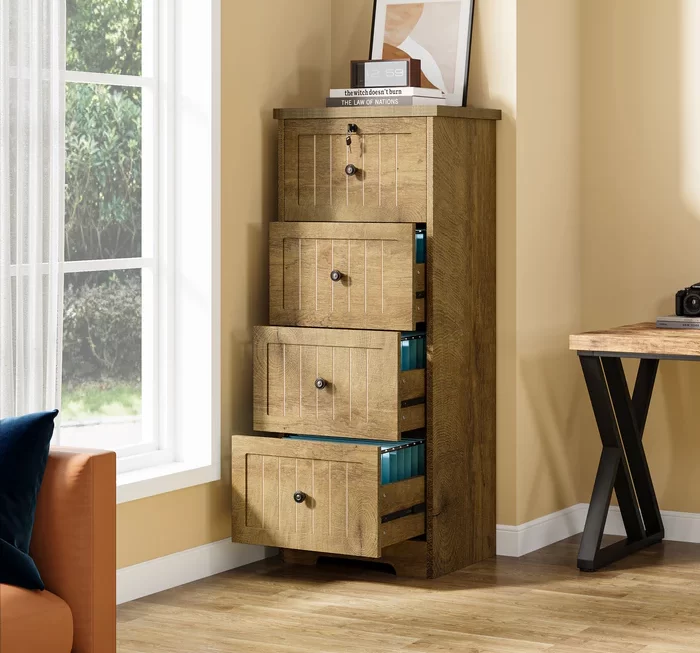
Tips for Customizing Your Cabinet Design
When building a cabinet with drawers, adding a personal touch can make it unique. Here are some tips to customize your cabinet design:
- Choose Your Wood: Select the type of wood that fits your style and the room’s decor. Each type adds a different character.
- Pick a Color Scheme: Decide on paint or stain colors that complement your home. This can change the look entirely.
- Hardware Styles: Choose knobs or handles that reflect your taste. They also add to the cabinet’s functionality.
- Drawer Configuration: Think about how you use space. Adjust drawer sizes and positions to fit your needs.
- Add Decorative Elements: Trim, moldings, or glass panels can add elegance. These design elements can create a custom feel.
Always keep function in mind. Make sure any changes still allow the cabinet to serve its purpose. Do not sacrifice the ease of use for design. Your custom design should enhance both the cabinet’s style and its utility.
By following these tips, you can build a cabinet with drawers that is not just practical, but also a reflection of your personal taste. A customized cabinet becomes a focal point in any room and something you can take pride in every day.
Maintaining and Caring for Your Cabinet
Once you’ve built your cabinet with drawers, maintaining it well is key to ensure it lasts long. Here’s how to take good care of your new cabinet:
- Clean Regularly: Wipe down your cabinet often with a soft cloth. Avoid harsh chemicals that can damage the finish.
- Check Drawer Slides: Over time, drawer slides may need adjusting. Keep them working smoothly with occasional checks.
- Tighten Hardware: Screws and joints can become loose. Tighten them up as needed to keep everything stable.
- Avoid Excess Weight: Don’t overload drawers. Keep the weight within limits to avoid damage.
- Protect From Moisture: If your cabinet is in a damp area, ensure it stays dry. Use a dehumidifier if needed.
- Use Coasters or Pads: Place these under any hot or wet items on the cabinet surface.
- Rotate Items: Changing the position of items in and on the cabinet prevents pressure marks.
How to build a cabinet with drawers? Remember, regular care will keep your cabinet in good shape for years. Address small issues as soon as they appear to avoid bigger problems later.