Introduction to DIY Sandblasting
DIY sandblasting cabinets are perfect for small-scale restoration projects. A sandblasting cabinet ensures you can clean and refurbish parts effectively and safely. This tutorial will guide you on how to design, build, and maintain a cabinet by yourself.
Building your own DIY sandblasting cabinet in 2024 might seem daunting, but it’s quite manageable with the right guidance and tools. It allows you to control the quality and customize it to fit your needs. Whether you want to restore old car parts, clean up rusty tools, or work on other renovation projects, creating your own sandblasting setup can save you money and provide a useful skill.
By following the steps outlined in this blog, you can assemble a robust and efficient sandblasting cabinet. You will learn about choosing materials, constructing the frame, managing dust, and incorporating safety practices. The process not only equips you with a functional piece of equipment but also enriches your DIY skills significantly.
Designing Your Sandblasting Cabinet
Designing a diy sandblasting cabinet requires careful planning. It’s important to choose durable materials and the right dimensions for your projects.
Choosing the Right Materials
Select materials that can withstand abrasive forces. Steel or thick plywood are good choices for the structure. Use silicon seals for any joints to prevent leaks of sand and air. The viewing glass should be made of tempered safety glass. This ensures visibility and safety. Remember to pick a material for the gloves that is both flexible and tough.
Cabinet Size and Dimensions
Consider the size of the items you plan to sandblast. The cabinet must be large enough for easy maneuvering but compact enough for your workspace. A typical diy sandblasting cabinet might be 24 inches wide, 36 inches tall, and 24 inches deep. However, tailor the dimensions to fit your needs. Ensure there’s enough room for the blasting gun movement and workpiece rotation without restrictions.
Constructing the Sandblasting Cabinet
Constructing a DIY sandblasting cabinet requires precision and attention to detail. This section will guide you through the key construction steps: assembling the frame, securing the viewing glass, and installing the glove ports.
Assembling the Cabinet Frame
Start by laying out all the materials needed for the frame. If you chose steel or thick plywood, measure and cut them to fit the previously defined dimensions (24x36x24 inches typically work well). Use bolts and screws to piece together the frame, ensuring that each connection is tight and stable to support the weight of the sandblasting medium.
Ensure the structure is squared and leveled. It’s crucial for the proper operation and safety of your sandblasting cabinet.
Securing the Viewing Glass
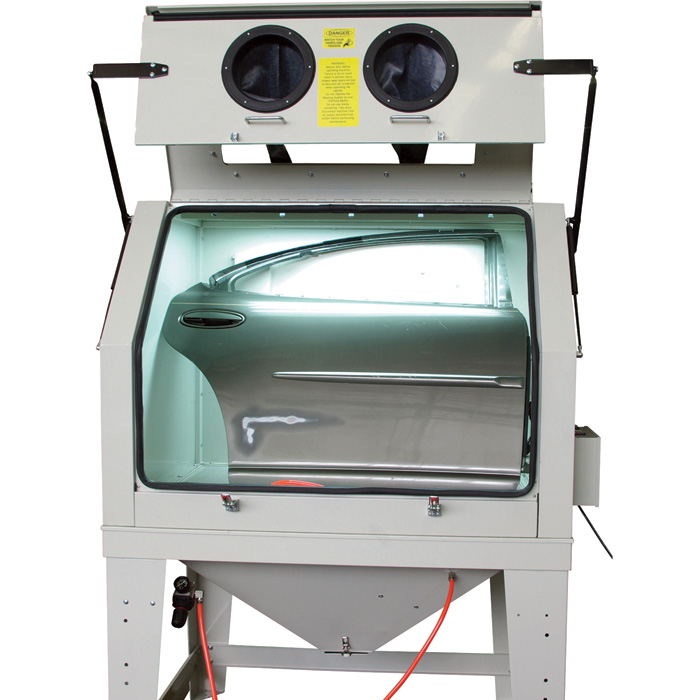
The viewing glass should be made of tempered safety glass to withstand the abrasive impact of sandblasting. First, create a frame within your cabinet frame specifically for this glass. Make sure this sub-frame fits the glass perfectly, allowing no room for vibrations or potential breakage.
Install the glass using a sealant that will keep it secure and airtight. This is important to ensure no abrasive material escapes and visibility remains clear during operations.
Installing the Glove Ports
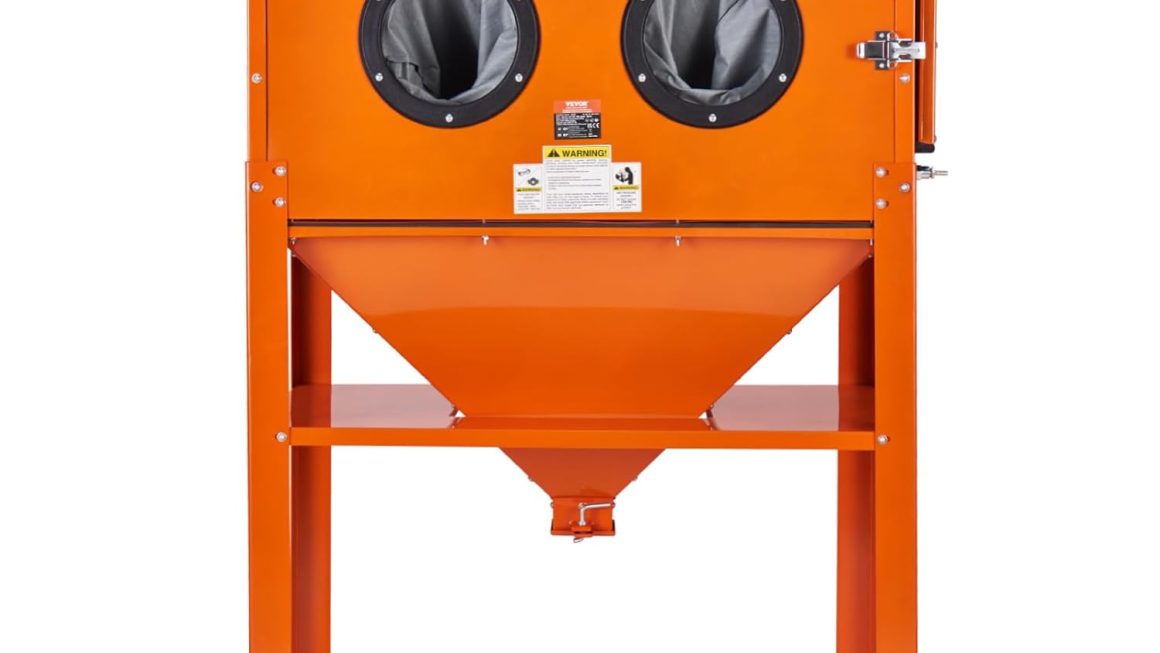
Finally, install the glove ports. Cut two holes on opposite sides of the cabinet at a suitable working height. The size of each hole must accommodate the heavy-duty gloves you intend to use, which should fit snugly to prevent any leaks.
Attach the gloves using durable gaskets that can hold up to the mechanical stress and abrasiveness of the blasting process. Ensure there is enough flexibility for free movement but tight enough to prevent any media from escaping.
The Sandblasting System
Choosing the right components for your DIY sandblasting cabinet is crucial.
Selecting a Blasting Medium
Select a medium based on the material you’re cleaning. Options include crushed glass, plastic beads, or aluminum oxide. Consider the hardness and shape of the medium for best results. The medium should suit the pressure your system can generate to be effective.
Building the Sandblasting Gun
Use common plumbing parts to build a cost-effective sandblasting gun. Assemble a nozzle, air hose, and trigger for control. Make sure the gun can withstand your chosen pressure and medium without wearing out quickly.
Understanding the Bernoulli Effect in Design
Incorporate the Bernoulli Effect into your sandblasting gun design. This principle helps in efficiently drawing the medium into the airflow. Align the nozzle and pressure settings to maximize this effect for an even blast.
Dust Management Solutions
When building your diy sandblasting cabinet, dust management is key. Proper dust control ensures a clean working environment and prevents dust accumulation on surrounding surfaces.
Creating a Dust Separator
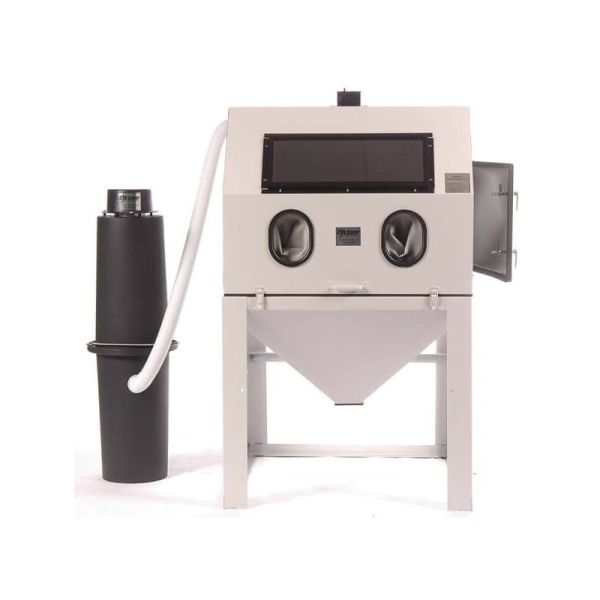
A dust separator is essential to maintain air quality and visibility while using a sandblasting cabinet. It filters out fine particles before they escape into the workspace. To create one, you might use a cyclone system. This utilizes centrifugal force to separate dust from the air. You can build a simple version using a vacuum cleaner and a series of ducts to direct air flow. The cyclone captures the dust in a separate container, keeping the work area clean.
Ensuring Clean Visibility During Operation
Ensuring clear visibility during sandblasting is crucial for precision and safety. Without proper management, dust can quickly cover the viewing glass. To keep the glass clear, design the airflow in your cabinet to draw fresh air across the inside of the glass, preventing dust from settling. This can be done by creating small openings around the edges of the viewing area that allow air to flow over the glass continuously while in operation. Clear visibility reduces the need to open the cabinet frequently, keeping the dust contained and your workspace clean. Always use a bright light source inside the cabinet to improve visibility and help monitor your work.
Safety Precautions and Maintenance
When operating your DIY sandblasting cabinet, safety must be your top priority. Regular maintenance ensures the longevity of your setup and safe operation at all times.
Protective Gear and Safe Operation
Before using your sandblasting cabinet, dress in the right gear. Wear a full-face mask to shield your eyes and lungs from fine particles. Use heavy-duty gloves to protect your hands from abrasion. Long sleeves and aprons made of thick material are also necessary to protect your skin.
Always check that the cabinet’s door is securely closed before starting. This prevents any stray particles from escaping. Ensure the area is well-ventilated to avoid inhaling dust. Use an air filtration system to maintain clean breathing air.
Follow the operating instructions carefully. Do not exceed the recommended pressure settings for your blasting medium. Doing so might damage the material you are working on, or worse, the cabinet itself.
Maintaining Your DIY Sandblasting Cabinet
After each use, clean your cabinet thoroughly. Remove any remaining blasting medium and dust. Check the viewing glass for scratches and clean it to maintain visibility.
Inspect the gloves for any tears or signs of wear. Replace them as needed to maintain an airtight seal. Review all seals and joints for leaks and repair them to keep the cabinet secure.
Regularly test the dust separator and clear out the collected waste. This ensures it continues working efficiently. Check the sandblasting gun for clogs and wear. Replace parts as needed to keep it functioning properly.
By following these guidelines for protection and maintenance, you can safely enjoy the benefits of your DIY sandblasting cabinet for years to come.
Wrapping Up and Cleanup
After working on your project, tidying up is essential. Here’s how to wrap up and clean your DIY sandblasting cabinet effectively.
Cleaning the Cabinet Interior
Once you’ve finished sandblasting, remove any leftover medium from the cabinet. Use a vacuum capable of handling fine particles to clear out dust and debris. Wipe down the interior surfaces with a damp cloth to catch any residue that the vacuum missed.
Checking for Wear and Tear
Inspect the cabinet for wear and tear, especially the gloves and viewing glass. Small cracks or holes can lead to leaks. If you find any damage, replace the parts to maintain the cabinet’s integrity.
Disposing of Used Medium
Dispose of the used blasting medium responsibly. Check local regulations for proper disposal methods. Some mediums can be hazardous to the environment if not handled correctly.
Storing Equipment
Store your sandblasting gun and other tools in a dry, clean place. This prevents rust and ensures your equipment is ready for next time. Organize hoses and cords to prevent tangling and damage.
Record Keeping
Keep a log of your sandblasting sessions. Note the pressure used, the medium type, and duration. This information helps you maintain consistent results and track the performance over time.
By following these steps, you can ensure a clean and safe DIY sandblasting cabinet. It extends the life of your equipment and keeps your work area tidy and ready for future projects. Remember, regular maintenance is key to the longevity of your DIY setup.
