Measuring Cabinet Space
Start by measuring the cabinet opening where your new drawers will go. Ensure accuracy; a small error can cause big problems later. Measure the height, width, and depth of the opening, and note the dimensions. Check for any obstructions, like pipes or hinges, that might affect the size of your drawers. If the cabinet has a frame, consider the depth of this too. Decide how many drawers you want and divide the vertical space accordingly. How to make cabinet drawers? Remember to account for the thickness of the drawer slides when planning your drawer width; refer to the slide manufacturer’s specifications. Write down all your measurements before moving on to gathering materials.
Materials and Tools Needed
To begin crafting your own cabinet drawers, you’ll need to gather the necessary materials and tools. Here’s a list to help ensure you have everything on hand before you start:
- Plywood – For the sides, front, back, and bottom of the drawers. You’ll want 1/2″ or 3/4″ sanded plywood for the sides and a thinner 1/4″ plywood for the drawer bottoms.
- Drawer Slides – Choose from options such as full extension, soft close, or ball bearing slides, depending on your preference and budget.
- Screws – Appropriate length screws for assembling the drawer boxes and attaching the slides.
- Wood Glue – To strengthen the bonds between the plywood pieces.
- Drill and Impact Driver – For drilling holes and driving screws. An impact driver is optional but helpful.
- Tape Measure and Pencil – For accurate measurements and markings.
- Miter Saw or Circular Saw – To cut plywood sheets to size.
- Sander and Sandpaper – To smooth out all surfaces and edges; 220 grit should suffice.
- Edge Banding (optional) – To give a clean, finished look to raw plywood edges.
- Drawer Pulls – The handles are your choice for opening the drawers.
Remember, accurate measurements are key to the success of your project, so double-check your dimensions before cutting. Keep your work area organized, and always prioritize safety when using power tools.
Cutting Drawer Components
To craft your cabinet drawers, initiate by cutting the plywood for all components. Utilize your measurements from the previous step to determine the precise dimensions required for each part. Remember to factor in the thickness of the material when calculating the sizes for the fronts, backs, and sides of the drawers. Additionally, consider the depth of the grooves for the drawer bottoms if employing dado cuts.
For sturdiness and aesthetics, use thicker plywood, like 1/2″ or 3/4″, for the sides, front, and back of the drawers, and thinner 1/4″ plywood for the bottoms. Employ a miter saw or circular saw to achieve clean, straight cuts. After cutting, thoroughly sand all components to prepare them for assembly.
When cutting, factor in any additional material needed for the grooves or edge banding. Allow slight extra width for the drawer bottoms to fit snugly into the grooves. It’s vital to ensure all pieces are uniformly cut for smooth drawer operation.
As a suggestion, create a cutting diagram to maximize plywood use and minimize waste. By carefully planning your cuts, you’ll be able to efficiently use your materials and possibly save enough for future projects or repairs.
Proceed with patience and precision to ensure all components fit perfectly when you assemble the drawer box. If you make any mistakes, don’t worry; wood filler can help correct minor errors before final assembly and installation.
Assembling the Drawer Box
After diligently measuring, selecting, and cutting your cabinet drawer components, it’s time to move onto the assembly phase. Assemble your drawer box using the following structured steps for a smooth construction process:
- Begin by laying out all the cut pieces of plywood for the drawer box, ensuring all parts are sanded and edges are smooth.
- Apply a strong wood glue along the edges where the sides of the drawers will connect with the front and back panels.
- Align the sides to the front panel and secure them with screws, ensuring they are fastened tightly. Clamps can be helpful in holding the pieces together while you work.
- Attach the back panel to the sides in the same manner, making sure everything is square and flush.
- Insert the bottom panel of the drawer into the grooves created earlier. If you opted to nail the bottom on, do so from beneath for a clean look inside the drawer.
- Wipe away any excess glue immediately with a damp cloth and allow the glue to dry according to the manufacturer’s specifications.
- Once dry, reinforce the assembly by driving additional screws through the sides into the front and back panels if necessary.
Throughout the assembly process, it’s essential to frequently check for squareness. A square drawer is crucial for proper slide installation and functionality. Use a carpenter’s square to confirm right angles and make any adjustments as needed.
Remember, patience and attention to detail during the assembly of your drawer box will result in smooth-running drawers that fit perfectly within your cabinet space. Proceed to the next step only once you’re confident in the solidity and accuracy of your assembled drawer box.
Drawer Slide Installation
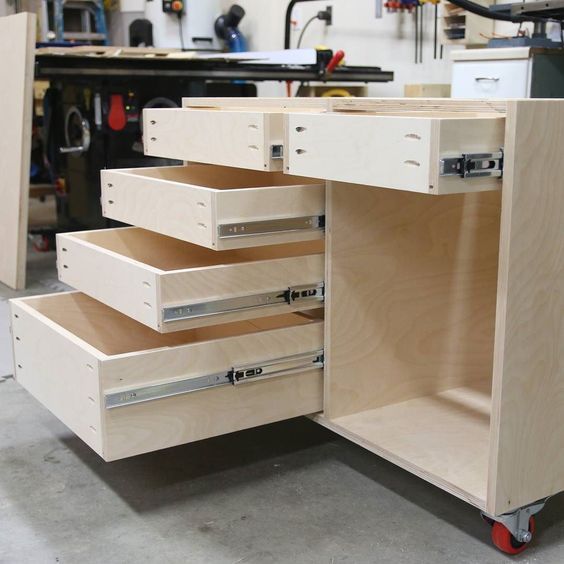
After assembling your drawer box, the next step involves installing the drawer slides. This process requires precision for the drawers to function smoothly. Here is a straightforward guide to help you through the installation process:
- Identify Slide Type: Confirm the type of slide your drawer uses: side mount, undermount, or center mount. Each type has specific installation requirements.
- Mark Slide Placement: Measure and mark where the slides will be attached on the cabinet walls. These marks should be aligned with those on your drawer for smooth operation.
- Secure Slides to Cabinet: Attach the slides to the cabinet using screws. Use your drill and carefully align the slides according to the marks you made.
- Fit Drawer into Slides: Place the drawer into the slides. If you’re using slides with ball bearings, ensure they are aligned properly to facilitate smooth movement.
- Test Drawer Movement: Once installed, gently pull the drawer in and out to check its movement. It should glide smoothly without any hitches. Make any necessary adjustments by realigning the slides.
- Secure Drawer to Slides: When the drawer slides smoothly and is properly aligned, secure the drawer to the slides with screws. This will ensure the drawer remains stable and doesn’t wobble when opened or closed.
During the installation, regularly check the alignment using a level. Proper installation of the slides ensures your drawer will operate efficiently and withstand daily use. Now your drawer is ready for the final steps—attaching the drawer face and installing the hardware.
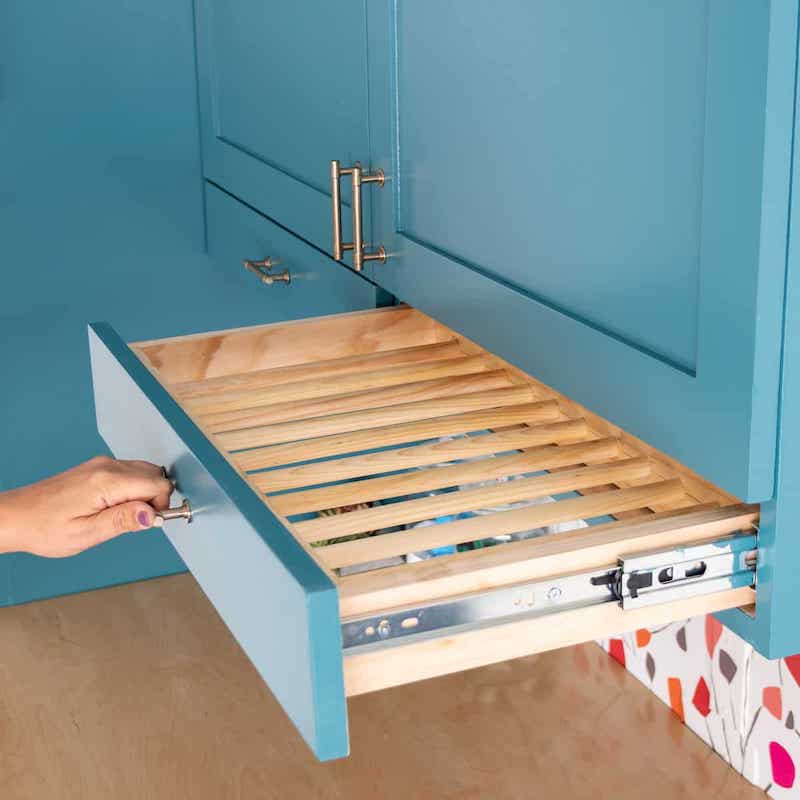
Attaching Drawer Faces
After you’ve installed the drawer slides, the next step is attaching the drawer faces. This part will give your drawers a seamless look that complements your cabinetry. Here’s how to do it effectively:
- Align and Attach: Place the drawer face against the drawer box. Ensure it’s perfectly aligned with the edges of the cabinet frame. Once aligned, temporarily attach it with clamps.
- Drill and Screw: While the drawer face is clamped, drill pilot holes through the drawer face into the drawer box. Be careful not to drill too deep. Follow up by securing the drawer face to the box with screws.
- Adjust for Perfection: Check the alignment of the drawer face once more. If adjustments are needed, loosen the screws slightly, adjust, and tighten again.
- Confirm Smooth Operation: Open and close the drawer to ensure it moves smoothly and the face stays in place.
This step is crucial for the visual appeal and functionality of your drawers, ensuring they blend neatly with the rest of your cabinetry. Proceed with patience and attention to detail to achieve the best results.
Finishing Touches and Hardware
Once your drawers are assembled and installed, it’s time for finishing touches. This final stage refines your project and adds the details that make your drawers both beautiful and functional.
Selecting and Installing Handles or Knobs
Choose hardware that matches your cabinet’s style. Measure the center points, drill holes, and fasten the knobs or handles. Be consistent with placement for a uniform look.
Applying Sealant or Finish
If desired, apply a wood sealant or finish to the outside of the drawers for protection. Let it dry based on product instructions.
Checking Drawer Operation
Open and close the drawers several times to ensure smooth operation. No sticking or squeaking should be present when using them.
Making Final Adjustments
Adjust drawer faces or slides if necessary. Small position tweaks can perfect drawer alignment and function. Always double-check that adjustments contribute to better operation.
By focusing on these final details, you enhance the durability and aesthetics of your DIY cabinet drawers. The right hardware and finish ensure your drawers are a joy to use every day.
Tips for Maximizing Efficiency and Usage
When assembling DIY cabinet drawers, efficiency is key. Here are tips to help you maximize the effectiveness and ease of use of your cabinet drawers:
Organize Tools and Materials
Keep all tools and materials organized before you start. This minimizes the time spent searching for items and increases the speed of assembly.
Use Templates for Hardware
Create templates for any hardware like drawer pulls. This ensures consistent placement across all drawers, saving time and avoiding errors.
Pre-drill Holes
Always pre-drill holes for screws to prevent wood from splitting. This step enhances the durability of your drawers and speeds up assembly.
Utilize Efficient Cutting Techniques
Plan cuts to minimize waste and reduce the number of cuts. Efficient use of materials saves money and time.
Keep a Clean Workspace
Maintain a clean and orderly workspace to improve safety and efficiency. A clutter-free environment allows for better maneuverability and less chance of errors.
Review Assembly Steps
Before beginning, review all assembly steps to familiarize yourself with the process. Understanding the workflow can prevent mistakes and speed up assembly.
By adopting these strategies, you can streamline the process of making DIY cabinet drawers and ensure a smoother, more efficient build.


