Introduction to Shaker Cabinet Doors
Shaker cabinet doors are a timeless choice for any kitchen. Their simple frames showcase elegant, straight lines and flat panels. This style fits modern and traditional kitchens alike. The beauty of making your own shaker cabinet doors lies in their simplicity. With basic woodworking tools and materials, you can build custom doors that elevate your kitchen’s look. The ‘how to build shaker cabinet doors’ process appeals to DIY enthusiasts. It offers a cost-effective way to update your cabinets without expert skills. In this guide, we’ll walk through each step to create beautiful shaker doors. We believe that with the right approach, anyone can craft these classic fixtures. Let’s demystify the process and embark on this rewarding DIY project together.
Materials Needed for DIY Shaker Doors
Gathering the right materials is crucial for your DIY shaker cabinet doors. You will need several key items to begin. First, quality wood is essential. Choose hardwood like maple or oak for a sturdy finish. You’ll also need wood glue to assemble the pieces securely. Flat panels, often made of MDF or plywood, form the door center. Don’t forget wood filler to cover any gaps or blemishes. For the door’s frame, you need four pieces of wood. Two will serve as the vertical stiles, while two will act as the horizontal rails. Lastly, gather screws and hinges for attaching the door to your cabinet.
To summarize, here’s a list of materials you’ll need:
- Hardwood (maple or oak) for stiles and rails
- MDF or plywood for the center panels
- Wood glue
- Wood filler
- Screws
- Hinges
Ensure all materials are the right size and type for your cabinet design. Selecting the correct materials will make the ‘how to build shaker cabinet doors’ process smoother.
Tools Required for the Project
To embark on the journey of learning how to build shaker cabinet doors, you need to gear up with the right tools. These are the instruments that will help you shape and assemble your materials into the final product. Have these tools on hand before you start to ensure a smooth building process:
- Measuring Tape: Precision is key, and it begins with accurate measurements.
- Saw: A circular saw or table saw will do the job for cutting wood to size.
- Drill: Needed for making holes for screws and hinges.
- Clamps: These help hold pieces firmly together while the glue sets.
- Square: Essential for checking the corners of your frames to ensure they are perfectly 90 degrees.
- Router or Shaper: For creating the recessed panel effect on the door.
- Screwdriver: To drive screws when attaching hinges and assembling the door parts.
- Sandpaper: For smoothing edges and surfaces before painting or staining.
- Paintbrush or Roller: If you choose to paint your doors, a good brush or roller is important for a uniform finish.
Having the correct tools not only aids in an accurate build, but it also increases safety. Always wear protective equipment like safety glasses and gloves when using these tools. Without the essential tools, your project will face unavoidable obstacles. Prepare well and the process of how to build shaker cabinet doors will be a rewarding experience.
Step-by-Step Process of Making Shaker Doors
Learning how to build shaker cabinet doors involves a straightforward process. By following these steps, you will create doors that look professionally made.
- Measure and Cut the Wood: Start by measuring the cabinet openings. Deduct 1/8 inch from each dimension for the door size to ensure a proper fit. Cut the hardwood stiles and rails to length. Then cut the center panel from MDF or plywood.
- Create the Door Frame: Use the router or shaper to cut a groove in the stiles and rails. This holds the center panel in place. Ensure the groove is the perfect width for the panel to fit snugly.
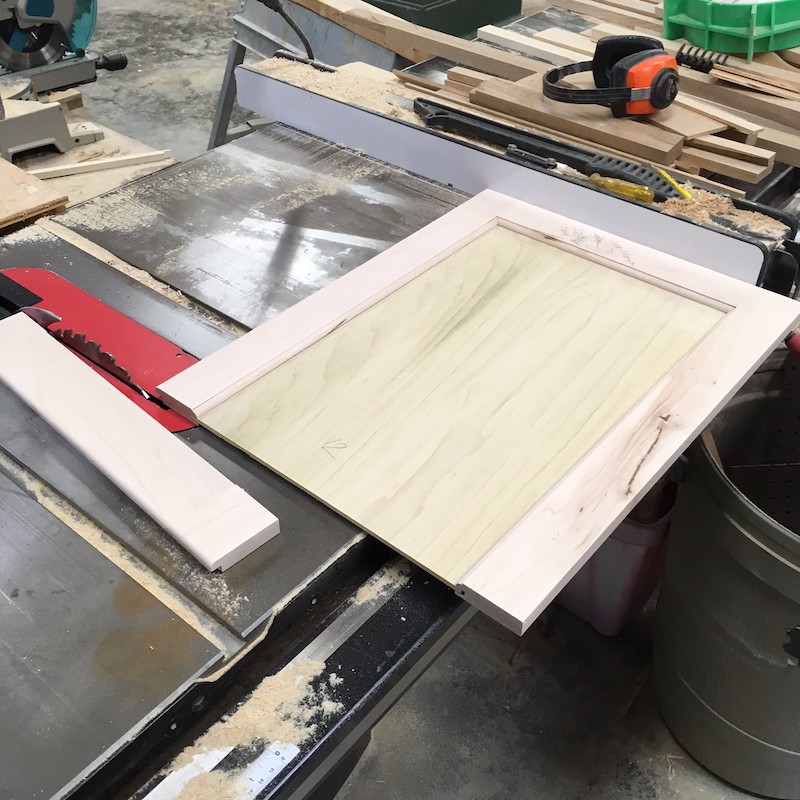
- Assemble the Frame: Apply wood glue to the cut ends of the stiles and rails. Fit them together to create a rectangular frame. Check the corners with a square to make sure they are true right angles.
- Insert the Panel: Slide the center panel into the groove. Do this gently to avoid any damages or misalignment. Remember, the panel should not be glued. It needs to ‘float’ to allow for wood expansion.
- Clamp and Dry: Secure the frame with clamps to hold it while the glue dries. Follow the glue manufacturer’s instructions on dry time. Patience here ensures a tight and secure door construction.
- Reinforce with Screws: Once the glue has dried, reinforce the joints with screws for extra strength. Countersink the screws to ensure they are flush with or below the surface of the wood.
- Fill Gaps with Wood Filler: Inspect the door for any gaps or cracks. Use wood filler to make the door surface smooth and even. Allow the filler to dry completely before moving on to finishing touches.
Each step is crucial for the stability and appearance of your shaker doors. Take your time and follow these steps for the best results. With care and attention to detail, you’ll construct shaker doors that enhance your kitchen’s charm.

Tips for Measuring and Cutting Materials
Accurate measuring and cutting are the foundation of constructing shaker cabinet doors. Here are some tips to help you through this critical stage:
- Double-Check Measurements: Before cutting, always recheck your measurements. Errors are often hard to fix once material is cut.
- Mark Clear Lines: Use a pencil and a straight edge to draw your cut lines. Visibility helps ensure precision.
- Support Your Wood: Ensure the wood is stable on your work surface to prevent movement while cutting.
- Use Sharp Blades: Dull tools can cause inaccurate cuts and may damage the wood.
- Measure Twice, Cut Once: This age-old carpentry advice remains invaluable. Take extra care in measuring to avoid waste.
- Safety First: Always wear safety goggles and follow tool guidelines to prevent accidents.
Implement these tips when measuring and cutting to create high-quality shaker cabinet doors.
Assembling the Shaker Cabinet Doors
Once you have your materials cut to the specified dimensions, it’s time to assemble your shaker cabinet doors. This phase is where your project starts to take shape, and following these simple steps will help ensure a sturdy, professional-looking finish.
Here’s what you need to do when assembling your shaker doors:
- Dry Fitting: Before applying any glue, do a dry fit. Arrange the stiles and rails around the panel to check for a good fit.
- Apply Wood Glue: Place a thin line of wood glue on the ends of the rails and in the groove of the stiles. Avoid using too much glue to prevent squeeze-out, which can be difficult to clean and can affect the finish.
- Clamp Everything Together: Assemble the frame around the panel. Use clamps to hold the stiles and rails tightly together. Ensure that the panel is free to move within the groove for expansion and contraction.
- Check the Square: Use your square to confirm that the door is perfectly square. If necessary, adjust the clamps until you achieve the right angle.
- Secure with Screws: After the glue dries, reinforce the frame by driving screws into the joints. Remember to countersink the screws to keep the surface flat.
- Wipe Any Excess Glue: Quickly wipe away any glue that seeped out with a damp cloth before it dries.
- Final Check: Once the door is clamped and the glue is set, do a final check for squareness and make any last-minute adjustments.
Patience is crucial during the assembly process. Allow plenty of time for the glue to dry completely before moving on to the finishing touches. With these steps, your shaker cabinet doors will be ready for sanding, painting, and installation.

Finishing Touches: Sanding and Painting
After assembling your shaker cabinet doors, it’s time for the finishing touches. Sanding and painting are key to creating a sleek, professional look.
Sanding Your Doors Smooth
Before painting, you must sand your doors. This step is crucial for a smooth finish. Start with medium-grit sandpaper to remove any roughness. Move on to fine-grit paper for a polished surface. Always sand in the direction of the wood grain to prevent scratches. Wipe the doors with a damp cloth to remove all dust.
Painting Your Shaker Doors
Choose a durable paint that suits your kitchen’s style. For best results, start with a primer coat. Let it dry completely. Next, apply at least two coats of paint. Use smooth, even strokes with your brush or roller. Wait for the first coat to dry before adding the next one. Don’t rush this process; patience ensures a high-quality finish. Once dry, your shaker cabinet doors will look stunning and be protected from wear and tear.
By carefully sanding and painting, you ensure your shaker doors are not only beautiful but durable. These final steps bring together your hard work, showcasing your craftsmanship and attention to detail. With the right approach, your doors will enhance your kitchen for years to come.
Installing the Shaker Doors on Your Cabinets
After creating your shaker cabinet doors, installing them is the final step. Here is a simple guide to help you attach your doors to the cabinets.
- Align the Hinges: Position the hinges on the doors. Make sure they’re level and the same distance from the top and bottom.
- Mark Hinge Locations: With a pencil, mark where the hinges will go on the cabinet frame.
- Drill Pilot Holes: Carefully drill pilot holes where you have marked. This helps prevent wood from splitting.
- Screw on the Hinges: Attach the hinges to the cabinet frame using screws. This is done with your screwdriver or drill.
- Hang the Doors: Lift the doors and secure them to the hinges. Have someone help if they’re heavy.
- Adjust the Fit: Make sure the doors open and close smoothly. Adjust the hinges as needed for even gaps between doors.
- Add Knobs or Handles: Drill holes for knobs or handles. Then, secure them onto the doors.
- Final Look Over: Open and close the doors several times. This ensures everything is aligned and working properly.
With these steps, your shaker cabinet doors will be well-installed, giving your kitchen a fresh look.