Introduction to DIY Glass Cabinet Doors
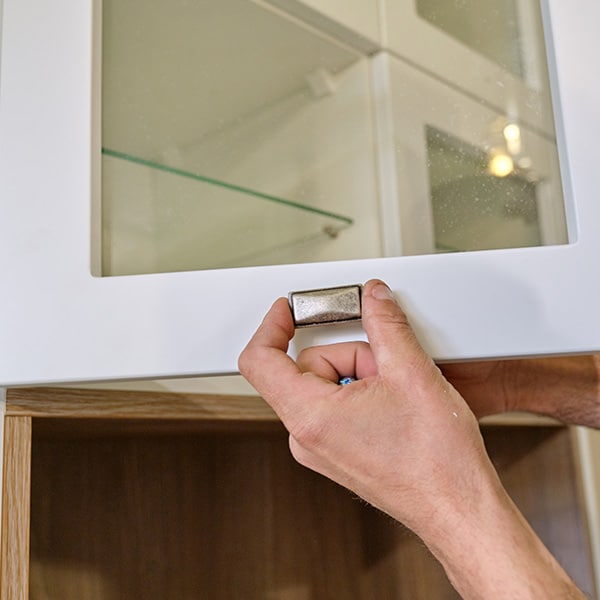
How to add glass to cabinet doors? Adding glass to cabinet doors boosts your kitchen’s appeal. It’s a DIY-friendly upgrade. With the right tools and a little knowledge, most homeowners can tackle this improvement.
You can choose from several glass styles. Clear panels give a classic look while plexiglass offers a lighter, shatter-resistant alternative. For a unique touch, consider stained or custom glass.
You’ll need just a few basic tools and materials. These may include a screwdriver, drill, and glass cutter, or plexiglass. If you’re careful and patient, the outcome can be rewarding.
This task not only transforms the kitchen’s design but showcases your finer dishes or decorative items. It also makes the space feel more open. Whether you’re updating old doors or inserting glass into new ones, this guide will help you complete the job effectively.
Through simple steps, you’ll learn how to remove the doors, cut the frames, measure the glass, and secure the new panels in place. With safety in mind, you can create a bright, stylish kitchen display. Let’s get started on this enriching project.
Types of Glass Door Inserts
When sprucing up your kitchen, choosing the right type of glass is vital. Glass inserts elevate the look of cabinet doors. You have options such as clear glass and plexiglass, each with pros and cons.
Clear Glass vs. Plexiglass
Clear glass is timeless, offering an elegant touch to cabinets. It allows you to see inside with ease. But, clear glass is also heavy and can break, so handle with care.
Plexiglass, a lighter acrylic sheet, is shatter-resistant. It’s a safe pick, especially in homes with kids or pets. Hardware stores cut both materials to size for you.
Custom and Stained Glass Options
For a distinctive style, consider custom or stained glass. Stained glass adds color and pattern to your kitchen. Custom pieces let you pick unique designs, perfect for a personal touch. These options can be pricier but make a big impact in your space.
Tools and Materials Required
To start your DIY cabinet renovation, gather the right tools and materials. You’ll need glass or plexiglass, and a set of tools for cutting and installing.
Glass or Plexiglass
Choose between glass or plexiglass for your cabinet doors. Glass offers elegance but needs careful handling. Plexiglass is lighter and won’t shatter, making it a safer option.
Essential Tools for the Job
You’ll need several tools for this project. A screwdriver to remove hardware, a drill for making start holes, and a glass cutter if you choose glass. A jigsaw helps cut the door panels. Safety glasses are a must for protection. Keep a measuring tape handy for accurate sizing. If using plexiglass, consider a scoring tool. For installing the glass, you’ll need silicone sealant or clips, and perhaps a caulking gun. Lastly, have a clean work area with a soft surface, like a towel, to protect the glass during cutting and installation. By getting everything ready beforehand, your project can move smoothly.
Step-by-Step Guide to Adding Glass
Transform your kitchen cabinets with a glass door renovation. This step-by-step guide will show you how.
Removing the Cabinet Doors
Start by taking off the old cabinet doors. Use a screwdriver to unscrew the hinges. Keep screws safe, as you will need them later.
Cutting and Preparing the Door Frames
Next, prepare the door frames. If adding glass to existing doors, cut out the panel. A drill and jigsaw work well for this part.
Selecting and Measuring the Glass
Choose your glass. Clear or plexiglass work equally well. Measure your door frames to know the glass size needed. Hardware stores can cut glass to these measurements for you.
Installing the Glass Inserts
To install, lay a bead of silicone in the frame or use clips to secure the glass. Carefully place the glass onto the silicone, ensuring it’s straight.
Finishing Touches and Reattaching Doors
After the glass sets, reattach the doors. Use the saved screws to attach the hinges back to the cabinet. Double-check the alignment for a perfect finish.
Glass Installation Tips and Techniques
When adding glass to cabinet doors, careful technique is crucial for clean, professional results. Here’s how to ensure your upgrade goes smoothly.
Cutting Glass vs. Ordering Pre-cut
You can cut glass yourself or order pre-cut. If you choose to cut, use a glass cutter and straight edge. For pre-cut, provide exact measurements to a supplier.
Use safety glasses when cutting glass. Cut on a padded surface to lower breakage risk. A scoring tool is essential for plexiglass. Run it firmly along a straight edge to score. Then, snap the material along the scored line.
Ordering pre-cut saves time and reduces the chance of mistakes. Hardware stores often cut glass to size. Have your frame measurements ready when ordering.
Securing Glass Panels in Place with Silicone or Clips
Silicone or clips can secure glass in cabinet doors.
For silicone:
- Clean the frame’s edge where glass will rest.
- Apply a bead of silicone around the frame.
- Press glass firmly into the silicone.
- Wipe excess silicone with a clean cloth.
- Allow to dry before rehanging.
Using clips:
- Position glass in the frame.
- Fasten clips evenly around the edges.
- Use enough to hold glass but avoid over-tightening.
Clips are quick and easy, while silicone provides a more seamless look. Select based on your design preference.
Safety Precautions When Adding Glass Doors
Safety is critical when adding glass to cabinet doors. Handle every step with care.
Personal Protective Equipment
Always wear safety glasses when cutting glass or plexiglass. Gloves protect hands from sharp edges.
Secure Work Area
Work on a stable surface, using a towel to prevent glass from sliding. Ensure no distractions around.
Proper Glass Handling
Glass is fragile. Lift and carry glass with both hands. Avoid bending or twisting it to prevent breaks.
Tool Safety
Use tools correctly. Make sure drills, cutters, and saws are in good condition before use.
Silicone and Caulking Gun
When using silicone, do it gently. Caulking guns should be handled with precision to avoid oozing.
Glass Disposal
Dispose of broken glass carefully. Wrap shards in newspaper and place in a box before discarding.
Ladder Safety
If a ladder is needed, ensure it’s stable. Never overreach; move the ladder instead.
Additional Considerations
While embarking on your cabinet door renovation project, it’s important to address additional aspects. Handling and maintaining glass doors ensures longevity, while creative design ideas can further enhance your kitchen’s aesthetics.
Handling and Maintaining Glass Doors
Properly handling glass doors can prevent damage and extend their life. Always lift glass panels with both hands from the edges. Use gentle cleaners that don’t contain ammonia or vinegar to clean your glass doors as harsh chemicals can damage the glazing. Dust the frames regularly to keep them looking fresh.
To maintain the doors, check the silicon seals or clips periodically. Over time, they may wear out and need replacing. If you notice a seal beginning to loosen, reapply silicone or adjust the clips to secure the glass panel back into place.
Good maintenance habits also involve inspecting the glass for scratches or cracks. If you find damage, it might be best to replace the glass to avoid further issues.
Design Ideas for Glass Cabinet Doors
There are many ways to customize the look of your glass cabinet doors. Consider using frosted or tinted glass for a subtle visual effect. You can also experiment with leaded or patterned glass designs for a more traditional feel.
For modern kitchens, think about back-painting glass panels in bold colors to match your decor. Lighting inside your cabinets can showcase glassware and create ambiance. Adding decorative mullions to the glass can bring additional character to the kitchen.
Combining different types of glass within one space can make for an eclectic mix. However, ensure that the designs complement each other for a cohesive look.
By focusing on these additional considerations, you make sure your glass door installation adds both function and flair to your kitchen.
Conclusion
Adding glass to cabinet doors can transform your kitchen with style. It’s a DIY project many can do with careful planning. It gives cabinets a touch of elegance or a modern look, depending on the glass type. Using this guide, you can complete the process step by step. Start by removing doors, then cut the frames and measure for glass. Secure glass with silicone or clips, and finally, reattach the doors. Safety is important, so always wear protective gear and take care when handling glass.
Whether you choose clear glass or plexiglass, custom or stained options, the result can be striking. Regular upkeep will keep your glass doors looking great. With the right tools and materials, and by following the tips and techniques, you can achieve professional-looking results. When done well, this upgrade not only improves the look of your kitchen but can also increase your home’s value.
Remember to choose the right glass, handle materials carefully, and adhere to safety guidelines. With patience and precision, you can enjoy your new glass cabinet doors for years to come. Get creative with design choices to personalize your space. Glass cabinet doors are not just about the look; they’re about crafting a space that reflects your taste and lifestyle. So take the leap and enhance your kitchen with this DIY renovation.


