Introduction to Base Cabinet Construction
How to build a base cabinet? Building base cabinets is a key skill for DIY enthusiasts. Let’s take a closer look. Base cabinets are the foundation of kitchens, bathrooms, and storage spaces. They sit on the floor and support countertops, sinks, and other fixtures. In this guide, we’ll walk you through everything you need to know about constructing a sturdy base cabinet. From materials and tools to step-by-step assembly, we’ve got you covered.
Here’s what we’ll cover: choosing the right materials, the tools you’ll need, cutting components to size, assembling the carcass, and the finer points of joinery. We’ll also touch on face frames, drawers, doors, and hardware. By the end of this guide, you’ll have a solid understanding of how to build a base cabinet from scratch. Let’s dive in and start building!
Essential Materials and Tools for Building Base Cabinets
To start your base cabinet project, you must gather the right materials and tools. Materials will make up the core structure, while tools will aid in cutting and assembling parts precisely.
Materials Required
- 3/4″ Plywood for the primary structure of the cabinet.
- 1/4″ and 5/8″ Plywood can be used for the back panel and drawer bottoms, respectively.
- Fast Setting Wood Glue to bond parts together during assembly.
- Finishing Supplies like sandpaper and paint or varnish for aesthetics and protection.
Essential Tools
- TS55 Tracksaw or Circular Saw: Required for straight and accurate cuts.
- Table Saw: Ideal for rip cuts and cleaning up edges.
- Router with Plywood Router Bit Set: For cutting grooves and dadoes.
- Kreg Jigs (Shelf Pin, Concealed Hinge, and Pocket Hole): For precise joinery work.
- Clamps (Bessey One Handed Clamps): To hold components together while fastening or gluing.
- Drill and Self Centering Drill Bit: For pre-drilling holes and attaching hardware.
Having the correct materials and tools at hand is crucial to ensure a smooth building process. With this setup, you’re ready to move towards the actual construction steps.
Step-by-Step Guide: Building the Cabinet Carcass
Building a cabinet carcass is a straightforward process. Follow these steps to ensure a solid foundation for your base cabinet. Remember, accuracy and quality joinery are key to a cabinet that will last for years.
Gathering Your Materials and Tools
Before you start, make sure you have all materials and tools ready. You’ll need 3/4″ plywood for the main structure and 1/4″ and 5/8″ plywood for the back panel and drawers. Fast setting wood glue and finishing supplies are also important. For tools, prepare your TS55 tracksaw or a circular saw, table saw, router with bits, Kreg jigs, clamps, drill, and self-centering drill bit.
Cutting Plywood to Size
Begin by cutting your 3/4″ plywood to create the sides, bottom, and top of the carcass. Ensure your cuts are straight and precise. For the bottom panel, cut a notch for the toe kick. Use your table saw to get clean edges on your parts.
Assembling the Carcass
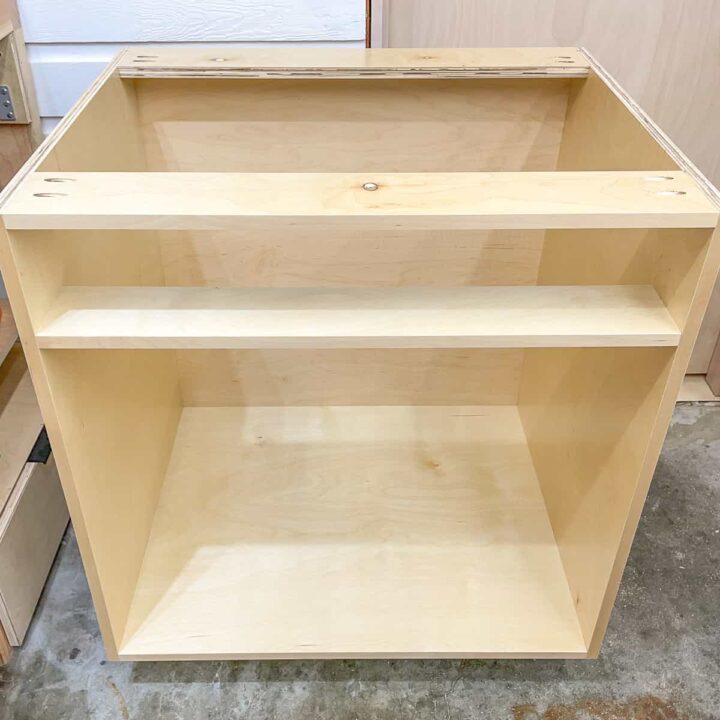
With your pieces cut, it’s time to assemble. Apply wood glue in the dados and fit the bottom panel in place. Secure it with clamps. Add the back stretchers, and then secure them with screws. Ensure everything is square and sturdy.
Adding Support and Joinery
Install the toe kick with pocket screws. For adjustable shelves, drill holes for shelf pins before the carcass assembly. Use pocket holes for the main carcass joinery. They’re strong and make assembly quick.
Completing the Carcass
Once the back stretchers and toe kick are attached, fix the back panel with brad nails or screws. Your carcass is now complete and ready for face frames, drawers, and doors.
Cutting and Fitting the Cabinet Components
Cutting and fitting the cabinet components accurately is crucial for a well-built base cabinet. Here’s how you can effectively handle this crucial step. Accuracy and precision in this step will determine the final quality and functionality of your cabinet.
Cutting the Plywood
Start with measuring and marking your 3/4″ plywood according to the dimensions required for the sides, bottom, and top of the cabinet. Use a TS55 Tracksaw or a circular saw to make clean and straight cuts. For the toe kicks, slightly modify the bottom corners of your side panels using a bandsaw for precision.
Cleaning Edges
Once the pieces are cut, use your table saw to strip off any rough factory edges. This ensures a clean finishing edge that aids in a better fit when assembling.
Fitting the Components
Begin assembling by inserting the bottom panel into the dado grooves of the side panels. It’s important that the fit is snug and precise. If using a router, you might want to adjust it to match the plywood thickness for creating perfect dadoes.
Ensuring Precision
After fitting all the panels, double-check their alignment and squareness. Any misalignment at this stage can cause issues with the drawer slides and door installation later on.
Follow these detailed steps to ensure that your base cabinet components are cut and fitted with perfection. This sets a strong foundation for the further steps involved in the assembly and finishing of the base cabinets.
Assembling the Cabinet Carcass
Assembling your base cabinet carcass is vital for a dependable structure. Follow these specific steps for a stable and precise assembly. This part of the process needs proper attention to ensure longevity and function of the cabinet.
Preparing the Pieces
Start by organizing all the cut pieces. Confirm you have two side panels, one bottom panel, and back stretchers.
Applying Wood Glue
Apply a thin layer of fast-setting wood glue in the dado grooves of side panels. Place the bottom panel carefully in these grooves.
Fitting and Clamping
Fit the pieces snugly together. Use clamps to hold them firmly. This reduces gaps and ensures a tight fit.
Attaching Back Stretchers
Position the back stretchers. These add extra support to the structure. Screw them firmly in place.
Checking Squareness
Before the glue sets, check that each corner forms a right angle. Use a speed square for accuracy.
Installing Toe Kick
Fix the toe kick at the bottom using pocket screws. This piece adds stability and protects the cabinet from floor moisture.
Securing with Screws
While the glue is still wet, reinforce the joints with screws. This dual approach enhances the carcass’s durability.
Final Adjustments
Make final adjustments to ensure all parts are aligned perfectly. Once satisfied, allow glue to dry completely.
By following these steps, the base cabinet carcass will be robust and ready for additional components like face frames, doors, and drawers. This forms the groundwork for a quality base cabinet that will serve effectively for years.
Joining Multiple Cabinets and Creating a Unified Unit
After building individual base cabinet carcasses, you might need to join them together. This creates a seamless run of cabinets for larger spaces or specific layouts. Here is a step-by-step process to do it right.
Aligning Cabinets
Begin by placing the cabinets side by side, ensuring their edges are flush. Use a level to check that all surfaces are even.
Clamping Cabinets Together
Secure the cabinets together tightly with clamps. This prevents them from moving while you join them.
Drilling Pilot Holes
Next, drill pilot holes into the sides of the cabinets. Doing this avoids splitting the wood.
Screwing Cabinets Together
Insert screws into the holes to join the cabinets. Screws should be long enough to hold, but not too long to puncture the opposite side.
Checking Alignment Again
After joining, check again with a level. The cabinets should remain flush and even.
Following these steps ensures that you build a stable and unified base cabinet unit. The result is both functional and aesthetically pleasing.
Fabricating and Attaching Face Frames
When you’re ready to give your base cabinet a polished look, face frames are essential. Here’s how to create and attach them.
Choosing the Material
- Use hardwood, like maple, for a natural finish or poplar for painted cabinets.
- Pick material that complements the cabinet’s design and purpose.
Cutting the Lumber
- Measure and cut hardwood to desired lengths for the frame.
- For stability, strips are often cut 1.5″ wide.
Assembly Process
- Apply glue to the ends of the frame strips.
- Join them using pocket screws for a strong hold.
- Be precise; this frame outlines your cabinet.
Attaching the Frame to the Carcass
- Glue the face frame onto the carcass.
- Use clamps to secure it while the glue dries.
- Avoid nails if you seek a nail-free finish.
Checking for Precision
- Ensure the frame is perfectly aligned with the carcass.
- Use a level to check the frame is flat and even.
By following these steps, your base cabinet will have a sturdy and attractive face frame. With the frame in place, your cabinet begins to take on a finished look, ready for drawers, doors, and hardware.
Crafting Drawer Boxes and Installing Drawer Slides
Creating drawer boxes involves precisions cuts in durable material, like 5/8″ Baltic birch plywood. Start by cutting parts for the four sides and the drawer bottom. Make sure your pieces fit snugly together, leaving room for the bottom which slides into place.
Measure and Cut Plywood
Measure the plywood accurately for each drawer side and bottom. Cut these pieces using a circular saw or table saw for straight edges.
Assemble Drawer Sides
Drill pocket holes in the fronts and backs. Place the sides between the front and back and clamp them. Attach with screws to form the box.
Fit the Bottom
Cut a groove along the drawer sides for the bottom to slide into. Insert the bottom panel, ensuring a flush fit with the box. Secure with brad nails or screws.
Install Drawer Slides
Choose full-extension slides for easy access. Attach slides to the cabinet with screws, guided by a level or jig for placement. Ensure slides are parallel for smooth operation.
By following these step-by-step instructions, you’ll craft strong drawer boxes and install reliable drawer slides for your base cabinet.
Door and Drawer Front Construction
When constructing doors and drawer fronts, precision and material choice are critical. Let’s break down the steps to ensure top-quality results.
Selecting the Right Materials
- Hard Maple is ideal for a sturdy and attractive natural finish.
- Poplar is a cost-effective choice for painted fronts.
- Choose 5/8″ Baltic Birch Plywood for the panels, known for its durability and smooth finish.
Cutting and Prepping Components
Start by measuring and marking the hardwood or plywood according to your design needs. Use a table saw for accurate and clean cuts. For joining parts, cutting a tenon or groove helps achieve a perfect fit.
Assembling the Frame
- Apply wood glue to the joints for added strength.
- Fit the pieces together, and secure them using pocket screws. This ensures a tight and durable join.
- For drawer fronts, ensure the frame aligns perfectly with the box size.
Attaching Panels
- If using a panel design, insert the cut plywood into the frame.
- Secure the panel by applying glue along the edging, which will be hidden once assembled.
Sanding and Finishing
- Sand the assembled fronts to eliminate any imperfections.
- Apply a finish such as varnish or paint to protect and enhance the appearance.
By following these detailed steps, your door and drawers will not only look great but also stand the test of time in both functionality and style.
Attaching Doors, Drawer Fronts, and Hardware
Attaching doors and drawer fronts adds the final visual touches to your base cabinets, while hardware installation ensures functionality. Here’s how to tackle this with precision.
Attaching Doors
- Choose hinges; cup hinges are common for a hidden look.
- Mark where hinges will go on the door and the cabinet frame.
- Drill pilot holes for hinges in the door and cabinet frame.
- Screw the hinges to the door, then to the cabinet frame.
- Adjust the door position for even gaps and smooth opening.
Attaching Drawer Fronts
- Line up the drawer front with the box, checking for even spacing.
- Temporarily attach the front with screws from inside the drawer box.
- Open the drawer and add additional screws from the front side.
- Remove temporary screws and finish with the handle or knob.
Installing Hardware
- Measure and mark the placement for knobs or handles on doors and drawers.
- Use a template or jig for precise hole placement.
- Drill the holes for handles or knobs.
- Secure the hardware with screws provided.
By carefully following these steps, you ensure that your base cabinet doors and drawers not only look aligned and professional but also function smoothly.
Final Touches and Cabinet Installation
After constructing your base cabinets, it’s time for the final touches and installation.
Preparing for Installation
- Inspect cabinets for any loose joints or screws.
- Sand edges and surfaces for a smooth finish.
- Clean the cabinets to remove dust from sanding.
Cabinet Installation
- Decide on the cabinet layout and mark positions on the wall.
- Locate wall studs for secure mounting.
- Attach a ledger board to the wall to support cabinets as you install them.
- Lift cabinets onto the ledger board and align them using your layout marks.
- Drill pilot holes and screw cabinets into wall studs for a firm hold.
- Check alignment and level; adjust as needed.
Final Checks
- Open and close doors and drawers to ensure proper operation.
- Adjust hinges and drawer tracks for smooth movement.
- Install cabinet hardware, such as knobs and pulls.
With these steps, you’ll have a set of base cabinets ready to use and enjoy. Remember, taking your time to focus on accuracy during installation will pay off with a well-functioning and visually pleasing final product.


