Types of Cabinet Hinges and Their Differences
Installing cabinet hinges starts with understanding the types you might use.
European Style Hinges
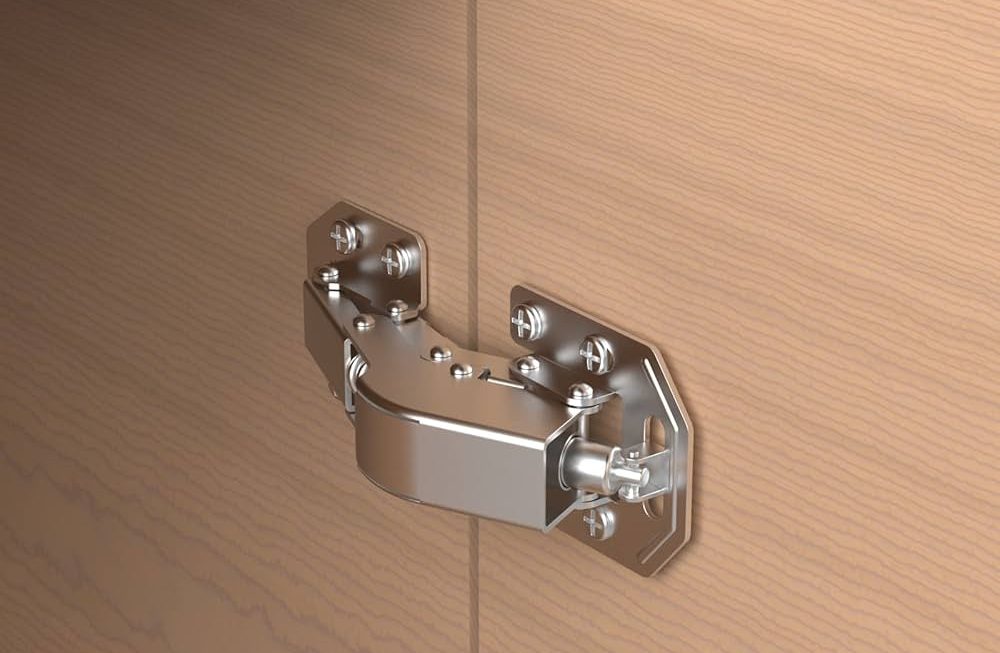
European style hinges are hidden and adjustable. They fit inside a hole in the cabinet door.
Overlay Cabinet Hinges
Overlay cabinet hinges attach to the cabinet door and frame. They cover the cabinet frame edges.
Butt Hinges
Butt hinges are traditional. They require mortising into the cabinet and door to fit right.
Tools and Materials Needed for Hinge Installation
Before embarking on the task of installing cabinet hinges, gather all necessary tools and materials. This preparation ensures a smooth and efficient installation process. Here’s what you will need:
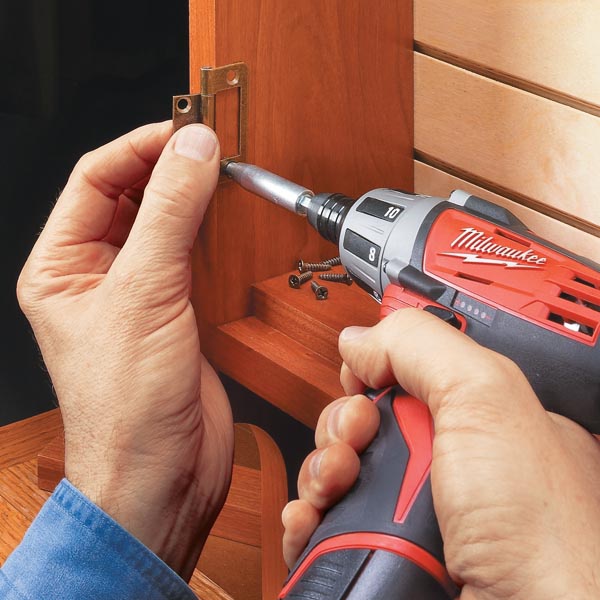
- Screwdriver: A Philips-head screwdriver is ideal for most hinge screws.
- Drill: An electric drill will save time and effort when creating holes.
- Drill bits: You’ll need a 35 mm bit for European style hinges and others for pilot holes.
- Measuring tape: Essential for precise measurements when placing hinges.
- Pencil or marker: To mark drilling points and hinge positions.
- Combination square: Helps draw straight lines for alignment.
- Hammer: Necessary if using nails or to gently tap hinges into place.
- Chisel: A sharp chisel is useful for mortising butt hinges.
- Router (optional): A plunge router can quickly create mortises for butt hinges.
- Hinges and screws: Ensure you have the correct type and size for your cabinets.
- Alignment template (if available): Some hinges come with templates to assist in marking.
Start by laying out all tools and materials. Ensure everything is within reach to avoid interruptions. As you progress through installing cabinet hinges, having the right tools at hand will make the task easier, leading to better results. Keep your work area organized and clear of debris to maintain safety and accuracy in your work.
Preparing the Cabinet and Door for Hinge Installation
Proper preparation of the cabinet and door is key before starting the installation of cabinet hinges. This stage lays the groundwork for a precise and solid hinge installation.
Measuring and Marking
Start by measuring the area where the hinges will attach. Use a measuring tape for accuracy. Depending on the type of hinge, position measurements will vary. For overlay hinges, measure the overlay by subtracting the cabinet opening width from the door width. Then divide the result by two to find the appropriate overlay. Mark these measurements clearly with a pencil or marker.
For European and butt hinges, measure the height from the top and bottom of the door where hinges will sit. Mark these points, ensuring they are straight and level, which can be achieved using a combination square. Always double-check measurements before proceeding to the next step to avoid mistakes.
Drilling Holes and Mortising
After marking, the next step is to drill holes for the hinge screws and cups. Use the correct size drill bits—35 mm for European style hinges, and adjust according to hinge specifications. If using butt hinges, a chisel may be necessary to carve out the mortise where the hinge will sit. For clean and accurate mortising, use sharp tools and carve out small amounts at a time.
It’s important to remove any wood shavings and dust after drilling to ensure that hinges fit snugly and operate smoothly. Make all adjustments necessary before installing the hinges to prevent any alignment issues after the door is mounted.
Step-by-Step Guide to Installing European Style Hinges
Installing European style hinges involves precise steps for a sleek look and perfect function.
- Measure and Mark: Begin by creating a parallel line to the door’s hinge-side edge. Make it 7/8 of an inch from the inset. Then measure 3 and a half inches from the top and bottom corners, marking the intersect points for drilling.
- Drilling Holes: Use a 35 mm drill bit to bore holes for the hinge cups at your marks. After drilling, remove any wood shavings and ensure the cups fit.
- Inserting Hinge Cups: Place the hinges into the holes, lining them up carefully. Drill pilot holes at the screw points with a 7/64-inch bit and secure with 5/8-inch #6 screws.
- Position and Measure Door: Temporarily set the door in place, checking for a uniform gap of 1/16 inch around the door’s edge.
- Mark Cabinet: Draw a vertical line on the cabinet’s side panel with a combination square, sitting at 2 ? inches from the front edge. Add a horizontal mark 3 ? inches from the cabinet opening.
- Mounting Plate: Detach the mounting plate from the hinge. Align its holes with the layout marks on the cabinet’s side panel.
- Pilot Holes and Screws: Drill pilot holes and fasten the mounting plate using 5/8-inch #6 screws.
- Attaching the Door: Place and open the door, hooking the hinges onto their plates. Press the hinges to secure them, and close the door.
- Adjust If Needed: If the door isn’t aligned properly, adjust it with a Phillips-head screwdriver until it’s perfect.
Following these steps will make installing cabinet hinges a clearer, less daunting task. Remember, taking your time and measuring accurately are crucial for a successful installation.
Step-by-Step Guide to Installing Overlay Cabinet Hinges
- Measure the Overlay: Start by measuring the width of your cabinet door. Subtract the width of the cabinet’s opening from this number. Divide the result by two to determine the overlay measurement. Mark this measurement on the door.
- Remove Old Hardware: Take off the existing hinges and hardware. Prepare the surface, which may include painting areas that were under the old hinges, ensuring the paint is totally dry before proceeding.
- Align and Mark Using Template: Many overlay cabinet hinges come with an alignment template. Position the template at the edge of the door. Use it to make accurate markings for your drill holes.
- Drill Holes: Drill a hole at each marked point to the depth specified by the hinge manufacturer. This is where the new hinges will be fitted.
- Attach Hinges to Door: Align the new hinges with the drilled holes on the door. Secure them using screws provided with your hinges. Some adjustments to the hinge may be needed to align the door correctly.
- Adjust Door Position: After attaching the hinges to the door, hang the door on the cabinet frame. Adjust the screws on the hinges to shift the door side to side and up or down. This ensures the door hangs evenly and closes smoothly.
- Test Movement: Open and close the door several times to check for smooth operation. Make any final adjustments.
By following these straightforward steps, you can successfully install overlay cabinet hinges ensuring a secure and aesthetically pleasing outcome.
Step-by-Step Guide to Installing Butt Hinges
- Measure Hinge Width: Measure from center to edge of the hinge. Subtract 1/32-inch for mortise width.
- Marking: Place marks on the cabinet frame’s edge. Align hinge’s longer edge with these marks.
- Outline Hinge: Position the hinge and trace its outline on the frame.
- Measure Mortise Depth: Determine the hinge flange depth. Mark it on the cabinet face frame’s exterior corner.
- Carve Mortise: Align marks and carve into them with a sharp knife. Use a chisel to clean out the mortise.
- Fit Hinge in Mortise: Check that the hinge fits evenly in its place.
- Secure Hinge: Position the hinge in the mortise. Hammer nails into the screw holes to secure it.
- Drill Pilot Holes: Use a small drill bit for each screw. Ensure holes are aligned correctly.
- Insert Screws: Position the mortise and screw it securely.
- Attach Door: Hold the door in place. Mark spots for hinge attachment on the door.
- Repeat Process: Ensure the hinge is securely attached to both the door and the frame.
Adjusting and Aligning Cabinet Doors After Installation
After installing cabinet hinges, it’s crucial to adjust and align doors for a perfect fit. Here are the steps to ensure your doors are level and close smoothly.
- Check the Door Alignment: Once the hinges are in place, close and open the door several times. Look for any gaps or misalignment.
- Adjust the Hinges: Most cabinet door hinges have screws for adjustment. Tweaking these can change the door’s height, depth, and side-to-side position.
- Tighten or Loosen Screws: If the door hangs too low, use your screwdriver to tighten the adjustment screw. If it’s too high, loosen it slightly.
- Align Side-to-Side: Adjust the side screws to shift the door from left to right or vice versa. Make small adjustments for a better fit.
- Check Gaps Evenly: Ensure the gap between the door and frame is even all around. An ideal gap is about 1/16 inch.
- Test the Swing: Open and close the door after each adjustment. This helps you see the changes and decide if more adjustments are needed.
- Fine-Tuning: Continue to make fine adjustments until the door sits flush and operates smoothly.
When aligning your cabinet doors, patience is key. Each small adjustment can make a big difference in the alignment.
Best Practices for a Smooth Hinge Installation Process
For a smooth hinge installation process, follow these best practices:
- Preparation is Key: Before starting, ensure all necessary tools and materials are ready and within reach. This preparation prevents delays.
- Measure Twice, Drill Once: Always double-check measurements before drilling. This accuracy prevents errors and wastage of materials.
- Use Sharp Tools: Sharp drill bits and chisels make cleaner cuts. This leads to a perfect fit for the hinges.
- Keep the Workspace Clean: Clear away wood shavings and debris continually. A clean workspace allows better accuracy and safety.
- Follow Manufacturer Instructions: Adhere to the guidelines provided with the hinges. This ensures correct installation and hinge functionality.
- Test Fits are Crucial: Temporarily set the hinge and door to check fits before fully securing screws. This allows for adjustments before finalizing.
- Apply Gentle Force: When inserting hinges or screws, use gentle force. This prevents damage to both hardware and cabinet surfaces.
- Seek Help if Needed: For heavy doors, getting help can prevent injuries and ensure proper alignment.
Following these practices ensures that installing cabinet hinges is effective, leading to well-aligned, smoothly operating cabinet doors.
Where to Purchase High-Quality Cabinet Door Hinges
Locating the right spot to buy quality cabinet hinges is crucial. Begin by checking local hardware stores. These shops often carry a variety of hinges. Look for renowned brands that stand for durability and quality. Ask shop attendants for advice if you’re unsure about what to purchase.
Online shopping is another great option. Websites offer a wider range. This includes specialty hinges not found in stores. Before buying, read customer reviews and check return policies. Ensure you’re getting the best product for your project.
Do not forget specialty woodworking and cabinet shops. These stores provide high-quality hardware tailored for cabinetry. Staff in these shops can offer expert advice. They will help match hinges to your specific cabinet design.
For European style hinges, search for suppliers offering a range of adjustments. Overlay cabinet hinges must come with their specific templates for ease of installation. Butt hinges should be solid, ensuring they last for many years.
Investing in high-quality cabinet door hinges pays off. It ensures longevity and smooth operation. Remember, good hinges mean doors hang straight, open smoothly, and close securely. Take your time to find the right supplier. This will make installing cabinet hinges a smoother, more satisfying experience.


