Introduction to Cabinet Box Construction
How to build cabinet boxes? Creating cabinet boxes can be a straightforward if slightly intimidating DIY task. This guide aims to demystify the process, showcasing how with the right materials and some basic tools, you can build sturdy and functional cabinet boxes for your home.
Preparing Your Workspace and Necessary Tools
How to build cabinet boxes? Before diving into the construction process, it’s essential to prepare your workspace. Ensure it’s clean, well-lit, and spacious enough to handle your materials and movement. Gather all necessary tools, which may include a tape measure, drill, Kreg pocket hole jig, saws for cutting plywood, a square, and a screwdriver. These tools are critical for accuracy and precision in your building process. Remember, safety is paramount, so also have your safety goggles and gloves ready.
Selecting Cabinet Box Materials
Choosing the right materials is critical to the success of your DIY cabinet boxes.
Understanding Plywood Specifications and Quality
When constructing cabinet boxes, plywood is the material of choice due to its strength and stability. How to build cabinet boxes? It’s essential to understand the various plywood specifications and quality grades to ensure your cabinets are durable and look great.
Plywood Thickness: The standard thickness for cabinet box construction is 1/2 inch or 3/4 inch. Thicker plywood offers more durability, which is particularly beneficial for frameless cabinet designs.
Plywood Grade: Plywood comes in different grades reflecting the quality of the surface veneer. ‘A’ grade plywood has a smooth, paintable surface, while ‘B’ or ‘C’ grades might have minor flaws or knots.
Plywood Type: Cabinet-grade plywood, often made from birch, is a popular choice. It provides a consistent finish and can be stained or painted to match your desired aesthetic.
Back Material: For the cabinet back, 1/8 inch plywood is commonly used but using the same thickness as the rest of the box ensures additional sturdiness. It’s a decision based on budget and preference.
Prioritize cabinet-grade materials to ensure a professional look and longevity. The stability of the plywood ensures that the cabinet box can support weight and resist warping over time. With these considerations, you’re ready to make informed choices about your cabinet box materials.
Cutting Techniques for Cabinet Boxes
When constructing cabinet boxes, accurate cutting is critical for a streamlined assembly process. Ensuring your plywood cuts are precise will lead to a more professional finished product.
Tools and Measurements for Precise Cuts
Initiating the cutting process requires a few essential tools and techniques. Start by adhering to these steps for accurate cuts:
- Measure Twice, Cut Once: Use a tape measure to double-check your measurements. Ensure accuracy before proceeding to cut.
- Marking the Plywood: Employ a pencil and a square to mark your cut lines on the plywood. Visible and straight lines guide your cuts.
- Using a Table Saw or Circular Saw: A table saw is ideal for making long, straight cuts. If unavailable, a circular saw paired with a straight edge guide can suffice.
- Dado Cuts for Shelves: For creating grooves to hold shelves, a dado blade on a table saw or a router with the appropriate bit can be used.
- Keeping the Workstation Clean: A clear and clean space aids in managing plywood sheets and facilitates safer cuts.
By systematically following these steps, you can achieve cuts that are not only precise but also consistent, which is paramount for the next stage of construction—the assembly of your cabinet boxes. Prepare your wood pieces, ensuring that all are cut to the specified measurements and ready for the next phase.
Assembling the Cabinet Box
With your cut pieces ready, it’s time to delve into the assembly phase. Following a systematic approach helps ensure your cabinet box comes together seamlessly.
Step-by-Step Guide on Assembly Processes
- Begin by laying out the side panels on a flat surface.
- Apply wood glue to the edges where the bottom panel will attach.
- Align the bottom panel with the side panels’ edges and clamp them together.
- Using a drill, secure the panels with screws if you’re not using pocket holes.
- Repeat this process for the top panel if your design includes one.
- Attach the back panel with glue and nails or screws, ensuring it’s square.
- Install any internal shelves or dividers by sliding them into place.
- If your design includes a toe kick, fix it to the bottom front of the cabinet.
Consistency in steps will lead to each cabinet box matching the next in your project.
Tips for Ensuring Durability and Strength
- Always use clamps to hold pieces together for precise alignment before securing.
- Double-check that each component is square before permanently attaching.
- Strengthen joints with screws rather than nails for added durability.
- Consider adding corner braces if you seek extra rigidity in the structure.
Sturdy construction is vital for cabinet boxes as they must endure daily use and hold significant weight. Employing these tips will garner a robust end product that lasts for years.
Adding Face Frames to Cabinet Boxes
Adding a face frame to your cabinet boxes can elevate the look and add strength. Let’s walk through the alignment and installation process.
Techniques for Frame Alignment and Installation
- Measure and Cut the Frame: Begin by measuring your cabinet box dimensions accurately and cutting your frame material to match these measurements.
- Drilling Pocket Holes: On the back side of the face frame pieces, drill pocket holes for easy attachment to the cabinet boxes.
- Assemble the Face Frame: Build the face frame by connecting the rails and stiles using pocket hole screws and wood glue for a sturdy frame.
- Attach Frame to Box: Apply wood glue on the front edge of the cabinet box and align the face frame. Secure with clamps before fastening with screws.
- Ensure Square Alignment: Before fully securing, double-check that the frame is perfectly square with the cabinet box to prevent any future alignment issues with doors or drawers.
- Finish the Installation: Once properly aligned, firmly attach the face frame with pocket hole screws and remove the clamps after the glue sets.
By following these steps, your cabinets will have a professional appearance and robust structure. With the face frames attached, your cabinet boxes are nearing completion and ready for the final touches.
Optional Cabinet Customizations
Customizing your cabinet boxes can add functional value and personal flair to your project.
Incorporating Adjustable Shelves and Drawers
Adjustable shelves offer flexibility for storage needs. To add them:
- Choose shelf pin jig and shelf supports.
- Drill holes inside cabinet sides for shelf pins.
- Cut shelves to slide in, resting on pins.
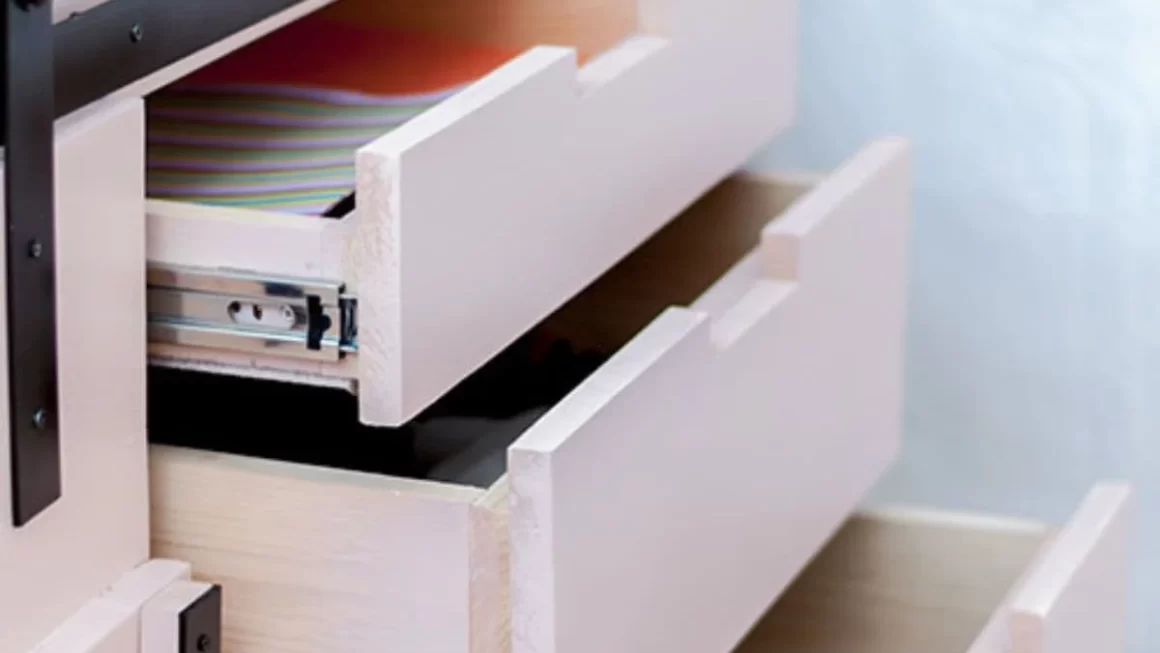
Installing drawers requires more steps:
- Build drawer boxes using earlier techniques.
- Attach drawer slides inside the cabinet.
- Fix drawer fronts to boxes with screws.
Include stoppers to prevent drawers from pulling out too far.
Tips for Aesthetic Enhancements
Enhance cabinet appearance with these tips:
- Select decorative handles or knobs.
- Apply finish or paint for a smooth look.
- Use crown molding on upper cabinets.
- Add glass inserts to doors for display.
These details will create a bespoke look and feel in your space.
Remember, custom features should not compromise cabinet stability. Plan and execute enhancements carefully for best results. Personal touches can make your cabinets unique and suited to your style.
Installation and Mounting of Cabinet Boxes
After your cabinet boxes are built, the next step is mounting them securely. Proper installation ensures that your cabinets stay in place and can support weight safely.
Preparing for Installation
Before installing your cabinet boxes, gather your tools and materials. You need a stud finder, level, drill, screws, and possibly shims for this task. Clear the area and make sure your floor and walls are as level as possible. Any unevenness can cause issues during installation.
- Locate wall studs with a stud finder and mark their positions.
- Determine the height and alignment for your cabinets, using a level for accuracy.
- Ready your drill and screws suitable for the wall material you’re working with.
- Have shims on hand in case adjustments are needed for evenness.
By using these preparations, you’ll set the stage for a smooth installation process, ensuring that the cabinet boxes are aligned and even.
Securing Cabinets to Wall Studs
Mounting your cabinets securely to wall studs is crucial for stability. Here’s how to do it:
- Hold the cabinet box against the wall, aligning it with your marks.
- Use a level to make sure the cabinet is perfectly horizontal.
- Drill pilot holes through the cabinet back into the wall studs.
- Drive screws through the back of the cabinet to anchor it to the studs.
- Check for levelness again after securing the cabinet. Adjust with shims if needed.
- Repeat the process for additional cabinets, ensuring a tight fit between units.
Securing your cabinets to the studs offers peace of mind, knowing that they are firmly attached and can handle the items you store in them.
Conclusion
How to build cabinet boxes? With this simplified guide, building cabinet boxes is an achievable DIY project that can lead to both a sense of accomplishment and significant cost savings. You’ve learned how to select the right materials, cut with precision, assemble for sturdiness, and add personal customizations to your cabinets. Even if you’re a novice woodworker, following these methodical steps can help you create high-quality cabinets that are both functional and visually appealing.
Review of Steps and Additional Resources
To recap, here’s a brief overview of the key steps we covered:
- Organize workspace and collect tools.
- Choose appropriate plywood and materials.
- Execute precise cuts for box components.
- Assemble the box with careful attention to durability.
- If desired, build and attach face frames.
- Customize with shelves, drawers, or finishes.
- Mount securely to wall studs during installation.
For further guidance or to tackle more advanced projects, consider consulting additional resources. Woodworking books, online forums, and video tutorials can offer in-depth explanations and demonstrations. Local workshops and community classes can also provide hands-on experience under the guidance of skilled instructors. Remember, practice makes perfect, and every project hones your skills for future endeavors.
How to build cabinet boxes? By embracing the challenge of cabinet box construction, you’re not only improving your living space but also enhancing your DIY capabilities. Good luck, and enjoy the process of crafting your custom cabinetry!


:max_bytes(150000):strip_icc()/101335925-16fd42b4743342af90d251a1bc852198.jpg)


