Preparing for a Touch-up
Before beginning any paint touch-up job on your cabinets, proper preparation is key. This ensures that the touch-up will blend neatly with your existing cabinet paint, maintaining the cabinets’ seamless appearance.
Cleaning and Assessment
Start with a thorough cleaning of the cabinets using a gentle cleaner and a soft cloth. Check for grease, dust, and any other residue, and ensure the area is spotless before proceeding. Examine the extent of the damage. Are there small chips or deep gouges? Understanding the size and depth will guide the touch-up process.
Tools and Materials Needed
Gather the essential tools and materials before starting the touch-up. You’ll need:
- Fine-grit sandpaper, like 320-grit, for smoothing the affected area without removing excessive paint.
- A high-quality small paintbrush or foam brush for precise application.
- Cleaning supplies, preferably a mix of water and a mild detergent.
Equipped with the right tools and a clean surface, you’ll have set the stage for a successful cabinet paint touch-up.
Choosing the Right Paint
Choosing the right paint is critical to ensuring your touch-up is invisible and durable. There are two main considerations when selecting paint for your cabinets: color and sheen. The aim is to match the new paint as closely as possible to the original finish.
Matching Paint Color and Sheen
To match the paint color, use a peeling or chipped piece from your cabinet as a sample. If this is not possible, remove a small door or drawer and take it to your local paint store for color matching. Most modern paint stores use high-tech scanners to create a precise match. As for the sheen, cabinets generally have a satin or semi-gloss finish. Examine your existing cabinets to determine the correct sheen – the amount of light reflected off the surface will guide your choice. Remember, mismatched sheen can make touch-ups obvious, even when the color is perfect.
When to Use a Primer
A primer helps paint adhere to surfaces and is crucial when touching up bare wood or areas with significant damage. If your cabinet paint is only slightly chipped or scratched, you can often skip the primer and apply your touch-up paint directly. However, for larger areas with exposed wood or layers of old paint, a primer ensures a firm base for subsequent paint layers. Apply a thin coat to prevent it from affecting the paint’s texture and apply the touch-up paint after the primer dries completely.
Touch-up Techniques
Proper touch-up techniques can make a big difference in the appearance of your cabinets. Whether dealing with minor blemishes or larger areas of damage, using the right method is key.
Using a Touch-Up Pen for Minor Blemishes
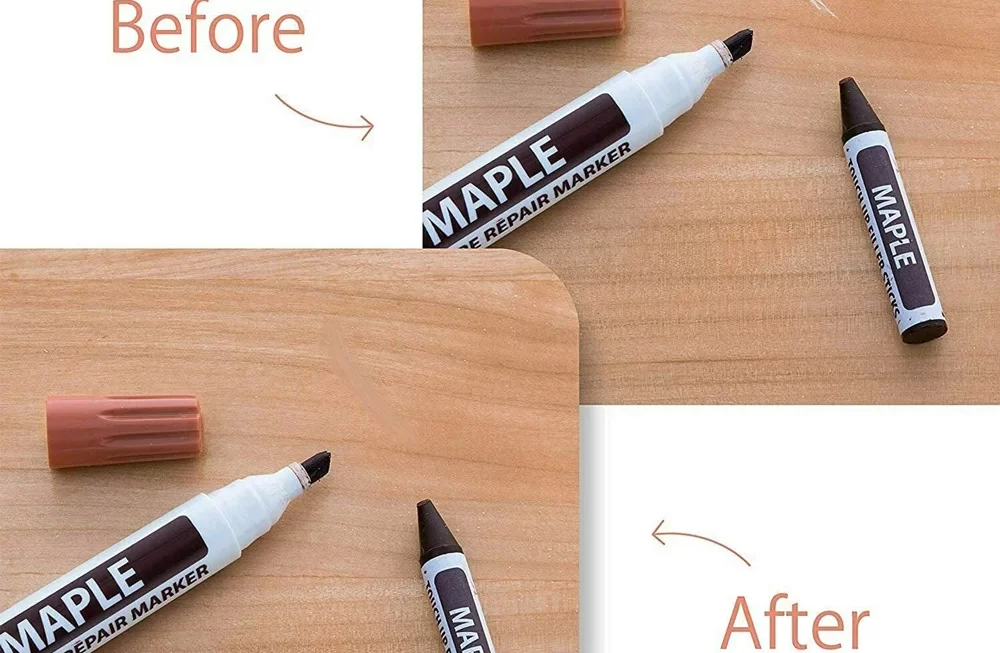
For small scratches and chips, a touch-up pen is your best bet. Select a pen that matches your cabinet’s paint color and sheen. Gently apply the pen to the affected area, taking care not to overdo it. It’s a simple solution that can effectively conceal minor imperfections.
Applying Paint with Brushes for Larger Areas
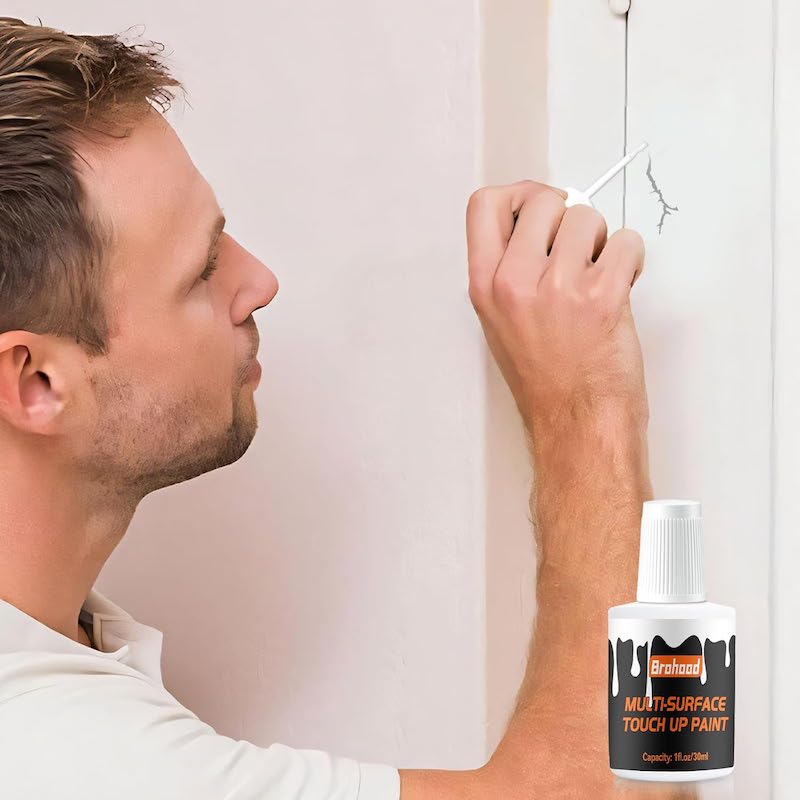
When dealing with larger areas, a fine-bristled brush or foam brush allows for a more controlled and even application. Use matched paint to fill in chipped or scraped places. Apply lightly, adding thin layers until the touch-up blends with the surrounding paint. Patience is crucial; rushing could result in visible paint streaks.
The Role of Sanding in Paint Touch-Ups
Sanding is vital for smooth touch-ups, especially when paint has been chipped away. Using fine-grit sandpaper, gently sand the area until smooth. This creates a better surface for the new paint to adhere to. After sanding, remove all dust before applying any paint, to avoid a grainy finish.
Additional Touch-up Options
When cabinet paint suffers more than just minor chips, additional strategies are necessary. Deeper scratches and gouges require a method that fills the void before painting. Let’s explore some effective touch-up options for these scenarios.
Using Fill Sticks for Scratches and Gouges
Fill sticks are ideal for mending scratches and shallow gouges in cabinet paint. Choose a shade that closely matches your cabinet color. Clean the damaged area, then rub the fill stick over it. Smooth the filler with a plastic card or a soft cloth. Let it harden, and then lightly sand it down. Now, the surface is ready for a dab of matched paint. This fix keeps cabinets looking fresh with minimal effort.
Techniques for Handling Deep Chips
Deep chips can be more challenging, but they’re not impossible to fix. Start by cleaning out the chip to remove any loose paint or debris. Use wood filler for solid wood cabinets, matching the color of your cabinets as closely as possible. For laminates, a color-matched laminate filler works best. Apply the filler sparingly, let it dry, then sand smoothly to level with the cabinet surface. Once the surface is prepped, you can proceed with painting, using the same care and patience as with lighter touch-ups. This restores the cabinet’s surface integrity and aesthetic appeal.
Finishing Touches
After repairing your cabinets, it’s essential to apply the right finishing touches.
Applying a Top Coat
A top coat seals your touch-up work, adding durability. Choose a clear, matching sheen top coat. Apply lightly, in even strokes, covering the touch-up area. Let it dry before adding a second coat if needed. The top coat should match your cabinets’ original finish for a seamless look.
Curing Time and Care Post-Touch-up
Newly applied paint needs time to cure, which may take up to thirty days. Until fully cured, treat your cabinets with care. Avoid heavy cleaning or rough use. Gentle wiping with a soft cloth should suffice. The waiting ensures the longevity of your touch-up work.
By following these steps, your cabinets will look as good as new with a touch-up that blends in and lasts.
Common Problems and Solutions
When undertaking a cabinet paint touch-up project, it’s not uncommon to face some challenges. Addressing common problems effectively ensures a flawless finish.
Blending Issues
Blending new paint with existing paint is often a primary concern. If the touched-up area stands out:
- Check if your paint color and sheen completely match. Even slight differences can be noticeable.
- Apply thinner paint coats. Thick coats make blending harder and can look patchy.
- Gradually feather the paint outwards. This helps the new paint fade into the old without harsh lines.
- Allow drying time between coats. This prevents blending problems like color bleeding or texture issues.
Following these tips can minimize blending problems and create a seamless appearance.
When to Seek Professional Help
Sometimes, a DIY approach might not be enough:
- If the damage is extensive, professionals ensure a long-lasting repair.
- When matching paint becomes too complex, expert color matching is key.
- For structural issues, professionals provide necessary repairs first.
Don’t hesitate to contact a skilled painter or cabinet specialist if the job exceeds your comfort level. Professional help guarantees quality results and saves time.
How to touch up cabinet paint?
-
Gather the necessary supplies, such as sandpaper, cleaning solution, paintbrushes, and the appropriate paint color.
- Start by cleaning the cabinets thoroughly with a cleaning solution to remove any dirt, grease, or grime.
- Use sandpaper to lightly sand the areas of the cabinets that need touch-up paint. This will help the new paint adhere to the surface and create a smooth finish.
- Wipe away any dust from sanding with a damp cloth and allow the cabinets to dry completely.
- Stir the touch-up paint thoroughly to ensure it is well mixed.
- Using a small paintbrush, carefully apply the touch-up paint to the areas that need to be touched up. Be sure to apply the paint evenly and in thin layers to avoid drips or uneven areas.
- Allow the touch-up paint to dry according to the manufacturer’s instructions. If needed, apply a second coat of paint once the first coat is dry.
- Once the touch-up paint is completely dry, carefully inspect the cabinets to ensure the touch-up areas blend in seamlessly with the rest of the cabinet surface.
- If necessary, use a clear topcoat or sealer to protect the touch-up paint and ensure a consistent finish across the cabinet.
- Clean up any paint spills or drips and allow the cabinets to dry completely before using them.


