Introduction to Shaker Cabinet Doors
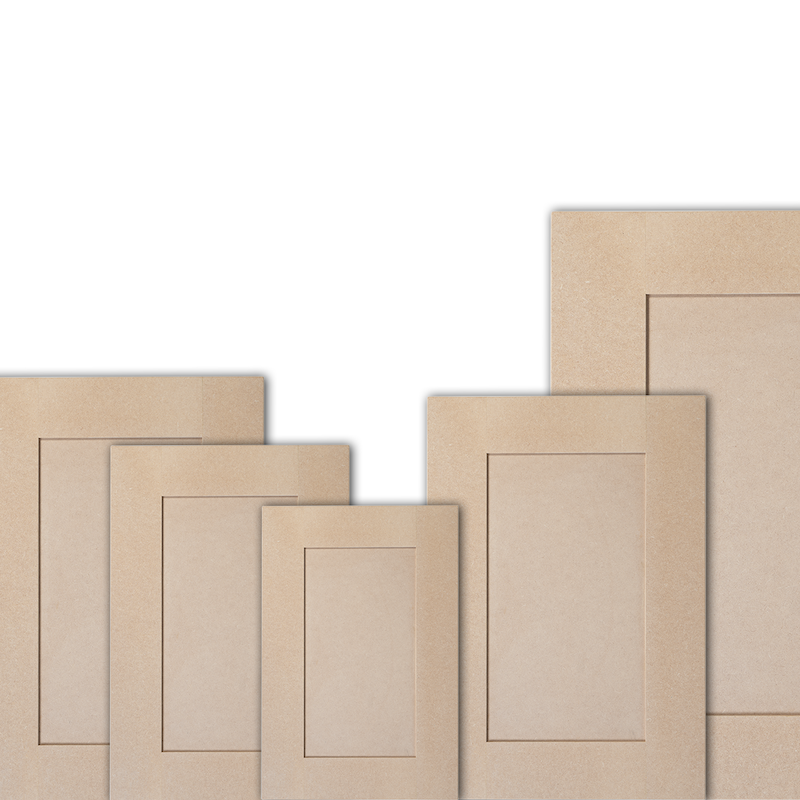
Shaker cabinet doors are known for their classic, simple design. They feature clean lines and a flat panel, framed by sturdy rails and stiles. These doors bring a timeless look to any room. Shaker doors fit well in both modern and traditional spaces. Making shaker cabinet doors can be a do-it-yourself project. With the right materials and tools, you can create custom doors for your home. How to make shaker cabinet doors? This blog will guide you through the process of how to make shaker cabinet doors. We will cover what materials you need and each step of making the doors.

Materials and Tools Needed
To embark on crafting your own shaker cabinet doors, you’ll need specific materials and tools. Ensuring you are well-equipped will streamline the building process and lead to a successful project.
Essential Materials for Shaker Cabinet Doors
The materials required to make shaker cabinet doors are simple and straightforward. Here’s a list to help you gather what’s necessary:
- 1×3 wood boards for the frames (popular options include pine or poplar).
- 1/4 inch plywood for the door panel, preferably birch for a smooth finish.
- Wood glue to secure the joints.
- Screws, appropriate for the depth of your wood, to assemble the frame.
- Caulk, to finish the door edges and ensure a snug fit of the panel.
- Primer and paint to give your doors a professional and matching look with your current decor.
Make sure to measure your cabinet openings accurately. Record these dimensions before buying materials.
Recommended Tools for the Project
The right tools make a huge difference in the quality and ease of your project. Here’s what you’ll need:
- A miter saw or miter box for precise cuts.
- A table saw for making notches and cutting panels.
- A drill with various drill bits for making holes and driving screws.
- Clamps to hold pieces securely in place.
- A speed square for accurate measurements and angles.
- A Kreg Pocket Jig* to join the pieces with pocket holes.
- Sandpaper or an orbital sander to smooth out wood surfaces.
- A tape measure and pencil for marking and measuring.
- Painting tools like a brush and foam roller for the final finish.
With these materials and tools at hand, you’re all set to create your custom shaker cabinet doors.
Measuring and Planning
To kick off your DIY shaker cabinet door project, precise measuring and thoughtful planning are key. This section will guide you through the steps to ensure your cabinet doors fit perfectly and look great.
Taking Accurate Measurements
Start by measuring the openings of your cabinets where the new doors will go. Use a reliable tape measure and jot down the height and width of each opening. Remember to measure twice for accuracy. Check for any irregularities in size among openings and note them down. These measurements will determine the size of the wood you’ll need for the frames and panels.
Sketching and Visual Planning
Once you have your measurements, make a sketch of the door design. This helps visualize the final product. Include the dimensions of the rails, stiles, and center panel in your drawing. Use a pencil and paper, or a digital tool if that suits you better. Your visual plan should guide you on how the pieces fit together. It ensures your cuts follow the designated measurements. With clear sketches, you’re less likely to make costly mistakes during construction. Now, with accurate measurements and a solid plan, you’re ready to move on to cutting and assembling the frames.
Cutting and Assembling Frames
To build your shaker cabinet doors, start by cutting and assembling the frames. Precision here is vital. With accurate measurements and careful crafting, you’ll set a solid foundation for your custom doors.
Cutting Rails and Stiles to Size
Begin by cutting your 1×3 wood boards. Use a miter saw for precise cuts. Cut the stiles, the vertical pieces, and rails, the horizontal pieces, to the required length. Remember, stiles run the height of the door, and rails stretch between stiles.
How to Drill Pocket Holes
Next, drill pocket holes at the ends of your rails. Use a Kreg Pocket Jig for this task. A drill and clamps will also be needed. Pocket holes should be drilled on the backside to be hidden.
Assembling the Door Frame
Now, assemble the frame. Join the stiles and rails using wood glue and screws. Clamp the pieces together and check with a speed square for right angles. Drill the screws into the pocket holes to unify the frame. Once done, you have the basic door structure ready.
Crafting the Center Panel
The center panel is the heart of any shaker cabinet door, providing both stability and style.
Choosing the Right Plywood
Select plywood that is stable, flat, and free of knots for a clean look. Birch plywood is a top choice for its smooth surface and durability. Ensure your plywood is 1/4 inch thick to fit neatly into the door frame you’ve created.
Cutting and Fitting the Center Panel
Use your measurements to determine the size of the panel. Add 1/4 inch to your height and width for a snug fit. Cut the plywood with a table saw or circular saw, aiming for accuracy. Once the plywood is cut, dry-fit it into the frame to confirm a perfect fit. If adjustments are necessary, make small trims until the center panel fits tightly within the frame. Now, with the center panel in place, your shaker cabinet door is starting to take shape.
Finishing Touches
After crafting the door frame and center panel, you’ll add finishing touches.
Caulking and Filling Holes
Caulk seals any gaps and ensures your door looks seamless. Apply caulk carefully between the plywood and the frame. For pocket holes on the back, use wood filler to make it smooth. Once dry, sand these areas to prep them for paint.
Priming and Painting the Doors
Priming your doors is key before adding paint. Use a primer that matches the paint type. Paint your shaker cabinet doors with a color that fits your space. A brush creates detail, while a foam roller gives a smooth finish. Apply at least two coats for durability.
Installation Process
After constructing and painting your shaker cabinet doors, the next crucial steps are installing them.
Fixing Hinges and Hanging Doors
Installing hinges is a key part of the installation process. First, decide on the type of hinge that complements your cabinet design. Concealed hinges are a popular choice for a clean, modern look. Align the hinges with the cabinet frame. If you are replacing doors, you can use the existing hinge positions as a guide. Secure the hinges to the door with screws, then fix them to the cabinet frame. Make sure the doors open and close smoothly.
Adding Knobs or Handles
Choosing the right knobs or handles can elevate the look of your cabinets. Measure the placement carefully for uniformity across all doors. Mark the spots where you’ll drill holes. Use a template for accuracy if available. Drill the holes and fasten the knobs or handles. Keep them tight enough so there’s no wobble. Once installed, test the doors to ensure handles are correctly positioned for easy use.
With these steps, your DIY shaker cabinet doors are not just made, but fully functional and ready to enhance the look of your space.
Finalizing Your DIY Project
Congrats on reaching the final steps of building your shaker cabinet doors. It’s a satisfying moment.
Checking Alignment and Fit
It’s key to check the fit of your new doors. Make sure they align with your cabinet frames. Open and close each door. They should move smoothly without rubbing or gaps. If you spot issues, adjust the hinges. This may involve tightening or loosening screws. Keep testing until you’re happy with the alignment and fit.
Admiring Your Handiwork
Stand back and take a moment to enjoy your completed project. Your DIY shaker cabinet doors should look fantastic and function well. They add charm and a fresh look to your space. Pat yourself on the back for a job well done. Your hard work has paid off and now you’ve got a set of doors that are uniquely yours.