Introduction
Turning a plain wall into a visually appealing and functional area is a DIY dream. Many homeowners look to add charm and storage with built-in bookcases and a cozy window seat. These elements not only enhance a room’s aesthetics but also provide practical solutions for organizing and displaying books, collectibles, and more. In this guide, we’ll explore the process of creating a customized diy built-in bookcase around a window along with a comfortable window seat.
From choosing the right materials to the final touches of paint, this guide is designed to help you through each step. Whether you’re an experienced DIYer or a beginner, the tips and techniques outlined here will ensure a successful project. You’ll learn how to measure, cut, and construct a sturdy frame, adhere to important construction details, and apply the finishing touches that make the built-in look like it’s always been part of your home. Let’s get started on transforming your space with a beautiful DIY bookcase and window seat.
Planning Your DIY Bookcase and Window Seat
Before diving into your diy built-in bookcase around window project, careful planning is essential. Start by assessing the space where you intend to build. Measure the area’s length, height, and depth. Consider the window’s placement and how the bookcase will integrate with it. Think about the items you will store or display on the shelves. This will help you decide on the number and spacing of shelves.
Next, sketch a rough design. This visual aid will serve as a guide throughout your project. Decide on a style that complements your room. Whether you prefer a traditional look or something more modern, your design should blend seamlessly with the existing decor.
Review your list of materials and tools (covered in the next section). Verify that you have everything you need before you start. This includes wood, screws, a saw, and other essentials. Have a budget in mind, and stick to it as you gather supplies.
Keep in mind the functionality of your window seat. It should not only look good but also be comfortable and practical. Determine the height and depth of the seat. Remember to leave space for a cushion if you plan to add one.
Finally, consider the steps involved in construction and installation. Break down the project into manageable tasks. Allocate enough time to complete each step without rushing. This will help ensure quality workmanship and reduce the risk of mistakes.
By planning thoroughly, you can ensure a smoother process and a successful outcome for your DIY bookcase and window seat.
Materials and Tools Needed for the Project
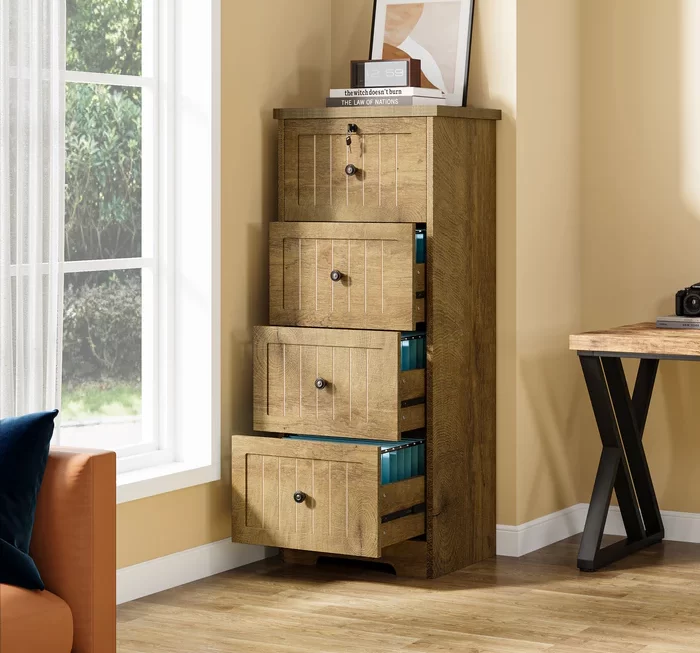
When starting your diy built-in bookcase around window, gather your materials and tools. You’ll need MDF (medium-density fibreboard) or plywood for the bookcase and window seat. Remember, MDF is affordable but requires pre-drilling to prevent splitting. Choose plywood if you want more strength.
Materials List
- MDF or plywood for the bookcase frames and window seat
- 2x4s for the frame of the window seat
- Screws, nails, and wood glue for attachment
- Wood filler for hole and crack filling
- Sandpaper (150 grit is ideal)
- High quality primer and paint (semi-gloss) for durability
- Trim pieces like crown molding or fluted door molding for aesthetics
- Piano hinge for the window seat lid
- Foam for the seat cushion and fabric to cover it
Tools List
- Tape measure for accurate measuring
- Saw for cutting wood (circular or miter)
- Drill with bits for pre-drilling and screwing
- Kreg Jig or other pocket hole system for strong joinery
- Clamp to hold pieces in place when joining
- Hammer or nail gun for attaching trim
- Paintbrush and small roller for priming and painting
Get all your materials and tools ready before starting. This will help you avoid interruptions once you begin the project. Check each item off your list. Make sure you have everything at hand. Planning ensures your build goes smoothly. Happy crafting!

Step-by-Step Construction of the Bookcase Frames
When creating your diy built in bookcase around window, the frame is the backbone. Follow these simple steps to ensure a solid foundation for your bookcase. Start by measuring the space where the bookcase will fit. Take note of the window position to plan the frame layout correctly. Cut your MDF or plywood to size for the bookcase sides, top, and bottom shelves. Use a saw for precision cutting; a circular saw or miter saw works best for straight cuts.
Next, assemble the frame. Align the cut pieces and pre-drill holes to prevent the MDF from splitting. Use screws and wood glue to join the pieces firmly. Ensure that the frame is square by checking the diagonals. They should be equal. For additional support, add a back panel to the frame using nails or screws.
Reinforce the structure with horizontal shelf supports inside the frame. These will hold the shelves and add more stability. Drill pilot holes and fix the supports with screws. Remember, the number of supports depends on how many shelves you plan to have.
Now, get your bookcase frames ready for installation. Check each frame carefully for any irregularities. Use wood filler to fix any holes or cracks. Sand the surfaces with 150 grit sandpaper for a smooth finish. Finally, make sure all frame pieces are primed for the best paint application. Follow these steps and you’re well on your way to constructing sturdy bookcase frames that will last for years.
Installing the Bookcases and Adding Trim
Once your bookcase frames are built, it’s time to install them. Find the wall studs and screw the frames into place. This gives your bookcases the necessary stability. Careful handling is key, as MDF can be more delicate than plywood.
After securing the bookcases, trim them out. Start with the top and bottom aprons. Nail them directly to the frames. Then, hide the MDF edges with fluted door molding or 1x3s. These also cover the gaps between the bookcase and wall.
It’s important to add wood scraps at the top for crown molding support. Screw them in from inside the bookcase up into the wood pieces. Place these at corners and center sections.
Your bookcases will then be ready for the trim. This step enhances the look and ensures a polished finish. Use wood filler for holes and caulk for seams. After these steps, your bookcases will look built-in and bespoke.
Building and Fitting the Window Seat
Once you’ve installed your bookcase frames, the next step is building the window seat. This is where you can add a comfy nook to your room. Here’s how to build and fit your very own window seat between the bookcases.
First, measure the space between the bookcases. This ensures a perfect fit for your window seat frame. Use 2x4s to construct the frame, ensuring it matches these measurements closely.
Join the 2x4s using a pocket hole system like the Kreg Jig. This tool makes the job easy and provides strong joints. It’s ideal for a window seat that needs to support weight.
Carefully position your frame beneath the window. Check that the seat will sit flush against the wall. Use wooden cleats to bridge any gaps between the frame and the wall.
Secure the cleats to wall studs for stability, then attach your frame. Drive screws through the frame into the cleats. This anchors your window seat firmly in place.
Now, choose the trim for the window seat. Crown molding and fluted casing add a traditional touch. Alternatively, straight boards give a modern edge to your diy built-in bookcase around window.
Fill all nail holes with wood filler for a smooth finish. Caulk is perfect for sealing seams. Once painted, these will blend seamlessly with the rest of the built-in.
Lastly, it’s time to consider comfort. Plan for a padded cushion on your window seat. A welcoming window seat invites you to sit back with a good book or simply enjoy the view.
By carefully building and fitting your window seat, you’ll have a charming spot that’s also highly functional.
Finishing Touches: Filling, Sanding, and Painting
After building and installing your bookcase and window seat, it’s time for the finishing touches. This stage will ensure a smooth, professional look for your DIY built-in bookcase around the window. Here’s what you need to do:
- Start by filling any nail holes with wood filler. This gives you a flawless surface for painting.
- Once the filler dries, sand all surfaces with 150 grit sandpaper. Aim for a smooth touch.
- Remove all dust from sanding. Use a damp cloth to wipe down the surfaces.
- Apply a high-quality primer to each area. Don’t skip this step. MDF absorbs paint and primer prevents a rough texture.
- After priming, sand the surfaces again lightly. This helps the final paint coat adhere better.
- Now, paint your bookcase and window seat. Go for two coats of semi-gloss paint. This type of paint is durable and easy to clean.
- Use a brush for the trim and edges. A small roller works best on flat areas. It leaves a smooth finish.
- Allow the paint to dry fully before you place anything on the shelves or use the seat. It can take up to 24 hours.
Remember to handle the freshly painted surfaces gently. Full paint curing takes about 21 days. Following these steps will help protect your DIY project and keep it looking great for years.
Customizing and Adding Cabinet Doors
After fitting your bookcases and window seat, consider adding cabinet doors. This enhances both the look and practicality of your built-in. Here’s a rundown of the steps to customize and install cabinet doors for your diy built-in bookcase around window.
First, measure the openings of the bookcase where the doors will fit. Ensure that your measurements are precise for the doors to close well. Based on these measurements, you can get doors cut. If you’re working with MDF, remember to order them slightly smaller to allow for the paint thickness.
Attach hinges to the doors. You have many hinge types to choose from. Soft-close hinges are a good pick as they prevent door slamming. Drill holes on the bookcase frame for the hinges. Make sure they align well with the doors.
Next, hang your doors on the bookcase. Adjust the hinges so the doors sit evenly and open smoothly. It might take some trial and error to get it just right.
When you’ve got that perfect alignment, add handles or knobs. This adds a personal touch to your diy built-in bookcase around window. Go for a style that complements your room’s decor. Classic knobs work well for a traditional room. For modern spaces, sleek handles might be better.
Finally, if you want to paint your cabinet doors, do so before installation. This avoids drips and streaks on them. Also, painted doors should be given enough time to dry before attaching them to the bookcase to avoid sticking.
Adding doors not only gives you hidden storage but it also completes the built-in look. With these steps, your DIY project moves one step closer to a professional finish.

Creating and Attaching the Window Seat Lid
To complete your diy built in bookcase around window, creating a lid for the window seat is your next task. Here’s a straightforward approach:
- Measure your Seat: Determine the length and width of your window seat. This will guide the size of your lid.
- Cut the Lid: Using MDF or plywood, cut a piece to match your measurements. Remember, 3/4″ MDF is sturdy and recommended.
- Sand the Edges: Smooth the cut edges with sandpaper to prevent splinters and roughness.
- Attach the Hinge: Choose a piano hinge that matches the length of your lid. This ensures a seamless look.
- Drill Hinge in Place: Carefully align the hinge with the edge of the lid and window seat. Pre-drilled holes prevent MDF from splitting. Screw the hinge securely.
- Test Lid Movement: Open and close the lid to ensure it moves easily and fits well. Adjustments are fine at this stage.
- Choose a Handle or Knob: Attach a handle or knob that complements your room’s style. This aids in easy lid opening.
Once attached, your window seat will not just be a comfortable nook, but also offer handy storage beneath. Be sure to fill any gaps with wood filler for smoothness. For that perfect built-in appearance, paint the lid to match the rest of your structure.
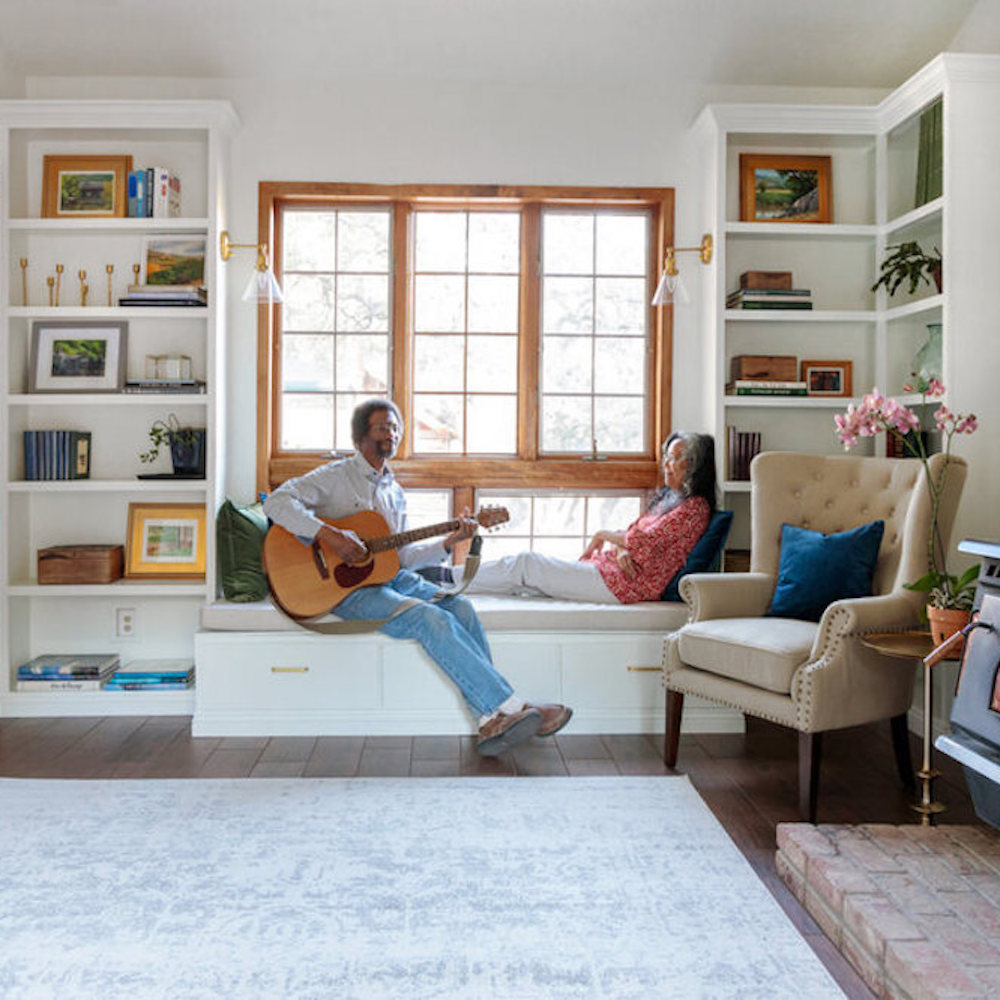
The Final Reveal: Decorating and Using Your New Space
With the construction complete, it’s time to unveil your diy built in bookcase around window. This final step is all about adding personal touches and seeing your vision come to life. Begin by decorating your shelves. Choose items that reflect your style and interests. Place books, photo frames, and collectibles on the shelves. Arrange them in groups for a balanced look.
Next, dress up your window seat. Add a comfy cushion and some colorful pillows. This creates an inviting spot to relax in. Consider the fabric patterns and colors. They should match the room’s theme. For added coziness, drape a soft throw over the seat. Now, your window seat is not just a feature, but a retreat.
Think about the lighting too. A lamp on the bookcase can add a warm glow. Or, if you prefer, install wall sconces above. Good lighting will highlight your diy built in bookcase around window and make it a focal point. It will also make reading on your window seat a pleasure.
Finally, use your new storage space. The cabinet doors hide clutter and keep your room looking neat. The window seat lid lifts to offer storage for blankets and games. It’s both practical and aesthetic.
Your DIY project is now complete. You’ve transformed a plain wall into a custom feature that’s both beautiful and functional. Enjoy your new space and the satisfaction of having created it yourself.