Choosing the Right Materials for Your Cabinet Doors
How to build a cabinet door? Choosing the right materials is crucial for building sturdy and stylish cabinet doors. You need wood that is durable, easy to work with, and suits your design preferences. Here’s a breakdown of what to consider:
How to build a cabinet door?
Selecting the Wood
Poplar and birch plywood are excellent choices for painted cabinet doors. Poplar is strong, easy to work, and takes paint well. Birch plywood is stable and has a smooth surface ideal for panels. If you’re not painting, choose a wood type that matches your existing cabinetry.
Picking the Right Plywood
Use 1/4″ plywood for the center panel. It should complement the wood frames for consistency in appearance.
Hardware Considerations
Don’t forget the hinges! For a clean finish, concealed hinges give a modern look. Make sure you choose the right type (full, half, or inset) depending on your door style.
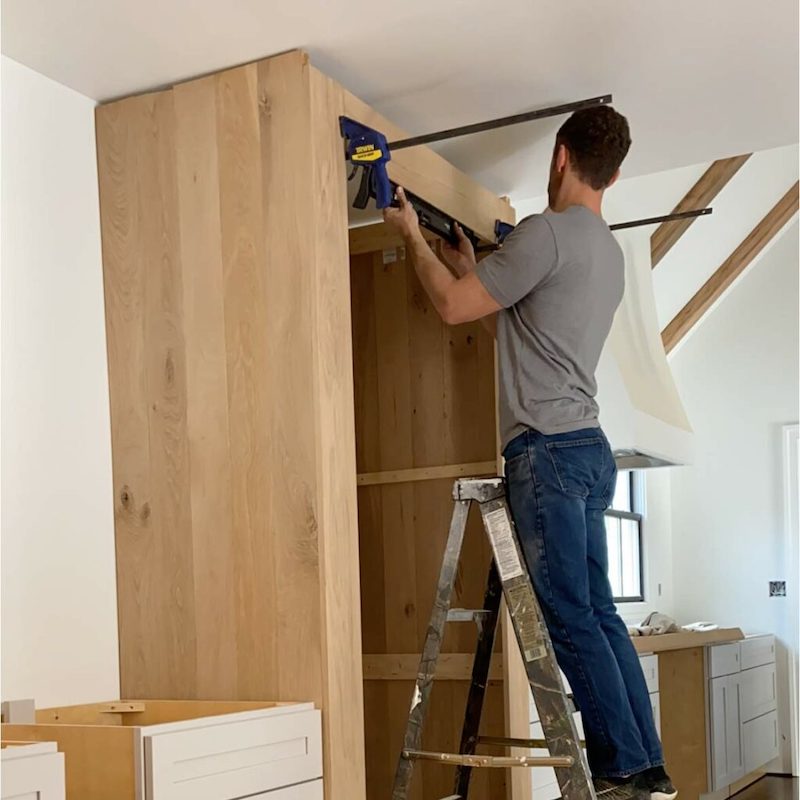
Tools and Supplies
Ensure you have the necessary tools. You’ll need a miter saw, table saw, clamps, drill, and possibly a router for edges. Gather supplies such as screws, wood glue, sandpaper, primer, and paint.
Remember to select quality materials and hardware for the best outcome. Proper materials make the building process smoother and yield doors that last.
:max_bytes(150000):strip_icc()/101335925-16fd42b4743342af90d251a1bc852198.jpg)
Measuring and Sizing Cabinet Doors Correctly
Accurate measuring is key to custom cabinet doors that fit well. Start by measuring the cabinet’s opening. For inset doors, subtract 1/8″ from each dimension for a proper fit. How to build a cabinet door? For overlay doors, add the overlay size to the opening’s height and width. Double check measurements for accuracy.
Record Cabinet Opening Dimensions
Write down the height and width of your cabinet’s opening. Get a tape measure, be precise, and record to the nearest 1/16″. This ensures a snug fit.
Calculate Door Sizes
For inset doors, doors sit inside the frame, so subtract 1/8″ for clearance. For partial overlay, add twice the overlay width to the opening size. Full overlay doors should cover the whole frame, so size them close to the cabinet size.
Account for Door Clearance
Leave a gap between doors and cabinet parts. Normally, a 1/8″ gap works well for easy door movement and to prevent sticking.
Double-Check Your Math
Revisit calculations to make sure they’re right. Correctly sized doors depend on it. Measure twice, cut once, as the adage goes. It saves time and material.
Remember, exact measurements lead to doors that fit and function as they should. It’s an effort that pays off when you see your finished cabinet doors.
Cutting and Preparing the Wood for Frames and Panels
How to build a cabinet door? Once you’ve chosen the right materials, it’s time to cut and prepare the wood. Here are the steps:
Selecting the Boards
First, pick 1×3 poplar boards for the door frames. For panels, 1/4″ plywood, like birch, works well.
Cutting to Size
Measure and cut your boards to the specific dimensions you’ve calculated. Use a miter saw or a table saw.
Marking the Pieces
After cutting, mark each piece of wood. This helps with assembly later on.
Smoothing Edges
Before assembly, smooth out the wood with sandpaper. This makes for a cleaner finish.
Every cut must be precise to ensure a perfect fit. Smooth edges contribute to a professional look. When working with tools, prioritize safety and accuracy. This stage sets the foundation for your cabinet doors, so take your time.
Routing and Adding Decorative Elements to Door Frames
To create visually appealing cabinet doors, routing is key. This process adds elegant, customized details. Here is a basic guide on how to achieve this:
Choosing a Router Bit
Selecting the correct router bit is vital. A round over bit can give a smooth, curved edge. A trim router is ideal for this delicate task.
Setting Up Your Router
Adjust the router to the edge design depth. Secure the wood firmly before beginning. Always wear safety gear to prevent injuries.
Routing the Edges
Carefully guide the router along the wood’s edge. Keep a steady pace for an even finish. Retract the router and turn off the machine once complete.
Sanding the Edges
Sand down any rough edges left after routing. Use a fine-grit sandpaper for a smooth touch. Clean off the sawdust before assembling the frame.
Adding the Panel Groove
Cut a dado groove to fit your panel. This should be on the edge opposite the routed detail. Ensure the groove is centered and the right depth.
Patience and precision are key to routing. Well-routed edges raise the craftsmanship level of your doors. Remember to follow the router’s manual for the best results and safety.
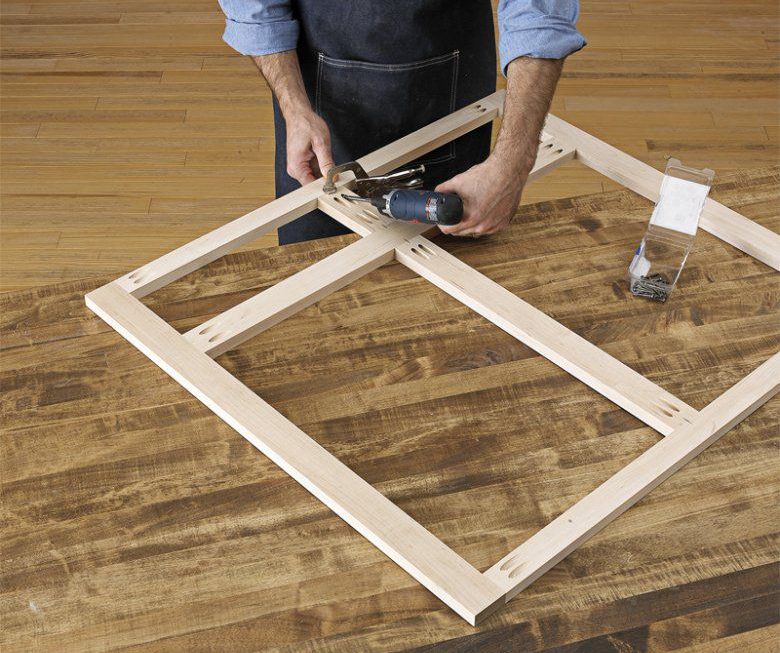
Assembling the Door Frame and Panel
Assembling your custom cabinet door frame and panel is a satisfying step in your DIY project. Here’s how to do it right:
Getting Started
Begin by laying out all the pieces on a flat surface. Make sure each part is marked according to your previous step for easy identification.
Attaching Frame Pieces
Apply wood glue along the edges where the stiles and rails will join. Use clamps to hold them tight until the glue sets. For extra strength, consider using dowels or pocket screws if your design allows it.
Inserting the Panel
Ensure the plywood panel you cut fits snugly into the groove of your frame. You don’t need glue here — the panel should float to allow for wood expansion.
Final Assembly
With the panel in place, finish by securing all the frame parts together. Check for squareness before the glue fully dries. Wipe away any excess glue immediately to avoid residue.
Tips for Success
Remember, often dry-fitting parts before final assembly can spot potential issues. Be patient and allow the glue to dry completely before moving on to finishing touches.
Assembling the door frame and panel sets the stage for adding a polished finish to your cabinetry. Ensure each step is done with care for a door that looks great and functions smoothly.
Finishing with Sanding, Putty, and Caulk
How to build a cabinet door? To give your cabinet doors a flawless finish, follow these steps for sanding, puttying, and caulking.
Begin with Sanding
Start by smoothing out the door frame and panel. Use fine-grit sandpaper for a sleek surface. Remove all rough patches and dust.
Fill with Putty
Examine the door for gaps or holes. Fill them with wood putty. Allow it to dry. Then, sand it down until it’s even with the wood.
Apply Caulk
For inset doors, apply a bead of caulk around the panel. This seals the frame and panel. It also gives a clean edge to paint over later.
Sand Again for Smoothness
After putty and caulk dry, sand the areas again. This ensures a smooth, ready-to-paint finish. Clean off any remaining dust.
Remember, patience during finishing stages pays off. Take your time to sand, fill, and caulk your cabinet doors. This attention to detail will make a clear difference in the final look.
Attaching Concealed Hinges for a Sleek Look
Concealed hinges are great for a clean cabinet appearance. Here’s how to attach them:
Choose the Right Hinges
Pick the correct concealed hinge type. It should match your door overlay. Inset, half, or full are common types.
Mark Hinge Placement
On the door, mark where hinges will go. Ensure they are evenly spaced for balance.
Drill Hinge Cups
Use a drill and a concealed hinge jig. Drill cups into the door where marked. This step is crucial for hinge fit.
Attach Hinges to Doors
Screw the hinges into the drilled cups. Be careful not to strip screws. This secures the hinge in place.
Install Doors on Cabinet
With hinges on doors, align them with the cabinet. Mark Drill holes on the cabinet frame. Pre-drill to prevent splitting.
Final Adjustments
Attach the door to the cabinet frame with screws. Adjust hinges for alignment. Make sure doors open smoothly.
By following these steps, your cabinet doors will have that modern, sleek look. It’s a detail that makes a big difference. Remember to take your time for a precise finish.
Painting and Installing Your Custom Cabinet Doors
How to build a cabinet door? When your cabinet doors are assembled, it’s time for painting and installation. Here’s a simple guide to make sure your finished doors look their best.
Preparing for Painting
Before painting, ensure the door surface is clean and smooth. Start by sanding the door with a fine-grit sandpaper. Wipe the surface to remove any dust. Next, apply a primer that’s suitable for your chosen paint. Let it dry as directed. Once the primer is dry, lightly sand the surface again.
Painting Your Doors
Select a paint that complements your kitchen’s decor and is durable. Use a foam roller for a smooth finish or a paintbrush for detailed areas. Apply thin coats of paint, letting each layer dry thoroughly before adding another. Usually, two to three coats achieve a solid finish. Don’t rush; let the paint dry completely.
Installing Concealed Hinges
Installing concealed hinges gives cabinet doors a neat look. For exact placement, use a jig and drill the hinge cups into the door. Screw the hinges into these cups, being careful not to strip the screws. This securely attaches the hinges to the doors.
Attaching Doors to the Cabinet
Hold the door up to the cabinet to mark drill spots for hinge attachment. Pre-drill these spots to avoid splitting the wood. Screw the door to the cabinet, ensuring it’s straight and level. Make any necessary adjustments to the hinges for smooth operation. Finally, open and close the door several times to test.
How to build a cabinet door? By following these simple steps, your custom cabinet doors will be beautifully painted and securely installed, giving your cabinets a fresh, clean look. Remember, taking your time at each step can lead to professional-looking results. Enjoy your newly built cabinet doors!