How to build a cabinet box?
How to build a cabinet box? In today’s world, more and more people are turning to do-it-yourself (DIY) projects to save money and customize their living spaces. One popular DIY project is constructing cabinet boxes for kitchens, bathrooms, and other storage areas. While the thought of building your own cabinet boxes may seem daunting, it can actually be simplified with the right knowledge and tools. In this article, we will explore the step-by-step process of DIY cabinet box construction. We will provide tips and tricks to make the process easier and more efficient.
Part 1: Understanding the Basics of Cabinet Box Construction
Level 1: Materials and Tools
To begin the construction of your DIY cabinet boxes, it is important to gather the necessary materials and tools. You will need plywood or MDF board for the box itself. As well as wood glue, screws, and finishing materials such as paint or varnish. In terms of tools, a table saw, circular saw, drill, and clamp are essential for cutting and assembling the cabinet box.
Level 2: Measurements and Planning
Before diving into the construction process, it is crucial to carefully measure the space where the cabinet box will be installed. Consider the height, width, and depth of the cabinet. As well as any specific requirements for the type of items that will be stored inside. With these measurements in hand, you can begin planning the layout and design of your cabinet box.
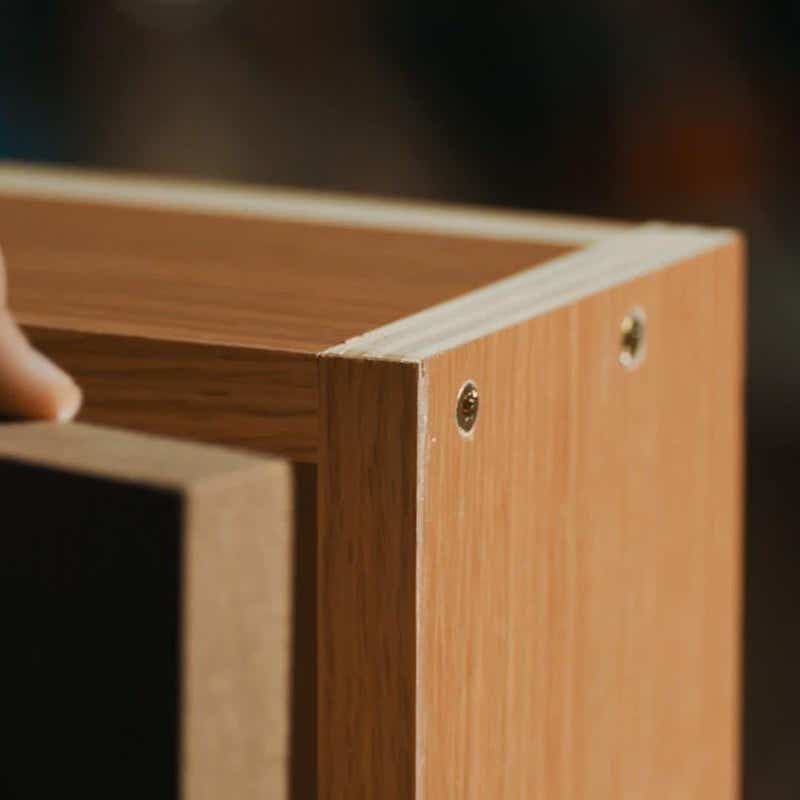
Part 2: Cutting and Assembling the Cabinet Box Panels
Level 1: Cutting the Panels
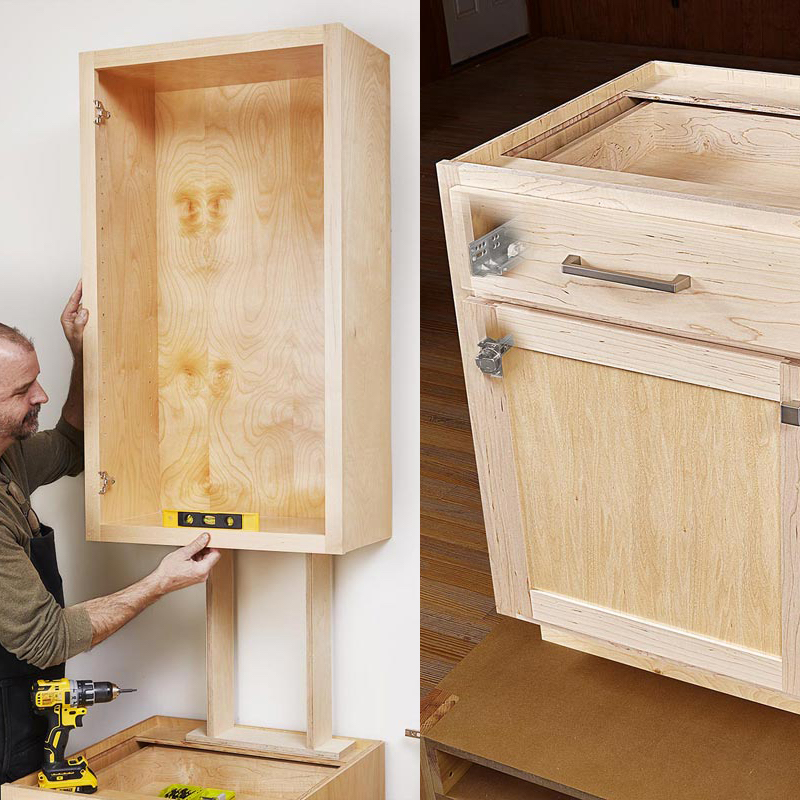
Using the measurements and designs you have created, it is time to cut the plywood or MDF board into the necessary panels for the cabinet box. This will include the top, bottom, sides, and back panels. A table saw is the best tool for making precise cuts, and it is important to use a straight edge or guide to ensure the panels are cut accurately.
Level 2: Assembling the Panels
Once the panels have been cut, it is time to assemble the cabinet box. Using wood glue and screws, begin by attaching the sides to the bottom panel, followed by the back panel, and finally the top panel. Use clamps to hold the panels in place as the glue dries, and check for squareness and level as you progress through this step.
Part 3: Adding Shelves and Drawers
Level 1: Installing Shelves
Depending on the design of your cabinet box, you may need to install shelves to create storage compartments. Measure and cut additional pieces of plywood or MDF to serve as the shelves, and use shelf supports or brackets to secure them in place. It is important to ensure the shelves are level and evenly spaced for a professional finish.
Level 2: Building Drawers
If your cabinet box will include drawers, it is important to plan and construct these components with precision. Measure and cut the pieces for the drawer box, including the front, back, sides, and bottom. Assemble the drawer box using wood glue and screws, and add drawer slides to ensure smooth opening and closing. Finally, attach the drawer front for a seamless look.
Part 4: Finishing and Installing the Cabinet Box
Level 1: Sanding and Finishing
Once the cabinet box is assembled, it is important to sand the surfaces to remove any rough edges and create a smooth finish. Apply a coat of primer and paint. Or a layer of varnish to protect and enhance the appearance of the cabinet. This finishing step adds a professional touch to your DIY project.
Level 2: Installing the Cabinet Box
With the cabinet box complete, it is time to install it in its intended location. Use a level to ensure the cabinet is straight and secure it in place using screws or mounting brackets. Double-check the measurements and fit before finalizing the installation, and make any necessary adjustments to ensure a perfect fit.
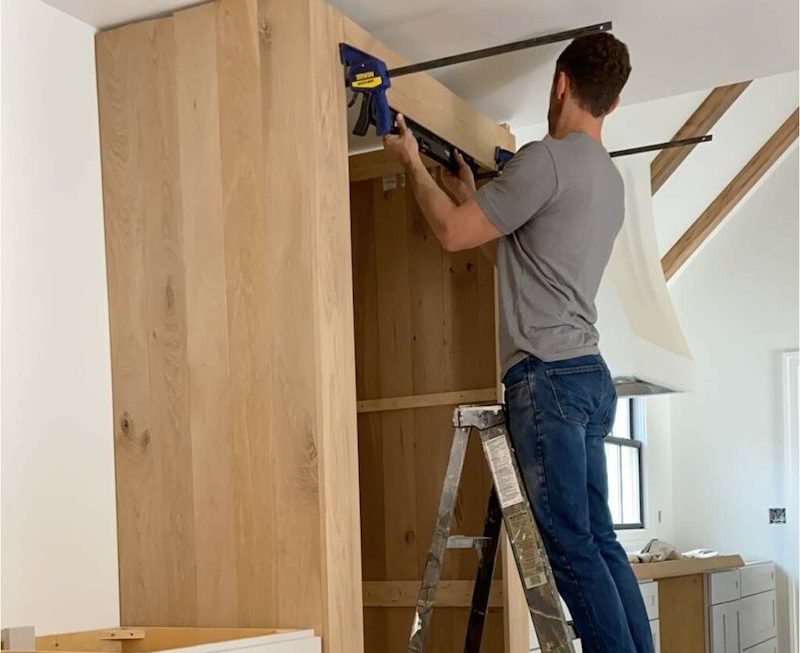
Part 5: Attaching the Cabinet Back
Now, it’s time to move on to adding the cabinet back. The back of the cabinet serves to provide stability and support to the structure, and it also helps to keep the contents of the cabinet secure.
To attach the back panel, measure the dimensions of the back of the cabinet box and cut a piece of plywood or MDF to fit. Position the back panel on the back of the cabinet and use screws or nails to secure it in place.
It’s important to ensure that the back panel is aligned properly with the edges of the cabinet box to ensure a secure fit. You can further reinforce it by adding corner brackets or braces for extra stability.
Part 6: Adding Shelves and Dividers
With the back panel securely in place, the next step is to add shelves and dividers to the inside of the cabinet box. Shelves and dividers help to organize the contents of the cabinet and make the most of the available space.
To add shelves, measure the height and width of the inside of the cabinet box and cut pieces of plywood or MDF to fit. Use shelf pins or supports to hold the shelves in place at the desired height.
If you want to add dividers to the cabinet, measure the width and depth of the cabinet box and cut pieces of plywood or MDF to fit. Secure the dividers in place using screws or nails.
Before adding the shelves and dividers, it’s a good idea to paint or finish them to match the cabinet box for a cohesive look.
Part 7: Finishing Touches
With the cabinet box construction complete, it’s time to add the finishing touches. This may include sanding the edges and surfaces of the cabinet to smooth out any rough spots, as well as painting or staining the cabinet to achieve the desired look.
When painting or staining the cabinet, be sure to use a high-quality primer to ensure even coverage and adhesion of the paint or stain. You may also want to add decorative hardware such as knobs or pulls to the cabinet doors for a polished appearance.
How to build a cabinet box? Finally, give the cabinet ample time to dry and cure before putting it to use. Once the finishing touches are complete, you can install the cabinet doors and any other accessories to complete the project. Enjoy your newly constructed DIY cabinet box!
:max_bytes(150000):strip_icc()/101335925-16fd42b4743342af90d251a1bc852198.jpg)
Conclusion
How to build a cabinet box? With the basic construction of the cabinet box complete, it’s time to add the finishing touches. Sand down any rough edges and surfaces. And apply a coat of paint or stain to enhance the appearance of the cabinets. Consider adding a clear sealant to protect the wood and prolong the life of the cabinets. Finally, install any additional accessories such as door bumpers or soft-close hinges to increase functionality and durability. By adding finishing touches, the DIY cabinet box construction will become a professional and polished final product.
Constructing your own cabinet boxes may seem like a daunting task, but with the right knowledge and tools, it can be simplified and achievable for DIY enthusiasts. By understanding the basics of cabinet box construction, and following the step-by-step process outlined in this article, you can create customized storage solutions for your home. How to build a cabinet box? Whether for a kitchen, bathroom, or other storage area, DIY cabinet box construction offers endless possibilities for customization and creativity. So, roll up your sleeves, gather your materials and tools, and get started on your next DIY project!