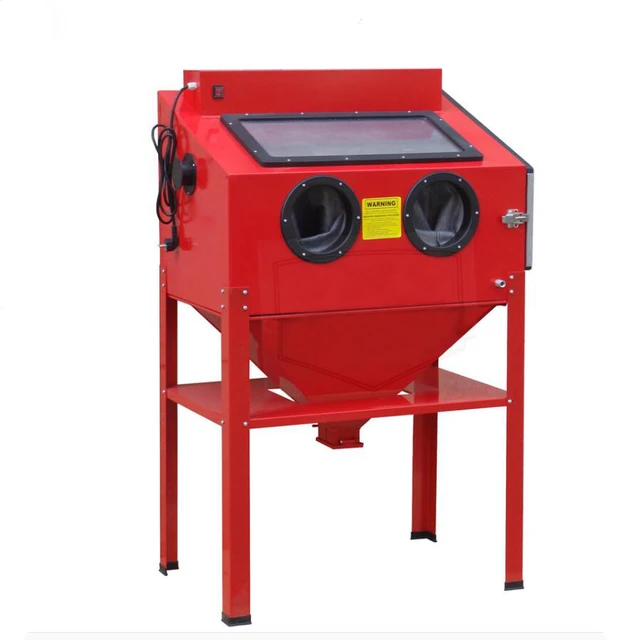
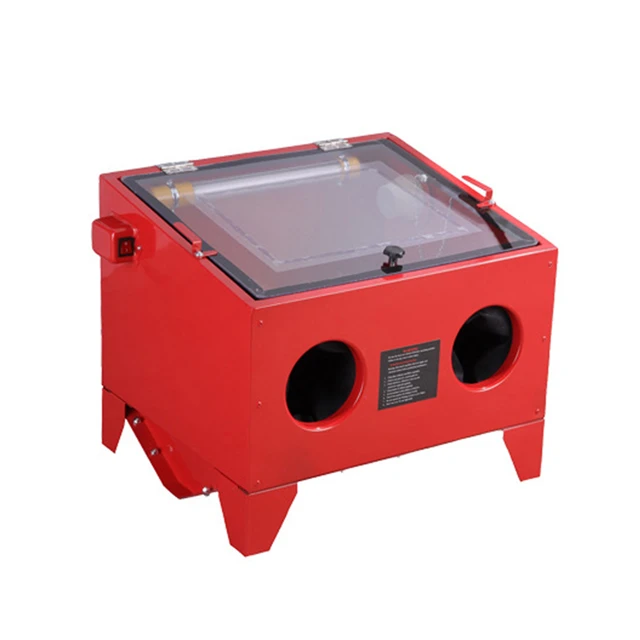
Creating a DIY sandblasting cabinet can be a rewarding project for anyone interested in metalworking, restoration, or even automotive repair. A sandblasting cabinet allows you to clean, etch, and prepare surfaces with ease, all while containing the abrasive material and dust. This comprehensive guide will walk you through the steps needed to build your own sandblasting cabinet, covering materials, tools, construction steps, and safety tips.
 Functions and benefits of a sandblasting cabinet:
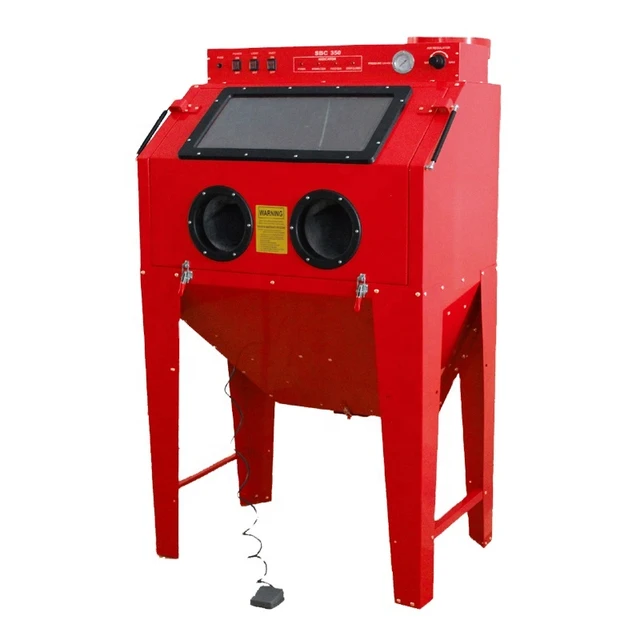
A sandblasting cabinet is a specialized enclosure used for abrasive blasting, offering a controlled environment to clean, finish, or prepare a variety of surfaces. Here are the primary functions and benefits of a sandblasting cabinet:
1. Surface Cleaning
Description: Removes contaminants such as rust, paint, and scale from surfaces.
- Pros: Provides a clean, bare surface that is ready for further processing or finishing, improves adhesion for coatings and paints.
2. Surface Preparation
Description: Prepares surfaces for painting, coating, or bonding.
- Pros: Enhances the surface profile to ensure better adherence of new coatings, crucial for achieving durable finishes.
3. Material Finishing
Description: Can be used to achieve desired surface textures and finishes.
- Pros: Smooths rough surfaces, can create matte or satin finishes, useful for aesthetic and functional applications.
4. Deburring
Description: Removes burrs and sharp edges from metal components.
- Pros: Improves safety by eliminating sharp edges, enhances the aesthetic appearance of parts, and ensures better fitting parts in assembly.
5. Peening
Description: Process of hammering or compressing the surface to strengthen materials.
- Pros: Increases material strength and fatigue resistance, commonly used in metalworking to extend the lifespan of components.
6. Controlled Environment
Description: Containment of the blasting media and blasted materials within the cabinet.
- Pros: Reduces exposure to dust and abrasive particles, protects the operator and surrounding environment, minimizes clean-up effort.
Understanding the Basics of Sandblasting
What is Sandblasting?
Surface Preparation: Sandblasting is a process that uses abrasive material propelled at high velocity to clean, etch, or smooth a surface.
Common Uses: It’s commonly used for removing rust, paint, and other contaminants from metal parts, preparing surfaces for painting, and creating frosted glass.
 Why Use a Sandblasting Cabinet?
Containment: Keeps the abrasive material and dust contained, improving safety and cleanliness.
Efficiency: Allows for more controlled and efficient sandblasting compared to open blasting.
Reuse: Enables the reuse of abrasive material, reducing waste and cost.
Materials and Tools Needed
Essential Materials
Plywood or MDF: For constructing the frame and panels of the cabinet.
Plexiglass: For the viewing window to monitor the sandblasting process.
Rubber Gloves: Heavy-duty gloves for hand protection and manipulation of items inside the cabinet.
Rubber Seals: To create airtight seals around the cabinet doors and openings.
PVC Pipes and Fittings: For the exhaust and air supply systems.
Blast Gun: A sandblasting gun kit, available at most hardware stores.
Abrasive Media: Sand, glass beads, or other abrasive materials depending on the project requirements.
Screws and Nails: For assembling the cabinet structure.
Optional Materials
Lighting: LED lights to illuminate the interior of the cabinet.
Dust Collector: An attachment to collect dust and debris, keeping the working area clean.
Turntable: A rotating platform to easily rotate and blast all sides of the object.
Essential Tools
Electric Drill: For drilling holes and driving screws.
Saw: For cutting wood panels to the required sizes.
Measuring Tape: To accurately measure and cut materials.
Clamps: To hold pieces in place while assembling.
Screwdriver: For attaching screws.
Safety Gear: Safety goggles, mask, and gloves for personal protection.
 Step-by-Step Construction Guide
Design and Planning
Determine Size and Dimensions
- Measure Workspace: Measure the available space in your workshop to determine the maximum size of the cabinet.
- Plan Interior Space: Decide on the interior dimensions based on the size of items you plan to sandblast.
Sketch the Design
- Draw Blueprint: Sketch a detailed blueprint of the cabinet design, including dimensions, placement of the window, doors, and other features.
Cutting and Assembly
Cut Wooden Panels
- Mark Measurements: Mark out the measurements on the plywood or MDF panels according to your blueprint.
- Cut Panels: Use a saw to cut the panels to size, including the front, back, sides, top, and bottom.
Assemble the Frame
- Attach Sides to Base: Attach the side panels to the base panel using screws and an electric drill.
- Attach Back Panel: Secure the back panel to the sides and base.
- Attach Top Panel: Secure the top panel, ensuring it aligns with the sides and back.
Create Viewing Window
- Cut Window Opening: Mark and cut out a window opening on the front panel, ensuring it is large enough for visibility.
- Attach Plexiglass: Secure a piece of plexiglass over the window opening using screws and rubber seals to create an airtight seal.
Install Rubber Gloves
- Cut Hand Openings: Mark and cut two hand openings on the front panel below the viewing window.
- Attach Gloves: Secure heavy-duty rubber gloves to the openings using rubber seals to create an airtight fit.
Ventilation and Air System
Install Exhaust System
- Cut Exhaust Hole: Mark and cut an exhaust hole on the side or back panel of the cabinet.
- Attach PVC Pipe: Install a PVC pipe and fittings to the exhaust hole, ensuring a secure fit.
Install Air Supply System
- Drill Air Intake Hole: Mark and drill an air intake hole on the side or back panel.
- Attach Air Gun: Secure the blast gun to the air intake hole, ensuring it connects to the air compressor.
 Final Assembly
Add Lighting (Optional)
- Install LED Lights: Attach LED lights to the interior of the cabinet to illuminate the workspace.
- Connect Power Supply: Ensure the lights are connected to a safe power supply.
Seal Edges
- Apply Rubber Seals: Apply rubber seals around all edges, openings, and doors to create an airtight cabinet.
- Check for Gaps: Inspect the entire cabinet to ensure there are no gaps or leaks.
Testing the Cabinet
Initial Test Run
- Check Connections: Ensure all connections are secure and airtight.
- Test Airflow: Turn on the air compressor and check for proper airflow through the blast gun.
Test Sandblasting
- Load Abrasive Media: Load the abrasive media into the cabinet.
- Test Blasting: Perform a test sandblasting on a scrap piece to ensure the cabinet is functioning correctly.
Safety Tips
Personal Protection
Safety Gear: Always wear safety goggles, a mask, and gloves when operating the sandblasting cabinet.
Ventilation: Ensure the workspace is well-ventilated to prevent inhalation of dust and fumes.
Cabinet Safety
Inspect Regularly: Regularly inspect the cabinet for any wear, tear, or leaks.
Maintain Cleanliness: Keep the interior of the cabinet clean to prevent clogging and maintain efficiency.
Proper Disposal: Dispose of used abrasive media and dust properly to avoid environmental contamination.
Maintenance and Upkeep
Regular Cleaning
Remove Debris: Regularly remove debris and spent abrasive material from the cabinet.
Clean Window and Gloves: Wipe down the viewing window and gloves after each use.
Periodic Checks
Check Seals and Connectors: Periodically check the rubber seals and connectors for wear and replace if necessary.
Inspect Airflow System: Ensure the air supply and exhaust systems are functioning properly and free of obstructions.
Upgrades and Modifications
Adding a Turntable
Improved Access: Installing a rotating turntable can make sandblasting larger or more complex items easier.
DIY or Purchase: You can either purchase a turntable or build one using a lazy susan bearing and a platform.
Enhanced Filtration
Dust Collector: Attach a dust collector to the exhaust system to capture fine particles and maintain a cleaner workspace.
HEPA Filters: Consider using HEPA filters for better air quality and particle capture.
Custom Nozzles
diy sandblasting cabinet
Specialized Nozzles: Experiment with different nozzles for specific sandblasting effects or materials.
Adjustment: Ensure the nozzles are adjustable and easy to change for versatility.
 Conclusion
diy sandblasting cabinet
Building a DIY sandblasting cabinet is a valuable project for anyone involved in metalwork, restoration, or automotive repair. By following this comprehensive guide, you can create a functional and efficient sandblasting cabinet tailored to your specific needs. With proper planning, construction, and maintenance, your DIY sandblasting cabinet will serve as a reliable tool for various projects. Safety should always be a priority, ensuring you use appropriate personal protective equipment and maintain a clean, well-ventilated workspace. Embrace the satisfaction of building your own equipment and enjoy the endless possibilities that a sandblasting cabinet can offer. Happy crafting!